The post Ep153 – Fridge Capacity: Is Bigger Better? appeared first on Snowys Blog.
]]>Is your camping fridge bigger than your appetite?
From 45L single-zones to 80L dual compartments, Ben and Lauren unpack the cold, hard facts about fridge capacity. Our gear gurus consider how vehicle space, party size, climate, and even adventure style can affect your ideal setup. They dive into practical considerations like fridge slides, temperature zones, and efficient compartmentalizing – proving that sometimes the bigger choice can be a little too much cold to carry.
Tune in for a refreshingly practical guide to matching your mobile refrigeration to your real-world needs.

Ben and Lauren unpack the cold, hard facts about fridge capacity.
Shortcuts:
00:00 – Intro
01:22 – Lauren’s Adventure on the Overland Track
04:57 – Is 45L the Right Size Fridge for One Person?
05:58 – Considering Space: Ben’s Setup
06:56 – Dual-Zone Fridges
07:46 – Operating as a Fridge Vs Freezer
08:48 – Family Vs Single
09:11 – Location and Climate
10:35 – Fridge Slides
12:12 – Compartmentalising in Dual-Zone Fridges
14:20 – Summary
Mentioned in this Episode:
Brands:
Products:
Thanks for listening, tune in again for next week’s episode!
Thanks for tuning in to this week’s episode of the Snowys Camping Show Podcast. Don’t forget to subscribe to us on YouTube, Spotify, iTunes, Amazon Music, iHeartRadio, Pocket Casts, Podcast Addict, or Stitcher so you never miss an upload.
If you have any questions for Ben and Lauren, make sure you head over to our Facebook group and let us know as we’d love to hear from you.
Catch you out there!
The post Ep153 – Fridge Capacity: Is Bigger Better? appeared first on Snowys Blog.
]]>The post Ep152 – What Size Solar Panel Do I Need? appeared first on Snowys Blog.
]]>So… watt solar panel size is the missing piece to your power puzzle?
From recharging depleted batteries to powering your camp kitchen, Ben and Lauren shed some (sun)light on the complexities of solar panel sizing. Our gear gurus break down the practical differences between 100W and 200W panels by explaining controller requirements, power station compatibility, and real-world limitations.
Tune in for a sun-soaked discussion of valuable amp calculations, plug-and-play recommendations, and Ben and Lauren’s personal approach to solar setups, so you can keep the campsite powered up off the grid.
light on the complexities of solar panel sizing.")
Ben and Lauren shed some (sun)light on the complexities of solar panel sizing.
Shortcuts:
00:00 – Intro
02:59 – What Sized Solar Panel Do I Need?
03:44 – The ‘One-Line’ Answer…
04:45 – Considering a 200W Vs 100W Solar Panel
06:06 – Limitations
07:06 – Considering a Solar Controller with Your Panel
10:01 – The Companion Rover 500 Power Station
11:50 – What Would Ben Do?
14:12 – Amp Replenishment
15:45 – Plug ‘N Play
18:07 – Summary
Mentioned in this Episode:
Brands:
Products:
Companion Rover 500 Power Station
Hard Korr 200W Heavy Duty Solar Mat MKII with 15A Lithium Compatible Regulator
Thanks for listening, tune in again for next week’s episode!
Thanks for tuning in to this week’s episode of the Snowys Camping Show Podcast. Don’t forget to subscribe to us on YouTube, Spotify, iTunes, Amazon Music, iHeartRadio, Pocket Casts, Podcast Addict, or Stitcher so you never miss an upload.
If you have any questions for Ben and Lauren, make sure you head over to our Facebook group and let us know as we’d love to hear from you.
Catch you out there!
The post Ep152 – What Size Solar Panel Do I Need? appeared first on Snowys Blog.
]]>The post Ep147 – When Camping Goes Wrong! appeared first on Snowys Blog.
]]>So the pegs won’t peg, the storm won’t settle, and you’re all wheel, no drive?
From flyaway tents and flooded campsites, to painful neighbours and malfunctions in the middle of nowhere – Ben and Lauren unpack how to handle camping catastrophes with a productive, spring-back attitude. Be it battening down the hatches or packing up early, our gear gurus share their hard-won wisdom on making the call between riding out the storm or hitting the road.

Ben and Lauren unpack how to handle camping catastrophes with a productive, spring-back attitude.
Shortcuts:
00:00 – Intro
01:20 – When Camping Goes Wrong
02:02 – Covering the Basics
03:10 – The Right Mindset
03:56 – Lauren’s Stance
05:03 – Fix the Problem, or Hit the Road
06:04 – Resilience and Resourcefulness
09:48 – Weather, Health, and Safety
11:18 – Campsites and Neighbours
14:08 – Additional Advice
17:27 – Summary
Mentioned in this Episode:
Podcasts:
Ep98 – Staying Safe on the Road
Ep61 – Finding the Best Campsites
Blogs:
Camping Etiquette: Being the Best Camper
How to Get the Best Weather for Your Lap of Australia
How to Repair a Broken Tent Pole
How to be a Self-Sufficient Camper
Thanks for listening, tune in again for next week’s episode!
Thanks for tuning in to this week’s episode of the Snowys Camping Show Podcast. Don’t forget to subscribe to us on YouTube, Spotify, iTunes, Amazon Music, iHeartRadio, Pocket Casts, Podcast Addict, or Stitcher so you never miss an upload.
If you have any questions for Ben and Lauren, make sure you head over to our Facebook group and let us know as we’d love to hear from you.
Catch you out there!
The post Ep147 – When Camping Goes Wrong! appeared first on Snowys Blog.
]]>The post Ep144 – Season 4 Wrap-Up appeared first on Snowys Blog.
]]>From jam-packed interviews to banter bites, Season 4 wrapped up with… Vegemite croissants?
Following chats with industry legends, product deep-dives, and plenty of banter about Ben’s beard – in this episode, Ben and Lauren recount their favorite moments of 2024.
From touching base with some of our favourite brands, introducing Tilda’s insights on a stylish campsite, and Zempire’s latest lineup – tune in for a year’s worth of highlights, some surprising stats about what you loved watching, and who we’re keen to see in the hot seat for 2025!

In this episode, Ben and Lauren recount their favorite moments of 2024.
Shortcuts:
00:00 – Intro
01:00 – A Tumultuous Season!
04:28 – S4’s Most Listened To / Watched Episodes
07:10 – Ben and Lauren’s Favourite Episodes
09:06 – Snowys’ Brick and Mortar – Brendale, QLD and Adelaide, SA
10:54 – Interviewing OZtrail
12:10 – Glamping Gear and Maddy Bockett from Tilda Outdoors
14:28 – Interviewing Joolca
16:16 – The Banter on Ben’s Beard!
20:21 – Zempire’s New Range
21:23 – Snowys’ First OZ Braai Product!
22:13 – Cam’s Back on YouTube!
24:03 – Ben’s Biggest Realisation (4 Seasons Later)
25:20 – Who Do You Want Us to Interview in 2025?
27:30 – Sea to Summit Vs Zempire Models
29:27 – Vegemite Croissants…?
30:56 – Happy Christmas from Ben and Lauren!
Mentioned in this Episode:
Products:
Zempire Hexolite camping tables
Podcasts:
Ep123 – Weird & Wonderful Camping Gear #3
Ep126 – New Season, New Gear: Winter ’24
Ep122 – Keeping it Clean with Camp Showers
Ep120 – Beach & Island Camping with Dave & Bec from Snowys Brendale
Ep114 – Rooftop Tents with Dave & Jacob from Snowys Brendale
Ep125 – Rooftop Tents, Awnings, & Everything OZtrail 2024 with Michael & Ben
Ep133 – Tilda Outdoors with Maddy Bockett
Ep142 – Joolca with Maciek Slodyczka
Ep138 – Zempire: Innovating the Outdoors with Richard Knauf
YouTube:
Sea to Summit Detour Stainless Steel Pan with Cam
Thanks for listening, tune in again for next fortnight’s episode!
Thanks for tuning in to this week’s episode of the Snowys Camping Show Podcast. Don’t forget to subscribe to us on YouTube, Spotify, iTunes, Amazon Music, iHeartRadio, Pocket Casts, Podcast Addict, or Stitcher so you never miss an upload.
If you have any questions for Ben and Lauren, make sure you head over to our Facebook group and let us know as we’d love to hear from you.
Catch you out there!
The post Ep144 – Season 4 Wrap-Up appeared first on Snowys Blog.
]]>The post Ep128 – Campsite Fun & Games appeared first on Snowys Blog.
]]>I spy with my little eye, something beginning with…
Ben, Lauren, and two working microphones. The answer is Episode 128 of the Snowys Camping Show – where our outdoor experts work hard, so you can play hard!
This week, Ben and Lauren bring to the podcast table hours of car and campsite games, guaranteeing ongoing entertainment on every family getaway.

This week, Ben and Lauren bring to the podcast table hours of car and campsite games. Image: BlackWolf
Shortcuts:
00:00 – Intro
03:15 – ‘I Spy’
05:12 – 20 Questions
06:57 – ‘I Went to the ___ and Bought a ___’
08:26 – The Story Game
10:35 – The Whistle Game
13:01 – Change One Letter
15:08 – ‘Did You Hear?’
16:20 – Shotgun
17:40 – Spotto / Punch-Buggie
18:37 – Murder in the Dark, Storm the Lantern, and Spotlight
22:17 – Alpha Challenge
23:47 – Target Practice
25:38 – Travel Documentation
28:00 – Charades
28:53 – Operation
29:50 – Monopoly Deal
30:26 – Uno and Yahtzee
30:52 – Five Crowns
32:52 – Checkers, Connect 4, and Chess
33:36 – Finska
34:30 – Summary
Mentioned in this Episode:
Podcasts:
Blogs:
Thanks for listening, tune in again for next fortnight’s episode!
Thanks for tuning in to this week’s episode of the Snowys Camping Show Podcast. Don’t forget to subscribe to us on YouTube, Spotify, iTunes, Amazon Music, iHeartRadio, Pocket Casts, Podcast Addict, or Stitcher so you never miss an upload.
If you have any questions for Ben and Lauren, make sure you head over to our Facebook group and let us know as we’d love to hear from you.
Catch you out there!
The post Ep128 – Campsite Fun & Games appeared first on Snowys Blog.
]]>The post Ep122 – Keeping it Clean with Camp Showers appeared first on Snowys Blog.
]]>Yeah, Ben and Lauren scrub up alright.
In this episode, they keep it classy in their squeaky clean discussion of everything camp showers.
From pared-back shower bags and basic bucket setups, to compact 12-volt appliances and gas hot water systems – your favourite outdoor experts run the tap on the range of shower options for a refreshingly rustic cleanse out bush!

In this episode, Ben and Lauren run the tap on the range of outdoor showers available. Image: Smarttek
Shortcuts:
00:00 – Intro
01:57 – Camp Showers
04:29 – Traditional Shower Bags
08:33 – Bucket Showers
12:08 – 12-Volt Showers
16:22 – Deluxe 12-Volt Showers and Hot Water Systems
24:28 – Shower Tents
28:59 – Pop-Up Buckets
31:25 – Summary
Mentioned in this Episode:
Products:
Sea to Summit Pocket Shower 10L
Rechargeable showers and hot water systems
Companion AquaHeat Lithium Gas Shower
Blogs:
‘How to Set Up the Perfect Outdoor Camp Shower’ by Ben Collaton
Brands:
Thanks for listening, tune in again for next fortnight’s episode!
Thanks for tuning in to this week’s episode of the Snowys Camping Show Podcast. Don’t forget to subscribe to us on YouTube, Spotify, iTunes, Amazon Music, iHeartRadio, Pocket Casts, Podcast Addict, or Stitcher so you never miss an upload.
If you have any questions for Ben and Lauren, make sure you head over to our Facebook group and let us know as we’d love to hear from you.
Catch you out there!
The post Ep122 – Keeping it Clean with Camp Showers appeared first on Snowys Blog.
]]>The post Ep121 – Off-Grid Communication appeared first on Snowys Blog.
]]>‘Don’t call me unless it’s an emergency’ should be taken just as seriously as ‘don’t talk to me until I’ve had my morning coffee.’
In this episode, Ben and Lauren discuss the kind of communication that requires a gadget caught between the all-out, ‘get me out’, sending-out-an-SOS Personal Locator Beacon, and the in-range, down-the-road, yarn-with-Mum mobile phone.
From connecting to satellites and choosing the right device, to navigating, recharging, and maintenance – we’re sending our own important message to every outdoor adventurer ahead of their next off-grid escape.

Ben and Lauren discuss the gadget that falls between the Personal Locator Beacon and the mobile phone. Image: Zoleo
Shortcuts:
00:00 – Intro
02:06 – Citizen Band (CB) or Ultra-High Frequency (UHF) Radios
03:21 – Short- and Long-Distance Communication
06:36 – Connecting to Satellites
07:09 – Satellite Communication Networks
08:50 – Satellite Navigation Systems
09:35 – Satellite Phones
11:24 – Satellite-Based Communication Devices
14:02 – Zoleo
14:40 – Spot Messenger
15:43 – Choosing the Right Device
18:02 – Maintenance and Recharging
18:26 – Starlink
21:58 – Summary
Mentioned in this Episode:
Podcasts:
Products:
Zoleo Global Satellite Communicator
Other:
Iridium Satellite Communication Network
Thuraya Satellite Communication Network
GLONASS Satellite Navigation System
COSPAS-SARSAT International Satellite System
GALILEO Global Navigation Satellite System
Thanks for listening, tune in again for next fortnight’s episode!
Thanks for tuning in to this week’s episode of the Snowys Camping Show Podcast. Don’t forget to subscribe to us on YouTube, Spotify, iTunes, Amazon Music, iHeartRadio, Pocket Casts, Podcast Addict, or Stitcher so you never miss an upload.
If you have any questions for Ben and Lauren, make sure you head over to our Facebook group and let us know as we’d love to hear from you.
Catch you out there!
The post Ep121 – Off-Grid Communication appeared first on Snowys Blog.
]]>The post Ep119 – Campsite Q&A’s #8 with Ben & Lauren appeared first on Snowys Blog.
]]>This week, Ben and Lauren are back behind the mic with their raw, rustic, and never-curated-ever-organic approach to answering even more of your campsite questions.
Be it tent protection from the top down, or preventing mid-adventure vermin invasions – boil the billy and settle in for another Q&A episode with your favourite outdoor experts! There’s usually something to learn, and always something to laugh about.

Be it tent protection from the top down, or preventing mid-adventure vermin invasions – boil the billy and tune in to your favourite outdoor experts! Image: Oztent
Shortcuts:
00:00 – Intro
03:28 – Best Shelter for Weekend Camping from Run and Sun?
08:25 – The Zempire Pronto V2 10P: Manageable Set Up Process for a Bloke with a Bad Back?
11:14 – Best All-Rounder of Gas Stoves / Kitchen Setups?
15:08 – Any Plans for a New Zealand Store?
15:56 – What Exactly is ‘Car Camping’?
19:57 – Pros and Cons of Zempire Roof Covers vs Tarp with Poles?
23:25 – Considerations When Building a ‘Tradie Trailer’ into a Camping Trailer?
30:22 – Tips for Keeping Vermin Out of Gear, in Storage and at Camp?
36:17 – What to Keep in the Emergency-Emergency Kit?
40:45 – Light and Easy-To-Roll Swag for a Solo Female with an Injured Shoulder?
45:21 – Tips for Camping with Kids Close to Rivers and Waterways?
49:49 – Best Way to Power a 35L Fridge and Charge a Phone?
55:59 – Summary
Mentioned in this episode:
Podcasts:
Ep38 – Awnings, Shelters & Shades for Summer
Ep59 – Shelters for Rainy Days
Ep94 – Back to Reality: Camp Gear Storage
Ep68 – Spare Bits for your Caravan Kit
Ep31 – Creepy Crawlies at the Campsite
Ep5 – Staying Powered Up When Camping
Ep110 – Car Camping Without Cramming
Blogs:
Understanding 12V Battery & Solar Setups for your 4WD – by Ben Collaton
5 Reasons to Own an Air Tent – by Matt McIvor
Products:
Elemental Emergency Survival Blanket
Dometic Pico FTC 1×1 TC Inflatable 1P Swag
Coleman Instant Swagger 1P Tent
Companion Rover Lithium 100Ah Power Station
Companion Rover Lithium 40Ah Power Station
HardKorr 200W Heavy Duty Portable Solar Mat – No Regulator
Thanks for listening, tune in again for next fortnight’s episode!
Thanks for tuning in to this week’s episode of the Snowys Camping Show Podcast. Don’t forget to subscribe to us on YouTube, Spotify, iTunes, Amazon Music, iHeartRadio, Pocket Casts, Podcast Addict, or Stitcher so you never miss an upload.
If you have any questions for Ben and Lauren, make sure you head over to our Facebook group and let us know as we’d love to hear from you.
Catch you out there!
The post Ep119 – Campsite Q&A’s #8 with Ben & Lauren appeared first on Snowys Blog.
]]>The post Ep117 – Campsite Q&A’s #6 with Ben & Lauren appeared first on Snowys Blog.
]]>Fresh at the desk for 2024, Ben and Lauren kickstart Season 4 with their sixth Q&A!
Be you a solo 4WDer or an on-the-road family of five – your favourite outdoor experts detail their answers to the top queries in their inbox, from fridge capacities and battery pack portability, to compact tents, extended trips, setups, and storage advice.

Be you a solo 4WDer or an on-the-road family of five – your favourite outdoor experts detail their answers to the top queries in their inbox. Image: Coleman
Shortcuts:
00:00 – Intro
01:13 – Kicking Off Season 4 with Another Q&A!
02:07 – Ben and Lauren’s New Year’s Resolutions
04:59 – Induction Cooking for Camping?
12:08 – Will Ben and Lauren Be Back for ACOF 2024?
13:29 – Thoughts on 4WDing Solo?
17:56 – Most Compact 4-Season Tent for a Family of 4?
24:57 – How to Prepare Items for Storage in Muggy Weather
31:40 – Weird Items to Take Camping?
34:14 – Perfect Fridge Capacity for Couples on a 1-2 Week Trip?
38:10 – Recommended Setup for a Family of 5 on the Move?
45:49 – Best Portable Lithium Battery Packs for 70L Fridge/Freezers?
52:11 – Best Way to Manage a Quiet Bush Camping Situation Involving a Petrol Generator?
57:24 – Summary
Mentioned in this Episode:
Blogs:
How to Plan a Solo Vehicle 4WD Trip
Podcasts:
Ep77 – Camp Cooking Competitions with Cam
Ep94 – Back to Reality: Camp Gear Storage
Ep12 – Caring for Your Camping Gear
Other:
Brands:
Products:
Zoleo Global Satellite Communicator
Spot X 2−Way Satellite Messenger with Bluetooth
Hard Korr Heavy Duty Battery Box
Gear Aid Seam Grip TF Tent Fabric Sealant
Nikwax Tent & Gear Solar Proof
Dometic CFX3 35 Portable Fridge/Freezer 36L
Engel MT−V45F 40L Fridge Freezer
Canvas Touring Tents: 4 Season
Thanks for listening, tune in again for next fortnight’s episode!
Thanks for tuning in to this week’s episode of the Snowys Camping Show Podcast. Don’t forget to subscribe to us on YouTube, Spotify, iTunes, Amazon Music, iHeartRadio, Pocket Casts, Podcast Addict, or Stitcher so you never miss an upload.
If you have any questions for Ben and Lauren, make sure you head over to our Facebook group and let us know as we’d love to hear from you.
Catch you out there!
The post Ep117 – Campsite Q&A’s #6 with Ben & Lauren appeared first on Snowys Blog.
]]>The post Ep115 – Christmas Gift Guide ‘23 appeared first on Snowys Blog.
]]>Well, Silly Season has officially hit the Snowys podcast room…
In this episode, gear gurus Ben and Lauren work their way down their wish lists, detailing the gear and gadgets fit for every outdoor adventure.
From perfectly practical stocking fillers to perfectly portable water faucets, solar-powered string lights, and Sundowner swags – watch or listen for the ultimate gift guide, bundled together with a bow by your favourite, festive outdoor experts!

Watch or listen for the ultimate gift guide!
Shortcuts:
00:00 – Intro
01:29 – ‘Tis the Season!
05:09 – Ben and Lauren’s Wishlist
06:02 – Tiegear Tiedown Equipment
07:26 – Blacksmith Camping Supplies Wheel Bag
08:50 – Dometic Hydration Faucet*
10:33 – Telescopic Camping Toasting Forks*
11:21 – BlackWolf Quick-Fold Lightweight Chair
12:31 – OZtrail Sundowner Swags
14:56 – Opinel Products
16:54 – MPOWERD Luci String Lights*
19:33 – Wacaco Coffee Maker*
20:24 – Camp Blanket*
22:34 – Dometic Iceboxes*
24:04 – Everclear Drinkware*
25:51 – Hard Korr Multi-Tool Shovel and U-Lites*
27:13 – C-Gear L-Shaped Mats*
28:17 – Firepits
30:35 – Folding / Pop-Up Washing Basket
34:24 – Summary
Mentioned in this Episode:
Blogs:
A Snowy(s) Christmas: Gift Guide 2023
Podcasts:
Ep82 – Christmas Gift Guide ’22
Ep6 – Do You Need a Portable Firepit?
Products:
Blacksmith Camping Supplies 4WD Wheel Bag
Dometic GO Hydration Water Faucet Portable Self-Powered Tap
AFN Fishing & Outdoor Telescopic Camping Forks
BlackWolf Quick Fold Lightweight Chair
MPOWERD Luci Solar String Lights
Wacaco Minipresso Espresso Machine
Wacaco Nanopresso Espresso Machine
Hard Korr U-Lite Dual Colour LED Lanterns
Thanks for listening, tune in again for next fortnight’s episode!
Thanks for tuning in to this week’s episode of the Snowys Camping Show Podcast. Don’t forget to subscribe to us on YouTube, Spotify, iTunes, Amazon Music, iHeartRadio, Pocket Casts, Podcast Addict, or Stitcher so you never miss an upload.
If you have any questions for Ben and Lauren, make sure you head over to our Facebook group and let us know as we’d love to hear from you.
Catch you out there!
The post Ep115 – Christmas Gift Guide ‘23 appeared first on Snowys Blog.
]]>The post Ep108 – New Season, New Gear: Spring ‘23 appeared first on Snowys Blog.
]]>For the outdoorsy type, a good drink bottle is like a good handbag.
Be it new bottle brands like Nalgene or new colours from Grayl – the Snowys warehouse is brimming with new gear, just in time for Spring. This week, Ben and Lauren harvest the outdoor gear in full bloom!
From storage bags and awning brackets, to camp tables and solar blankets – in this episode, Ben and Lauren detail the new camp clobber fit for the budding adventurers.

In this episode, Ben and Lauren detail the new camp clobber fit for the budding adventurers. Image: Tiegear
Shortcuts:
00:00 – Intro
02:13 – Tiegear
06:24 – RacksBrax
11:04 – Oztent Storage Bags
13:54 – Nalgene Water Bottles
16:38 – Grayl GeoPress Water Bottles (New Colours)
18:05 – Oztent and 23ZERO Chainsaw Bags
20:08 – Wanderlite Camp Chairs and Table
25:33 – Zempire Links, Wall Sets, Roof Covers, and Groundsheets
29:03 – Hardkorr 300W Portable Solar Blanket
33:14 – Surprise Product!
Mentioned in this Episode:
Oztent Hanging Storage Pockets and Shelves
Blacksmith Camping Supplies drawer bag
Exped Mesh and Vista Organisers
Wanderlite Camp Chairs and Table
Zempire Links, Wall Sets, Roof Covers, and Groundsheets
Hardkorr 200W Portable Solar Blanket
Thanks for listening, tune in again for next fortnight’s episode!
Thanks for tuning in to this week’s episode of the Snowys Camping Show Podcast. Don’t forget to subscribe to us on YouTube, Spotify, iTunes, Amazon Music, iHeartRadio, Pocket Casts, Podcast Addict, or Stitcher so you never miss an upload.
If you have any questions for Ben and Lauren, make sure you head over to our Facebook group and let us know as we’d love to hear from you.
Catch you out there!
The post Ep108 – New Season, New Gear: Spring ‘23 appeared first on Snowys Blog.
]]>The post Ep105 – Camp Security & Safety Tips appeared first on Snowys Blog.
]]>Camping is supposed to be a freeing experience…
…but often, the paranoia surrounding campsite theft can leave us feeling more tied to our setup than a guy rope to a tent peg!
In this episode, Ben and Lauren lock in the tried and tested tips and tricks for keeping your camp clobber contained and the tent intact.

Ben and Lauren detail how to keep your camp clobber contained and the tent intact!
Shortcuts:
00:00 – Intro
02:28 – Camp Security and Safety
03:36 – Vehicle Security
07:06 – Campsite Security
10:40 – Don’t Appear to Have Something to Steal!
13:32 – Get to Know Your Neighbours
14:50 – Your Campsite Configuration
15:42 – Cable Loops, Padlocks, and Chains
17:10 – The Luck of the Draw
19:18 – Insurance
22:15 – Paranoia
22:48 – Home Safety and Social Media
24:30 – Summary
Mentioned in this Episode:
Podcasts:
Products:
Korjo Solid Brass Padlocks 2 Pack
Korjo TSA Indicator Combination Lock
Korjo TSA Combilock Duopack 2 Pack
Thanks for listening, tune in again for next fortnight’s episode!
Thanks for tuning in to this week’s episode of the Snowys Camping Show Podcast. Don’t forget to subscribe to us on YouTube, Spotify, iTunes, Amazon Music, iHeartRadio, Pocket Casts, Podcast Addict, or Stitcher so you never miss an upload.
If you have any questions for Ben and Lauren, make sure you head over to our Facebook group and let us know as we’d love to hear from you.
Catch you out there!
The post Ep105 – Camp Security & Safety Tips appeared first on Snowys Blog.
]]>The post Ep98 – Staying Safe on the Road appeared first on Snowys Blog.
]]>From tedious traffic, detours, and re-directions…
…to beating the heat, sleet, and wet conditions – in this episode, Ben and Lauren take the wheel and steer the Snowys Camping Show in a new direction.
Buckle in for their detailed discussion on road safety more extensive than the Sturt Highway, touching on the plans to make and the precautions to take ahead of your next road trip.
Prepare to take the nearest exit onto the Snowys Expressway!

Ben and Lauren steer the Snowys Camping Show in a new direction! Credit: Visit Victoria
Shortcuts:
00:00 – Intro
01:17 – New Gear
04:39 – Packing Your Car
05:33 – Weather Conditions
07:19 – Traffic Conditions
07:39 – Planning Your Departure
08:25 – Regular Breaks
09:21 – Keep Your Windscreen Clean
10:05 – Stay Alert
10:49 – Share the Driving
12:04 – Coffee
13:29 – Practice and Awareness
16:24 – Night Driving
18:31 – UHF Radio Channels
19:57 – Sharing the Road with Trucks
21:39 – Overtaking Trucks
25:11 – Making Space
25:52 – Slipstream
27:07 – Passing Trucks
28:28 – Summary
29:30 – Story of the Week (…Sort Of)
Mentioned in this Episode:
Products:
New Gear:
Sea to Summit: new dry bag and stuff sack range
Other:
Thanks for listening, tune in again for next week’s episode!
Thanks for tuning in to this week’s episode of the Snowys Camping Show Podcast. Don’t forget to subscribe to us on YouTube, Spotify, iTunes, Amazon Music, iHeartRadio, Pocket Casts, Podcast Addict, or Stitcher so you never miss an upload.
If you have any questions for Ben and Lauren, make sure you head over to our Facebook group and let us know as we’d love to hear from you.
Catch you out there!
The post Ep98 – Staying Safe on the Road appeared first on Snowys Blog.
]]>The post Ep94 – Back to Reality: Camp Gear Storage appeared first on Snowys Blog.
]]>Be it back to the garage, or straight to the garbage,
this discussion on gear storage seriously stacks up! In this episode, Ben and Lauren unpack how to best manage, maintain, and store your camp clobber following every off-grid getaway.
From the gear bags to the clear tubs – tune in for their tips on tent longevity, pest prevention, and drying out the damp.

From the gear bags to the clear tubs – tune in for Ben and Lauren’s storage tips!
Shortcuts:
00:00 – Intro
01:40 – New Gear
04:53 – Unpacking Before Unwinding
06:05 – Cleaning Your Gear: Drying, Sweeping, and Spot-Cleaning
09:11 – Cleaning Your Gear After Coastal Camping
09:52 – Gear Maintenance: Refilling, Replacing, and Recharging
13:01 – Wet or Damp Gear
16:14 – Storing Your Gear
19:12 – Bedding, Sleeping Mats, and Sleeping Bags
20:31 – Lauren’s Storage Method
21:25 – Ben’s Storage Method
22:43 – Drawer Bags Vs Solid Tubs
23:56 – Reusing Wardrobes, Cupboards, and Drawers
25:42 – Packing Tents for Longevity
27:16 – Storing Self-Inflating Mats
28:17 – Storing Chairs and Furniture
28:48 – Storing Cookware
31:37 – Managing Pests
34:52 – How Do You Store Your Gear?
35:41 – Story of the Week
Mentioned in this Episode:
New Gear:
OZtrail Jindabyne sleeping bags
Companion Proheat 2 Burner High Pressure stove
Companion Proheat 2 Burner Low Pressure stove
Gasmate Wireless BBQ Thermometer 4 Piece
Brands:
Categories
Podcasts:
Thanks for listening, tune in again for next week’s episode!
Thanks for tuning in to this week’s episode of the Snowys Camping Show Podcast. Don’t forget to subscribe to us on YouTube, Spotify, iTunes, Amazon Music, iHeartRadio, Pocket Casts, Podcast Addict, or Stitcher so you never miss an upload.
If you have any questions for Ben and Lauren, make sure you head over to our Facebook group and let us know as we’d love to hear from you.
Catch you out there!
The post Ep94 – Back to Reality: Camp Gear Storage appeared first on Snowys Blog.
]]>The post Ep93 – Dometic Fridges with Paul Montaut appeared first on Snowys Blog.
]]>This may just be our coolest interview yet.
In this episode, Ben and Lauren sit down with the Product Manager of Mobile Cooling at Dometic, Paul Montaut.
Kick back and crack open a cold one as the three of them discuss the ins and outs of Dometic fridges – literally, from their capacity and compressor to how well they combat the weather!

Kick back and crack open a cold one as Ben, Lauren, and special guest Paul discuss the ins and outs of Dometic fridges. Credit: Dometic
Shortcuts:
00:00 – Intro
01:35 – Introducing Paul from Dometic
04:57 – The History of Dometic
07:22 – The RV Industry
09:31 – Dometic’s Transition to Waeco
13:39 – Dometic’s Compressor
20:46 – Noise Level and Harmonics: Contributing Factors
22:33 – Service and Support Network
23:57 – Premium Features and Performance for Value
28:43 – Ventilation
31:19 – Insulation and Flammability
34:53 – Duty Cycle
36:49 – Thermoelectric Coolers
38:15 – The Dometic Product Design Process (DPDP)
45:53 – Dual Zones: Most Efficient Temperature Settings?
51:22 – Capacity
53:20 – Power Draw
56:05 – Drawer Fridges: Limitations
59:09 – Lauren’s Fridge Setup
01:00:21 – Can the CFX Range be Used as a Home Freezer?
01:02:15 – Why Does the CD30 Lack a Divider System?
01:03:23 – Best Place to Store Your Fridge While Camping?
01:04:51 – Exposing Your Fridge to Water and Dust (IP Ratings)
Mentioned in this Episode:
Other Episodes:
Ep52 – Caravan Refrigeration with Kev
Brands:
Category Pages:
Products:
Dometic CFX3 25 Portable Fridge/Freezer 25L
Dometic Coolmatic CD30 Drawer Fridge
Thanks for listening, tune in again for next week’s episode!
Thanks for tuning in to this week’s episode of the Snowys Camping Show Podcast. Don’t forget to subscribe to us on YouTube, Spotify, iTunes, Amazon Music, iHeartRadio, Pocket Casts, Podcast Addict, or Stitcher so you never miss an upload.
If you have any questions for Ben and Lauren, make sure you head over to our Facebook group and let us know as we’d love to hear from you.
Catch you out there!
The post Ep93 – Dometic Fridges with Paul Montaut appeared first on Snowys Blog.
]]>The post Ep92 – Campsite Q&A’s #5 with Ben & Lauren appeared first on Snowys Blog.
]]>Ben and Lauren have a combined knowledge of the outdoors that stretches further than a snatch strap hauling a 4WD from a bad back-up job.
In the 5th episode of their Campsite Q&A’s series, your questions are answered – from the gear on its way up, to the gear on its way out.
The billy’s on the boil, the damper’s wrapped in foil, and there’s an empty camp chair waiting loyally by the fire just for you. Tune in here!

The billy’s on the boil, the damper’s wrapped in foil, and there’s an empty camp chair waiting loyally by the fire just for you. Credit: OZtrail
Shortcuts:
00:00 – Intro
01:47 – New Gear
06:59 – Are Ben and Lauren Involved in Scouting?
11:16 – Do I Need 3x MPPT Chargers for my 2x 120W and 1x 200W Solar Panels?
14:48 – When is the Right Time to Move From a Tent to a Trailer?
20:13 – Has Lauren Decided on Her Upgraded Kids’ Bedding System?
22:15 – Gear On-Trend and Gear Phasing Out?
27:32 – Suction or Magnetic Clip-On Awnings: Are They Good?
30:13 – Removeable Kitchen in a 4WD Boot: Can This Work?
33:46 – Story of the Week
Mentioned in this Episode:
Other Episodes:
Ep23 – Campsite Q&A’s with Ben & Lauren
Ep30 – Campsite Q&A’s #2 with Ben & Lauren
Ep48 – Campsite Q&A’s #3 with Ben & Lauren
Ep65 – Campsite Q&A’s #4 with Ben & Lauren (Part 1)
Ep66 – Campsite Q&A’s #4 with Ben & Lauren (Part 2)
Brands:
Products:
New or Updated Gear
Dometic Santorini FTK 2×4 TC Inflatable Tent
Dometic Santorini FTK 4×8 TC Inflatable Tent
Hard Korr 40A DC-DC Battery Charger with MPPT Solar Regulator
Hard Korr 25A DC-DC Battery Charger with MPPT Solar Regulator
Other
Exped Versa 2R LW Sleeping Mat
Outdoor Connection Fiesta Sun Shelter
Darche KOZI Series All-Rounder 1.8m Awning
Thanks for listening, tune in again for next week’s episode!
Thanks for tuning in to this week’s episode of the Snowys Camping Show Podcast. Don’t forget to subscribe to us on YouTube, Spotify, iTunes, Amazon Music, iHeartRadio, Pocket Casts, Podcast Addict, or Stitcher so you never miss an upload.
If you have any questions for Ben and Lauren, make sure you head over to our Facebook group and let us know as we’d love to hear from you.
Catch you out there!
The post Ep92 – Campsite Q&A’s #5 with Ben & Lauren appeared first on Snowys Blog.
]]>The post Ep89 – Caravan Gas Systems with Kev appeared first on Snowys Blog.
]]>Usually when it gets a little gassy in the van, one needs only to crack a window.
In this episode though, our podcast hosts Ben and Lauren sit down with resident caravanning expert Kev from the Snowys Warehouse to chat the ins and outs of caravan gas systems.
We mean that literally too, covering all from internal and external appliances, to compatibility, care, and maintenance.

Ben, Lauren, and Kev cover everything from internal and external appliances, to compatibility, care, and maintenance. Credit: Kevin Leslie
Shortcuts:
00:00 – Intro
00:32 – Introducing Kev
01:59 – The Basics of a Caravan Gas System
03:18 – LPG
04:29 – Regulators
05:51 – Built-In and Portable Gas Appliances
07:02 – Ventilation
09:29 – Compatible Appliances
10:29 – Internal Caravan Gas Appliances
13:57 – External Appliances and Thermocouples
20:58 – Transitioning to the LCC27 Fitting
23:19 – Gas System Maintenance and Care
26:05 – Second-Hand Van Certification
27:30 – Kev’s Explosive Experience!
30:56 – Summary
Mentioned in this Episode:
Other Episodes:
Ep83 – LCC27 Gas Regulations: The New Standards
Blogs:
POL & LCC27 Gas Fittings: Everything You Need to Know by Ben Collaton
Understanding Gas for Camping and Caravan Stoves by Ben Collaton
Products:
Companion Double Burner Wok Cooker
Companion 4kg LCC27 Gas Cylinder
Thanks for listening, tune in again for next week’s episode!
Thanks for tuning in to this week’s episode of the Snowys Camping Show Podcast. Don’t forget to subscribe to us on YouTube, Spotify, iTunes, Amazon Music, iHeartRadio, Pocket Casts, Podcast Addict, or Stitcher so you never miss an upload.
If you have any questions for Ben and Lauren, make sure you head over to our Facebook group and let us know as we’d love to hear from you.
Catch you out there!
The post Ep89 – Caravan Gas Systems with Kev appeared first on Snowys Blog.
]]>The post Ep87 – Building a Bucket List with Mariska Threadgold appeared first on Snowys Blog.
]]>Fellow campers, 4WDers, and outdoor adventurers…
…it’s about time we didn’t let that cardboard calendar hanging by a distorted paper clip dictate how we live our lives. Time is just as much of a factor in planning an off-grid getaway as it is in baking banana bread: there may never be a ‘right’ time, but some times are riper than others.
In this episode, our outdoor experts Ben and Lauren are back behind the mic talking bucket lists with copywriter, content creator, and adventure blogger Mariska Threadgold. From memories of rainbow ice-cream at Monkey Mia, to determining those big, ‘bucket worthy’ journeys – Mariska demonstrates why the time is now, the reason is adventure, and the only question is where.

The time is now, the reason is adventure, and the only question is where.
Shortcuts
00:00 – Intro
00:58 – Introducing Mariska Threadgold
03:03 – Is There Ever a ‘Right Time’?
03:52 – Mariska’s Story
08:10 – 10 Months on the Road
10:54 – Mariska’s Happy Place: Motivation to Move Forward
13:06 – Mariska’s Bucket List
14:20 – What is ‘Bucket Worthy’?
19:49 – Building a Bucket List
22:43 – ‘Bucket List Overwhelm’
27:33 – Ben’s Bucket List
28:54 – Monthly Mini Buckets
32:27 – Your Buckets Vs Theirs
36:28 – Social Media’s Role
37:46 – Mariska’s Inspiration and Research
40:49 – Bucket List Fails
42:50 – Follow Mariska for More
44:06 – Blog Gossip from a Little Birdy…
44:30 – Mariska’s Website
Mentioned in this Episode:
Mariska Threadgold | Copywriter
Thanks for listening, tune in again for next week’s episode!
Thanks for tuning in to this week’s episode of the Snowys Camping Show Podcast. Don’t forget to subscribe to us on YouTube, Spotify, iTunes, Amazon Music, iHeartRadio, Pocket Casts, Podcast Addict, or Stitcher so you never miss an upload.
If you have any questions for Ben and Lauren, make sure you head over to our Facebook group and let us know as we’d love to hear from you.
Catch you out there!
The post Ep87 – Building a Bucket List with Mariska Threadgold appeared first on Snowys Blog.
]]>The post Ep86 – That’s a Wrap on Season 2 appeared first on Snowys Blog.
]]>We’ve learned a lot this year.
Ben knows a thing or thirty about water filtration. Lauren secretly rates groundsheets. Adding red cordial to a brand new water bladder helps to eradicate the plastic-like flavour. There is such thing as a ‘swent’ (or is there?), and it is possible to talk for 30 minutes about tent pegs.
From burning toilet paper to boiling salt in water – tune in for the laughs, learnings, and most-loved moments of the Snowys Camping Show: Season 2.

We’ve learned alot this year.
Shortcuts:
00:00 – Intro
01:47 – Our New E-Mail Address!
02:54 – The Wrap Up
04:05 – Ben and Lauren: Pure Talent?!
05:26 – Lauren’s Learning: The Sea to Summit Kitchen Sink
07:28 – Ben’s Observation: Season 2’s Swear Words!
09:14 – Lauren’s Favourite Episode
10:17 – Ben’s Water Filtration Episode
11:27 – Lauren: ‘”Swents” Don’t Exist!’
12:59 – Lauren’s Change of Tune on Groundsheets
14:47 – That Time We Talked Tent Pegs for 30 Minutes…
16:21 – The Long, Technical, PLB Episode…
16:50 – Conversations with the CFS
19:02 – The Red Cordial Tip
22:45 – Burning Ben’s Toilet Paper…
24:15 – Adding Salt to Boiling Water
27:06 – Lauren’s Crocs
28:18 – The Beauty of Darkroom Tents
30:00 – The Riverland Camp Oven Festival in Renmark
31:38 – The Australian Camp Oven Festival
32:15 – Wrapping Up the Wrap-Up…
Mentioned in this Episode:
Podcasts:
Ep55 – Food for Adventure with Kate Grarock
Ep70 – ‘Fire to Fork’ with Harry Fisher
Ep50 – Swag, Tent, or ‘Swent’?
Ep69 – From the Ground Up: Talking Groundsheets
Ep63 – Talkin’ Tent Pegs: Hiking Edition
Ep45 – Fire Ban Seasons with the CFS
Ep51 – Taking Care of Business with Camp Toilets
Ep81 – Coleman Instant Up Tents
Ep77 – Camp Cooking Competitions with Cam
Ep78 – Camp Ovens with Kingbrown and Mick Viller
Ep79 – Aus Camp Oven Festival ’22 Wrap-Up
Other:
The post Ep86 – That’s a Wrap on Season 2 appeared first on Snowys Blog.
]]>The post Ep84 – The Muk Mat Story with Suze Horton appeared first on Snowys Blog.
]]>Or watch the video version here:
From the sand and salt post-surf, to the dust, dirt, and turf…
Muk Mat products boast a non-slip, clean-cut solution to preventing muck from making its way into homes, camp spaces, and vehicles.
In this episode, Ben and Lauren chat with Muk Mat founder Suze Horton about the growing success of the business – and why the grass is always greener with a Muk Mat!

Muk Mat products boast a non-slip, clean-cut solution to preventing muck from making its way into living spaces. Credit: Muk Mat
Shortcuts
00:00 – Intro
00:44 – Introducing Suze from Muk Mat
01:53 – Planting the Seed: The Origin of Muk Mat
03:57 – Not Just a Piece of Grass…
07:10 – Muk Mat’s Growing Success
08:44 – ‘Muk Mates’
10:23 – Manufacturing and Distribution
12:47 – Aussie Manufacturing
14:39 – The Real Fake Grass
17:48 – Muk Mat Quality: A Step Up
20:03 – Customised Mats and New Products
22:02 – Coloured Turfs
23:58 – Creative Muk Mat Uses
25:33 – The Plan for Muk Mat
Mentioned in this Episode:
Brands:
Products:
Thanks for listening, tune in again for next week’s episode!
Thanks for tuning in to this week’s episode of the Snowys Camping Show Podcast. Don’t forget to subscribe to us on YouTube, Spotify, iTunes, Amazon Music, iHeartRadio, Pocket Casts, Podcast Addict, or Stitcher so you never miss an upload.
If you have any questions for Ben and Lauren, make sure you head over to our Facebook group and let us know as we’d love to hear from you.
Catch you out there!
The post Ep84 – The Muk Mat Story with Suze Horton appeared first on Snowys Blog.
]]>The post Ep83 – LCC27 Gas Regulations: The New Standards appeared first on Snowys Blog.
]]>Or watch the video version here:
No, this episode isn’t about bowel movements.
Be it those backyard barbies before sundown, campsite brekkies at the crack of dawn, or just all-round outdoor leisure – the new LCC27 gas fitting now replaces the existing POL on common 4kg and 9kg LPG gas cylinders.
Our gear experts outline the reasons behind the transition, what this means for adventurers carrying gas, and how to proceed accordingly.

The new LCC27 gas fitting now replaces the existing POL on common 4kg and 9kg LPG gas cylinders.
Shortcuts:
00:00 – Intro
00:58 – It’s Ben’s Time to Shine… Again
02:29 – Changes to Australian Gas Standards
03:34 – Ben’s Blog
05:18 – POL to LCC27
06:11 – The Reason for the Change
07:30 – The New LCC27 Fitting
08:36 – Gas Seal
09:47 – Gas Standards Around the Globe
10:35 – Where Does This New Attachment Apply?
11:37 – As of April 2022…
12:15 – From Manufacturer to User
13:41 – The Transition Period
15:19 – Compatibility
18:09 – Distinguishing Old from New
18:40 – The Rubber Nose
20:12 – Regulations These Days
21:50 – Safety Vs Common Sense
27:13 – Adaptors
31:43 – Refills
31:53 – Caravans
32:25 – Taking the Foot Off the Gas: Summary
Mentioned in this Episode:
Blogs
POL & LCC27 Gas Fittings: Everything You Need To Know by Ben Collaton
Categories
Products
Companion 4kg LCC27 Gas Cylinder
Companion 9kg LCC27 Gas Cylinder
Thanks for listening, tune in again for next week’s episode!
Thanks for tuning in to this week’s episode of the Snowys Camping Show Podcast. Don’t forget to subscribe to us on YouTube, Spotify, iTunes, Amazon Music, iHeartRadio, Pocket Casts, Podcast Addict, or Stitcher so you never miss an upload.
If you have any questions for Ben and Lauren, make sure you head over to our Facebook group and let us know as we’d love to hear from you.
Catch you out there!
The post Ep83 – LCC27 Gas Regulations: The New Standards appeared first on Snowys Blog.
]]>The post Ep82 – Christmas Gift Guide ‘22 appeared first on Snowys Blog.
]]>Or watch the video version here:
Jingle bells, jingle bells,
Ben and Lauren here,
Bringing you our gift guide for
The best time of the year…
Who says Christmas in Australia can’t get a little Snowy? In this episode, our gear gurus unwrap the Snowys products they believe will be the most well-received, come Christmas Day.
From Muk Mats and MiniMeis, to beer kegs and knife sets – tune in for the ultimate sleigh ride of a gift guide!

Ben and Lauren unwrap the Snowys products they believe will be the most well-received for Christmas. Credit: iStock
Shortcuts
00:00 – Intro
02:05 – A Snowys Christmas Gift Guide for 2022
03:21 – Portable Coffee Maker
04:53 – Muk Mats
06:42 – Growlers and Beer Kegs
08:17 – Scorpro Explorer Box with Wine Glasses
09:53 – JetBoil
10:37 – Insulated and Silicone Drinkware
13:57 – Engel’s 60th Anniversary Limited Edition Fridge/Freezer
16:28 – Picnic Tables
18:27 – Scrubba Wash Bag
20:01 – Beach Shelters
22:39 – Camp Knife Sets
25:54 – Cookbooks
26:58 – MiniMeis Child Carriers
29:13 – Zippo Products
30:12 – Water Sports and Aquatic Gear
31:12 – Lawn and Camp Games
Mentioned in this Episode:
Podcasts:
Ep17 – Coffee Options for Camping
Ep38 – Awnings, Shelters & Shades for Summer
Ep70 – ‘Fire to Fork’ with Harry Fisher
Brands:
Categories:
Products:
AeroPress Portable Coffee Maker
Scorpro Explorer Box with Wine Glasses
JetBoil MiniMo Cooking System with Pot Support
Avanti Silicone Stemless Wine Glasses
Dometic Thermo Beverage Cooler
Stanley Classic Camp Vacuum Mug
Engel MT-V45SY 60th Anniversary Limited Edition 40L Fridge Freezer
Oztent Malamoo 4-Hub Beach Shelter
Caribee Collaroy Beach Shelter
Tramontina Low & Slow BBQ Knife Package
SICUT Low & Slow BBQ Knife Package
Fire to Fork Adventure Cooking by Harry Fisher
About That Much – Volume 1 by Jase Andrews
MiniMeis G4 Child Shoulder Carrier
Thanks for listening, tune in again for next week’s episode!
Thanks for tuning in to this week’s episode of the Snowys Camping Show Podcast. Don’t forget to subscribe to us on YouTube, Spotify, iTunes, Amazon Music, iHeartRadio, Pocket Casts, Podcast Addict, or Stitcher so you never miss an upload.
If you have any questions for Ben and Lauren, make sure you head over to our Facebook group and let us know as we’d love to hear from you.
Catch you out there!
The post Ep82 – Christmas Gift Guide ‘22 appeared first on Snowys Blog.
]]>The post Ep80 – Caravan Accessories with Kev appeared first on Snowys Blog.
]]>Or watch the video version here:
Life on the road can look like…
…anything from crisp white coastlines, pillows padding the open boot, and coffee thermoses cradled in the cupholders, to mud-caked wheels, scuffed stone guards, and ongoing kilometres of red dirt road.
In this episode of the Snowys Camping Show, Ben and Lauren invite Snowys’ resident caravanning expert Kevin to take the wheel. From chocks and hitch locks, to adaptors and jack pads – Kev lists the most necessary caravan accessories for a well-oiled machine on the open road.

Ben and Lauren invite Snowys’ resident caravanning expert Kevin to take the wheel in this week’s episode. Credit: Kevin Leslie
Shortcuts:
00:00 – Intro
00:52 – Introducing Kev
01:41 – Mirrors
05:14 – Levellers and Chocks
07:13 – Hoses and Filters
11:47 – Grey Waste Tanks: Needed?
13:00 – Antennas
14:52 – Steps
16:30 – Jack Pads
17:39 – Hitch Locks
20:09 – Caravan and Camper Covers
22:05 – Powered Jockey Wheel
24:18 – Ampfibian Power Cable and Adapter
25:41 – Stone Guards: Necessary?
26:45 – Wind Deflectors
28:01 – Reversing Cameras
28:52 – Brake Controller and Breaker Weight
30:54 – Is Ben Too Basic?
Mentioned in this Episode:
Categories:
Products
Supex 12mm Non-Taint Drinking Water Hose
Supex Smooth Bore Sullage Hoses
Ampfibian RV Plus Power Adaptor
Thanks for listening, tune in again for next week’s episode!
Thanks for tuning in to this week’s episode of the Snowys Camping Show Podcast. Don’t forget to subscribe to us on YouTube, Spotify, iTunes, Amazon Music, iHeartRadio, Pocket Casts, Podcast Addict, or Stitcher so you never miss an upload.
If you have any questions for Ben and Lauren, make sure you head over to our Facebook group and let us know as we’d love to hear from you.
Catch you out there!
The post Ep80 – Caravan Accessories with Kev appeared first on Snowys Blog.
]]>The post Ep74 – One-Pot Wonders appeared first on Snowys Blog.
]]>Or watch the video version here:
Ben and Lauren reveal the easy, one-pot meals that bolster our bodies and curb the campsite cravings.
Be it hearty pastas chockablock with chopped veg, bakes topped with a leopard-spotted blanket of bubbled cheese, hot-pot soups, or butter bean stews – listen in for a wholesome concoction of campsite creations.
Shortcuts:
00:00 – Intro
02:33 – One Pot Wonders: Explained
03:40 – Gnocchi with Pesto Sauce
06:15 – Nachos
09:50 – Quesadillas
12:05 – Soup
16:00 – Tomato and Vege Pasta
18:39 – White Bean and Lamb Shank Stew
22:06 – Vegetarian Chilli
24:51 – Mac and Cheese
26:58 – Ravioli
30:52 – Paella
34:24 – Stroganoff
Mentioned in this Episode:
Podcasts:
Ep55 – Food for Adventure with Kate Grarock
Ep70 – ‘Fire to Fork’ with Harry Fisher
Products:
Campfire Billy Teapot (Stainless Steel)
Campfire 12V/240V Vacuum Sealer
Thanks for listening, tune in again for next week’s episode!
Thanks for tuning in to this week’s episode of the Snowys Camping Show Podcast. Don’t forget to subscribe to us on YouTube, Spotify, iTunes, Amazon Music, iHeartRadio, Pocket Casts, Podcast Addict, or Stitcher so you never miss an upload.
If you have any questions for Ben and Lauren, make sure you head over to our Facebook group and let us know as we’d love to hear from you.
Catch you out there!

In this episode, Ben and Lauren reveal the easy, one-pot meals that curb the campsite cravings. Credit: Campfire
The post Ep74 – One-Pot Wonders appeared first on Snowys Blog.
]]>The post Ep72 – Lauren’s Setup appeared first on Snowys Blog.
]]>Or watch the video version here:
Lauren swaps the Oztent RV with the Mercedes backseat, and the swag bags for the Swagger 3Ps!
Be it caravan park setups or roadside pullups, Lauren’s Sprinter van is decked out with the campsite tackle, kitchen kit, and sleep systems for every off-grid adventure.
Join our gear gurus as they unload Lauren’s mobile mover – from the truck tarp shelter fit for family-sized shindigs, to the work-in-progress bevvie station in the crevice of her barn door.
Shortcuts:
00:00 – Intro
00:35 – Last Week on the Snowys Camping Show…
02:22 – Lauren’s Camping Style
03:18 – Lauren’s Sprinter Van Setup
08:59 – Interior
10:06 – Lauren’s Shelters, Awnings and Groundsheets
14:40 – Lauren’s Sleep System
17:39 – Lauren’s Camp Kitchen
21:03 – Lauren’s Drawer Systems
23:33 – Lauren’s Washing Station
24:09 – Water
25:11 – Lauren’s #VanLife
26:00 – Activities and Games
29:27 – Pro’s of Lauren’s Setup
29:43 – Potential Changes
31:08 – Lauren’s Past Setups
32:14 – Lauren’s Future Setups
36:12 – Watch This Space…
Mentioned in this Episode:
Coleman Instant Swagger 3P Tent
Supa Peg Outbound Shield 6 Freestanding Awning
Zempire Bomberpad 3D Camp Mattress
OZtrail Cotton Canvas Jumbo Sleeping Bag
Coleman Stratus Fleece Sleeping Bag Liner
Companion 4kg LCC27 Gas Cylinder
myCOOLMAN CCP85DZ Dual Zone Portable Fridge/Freezer 85L

Lauren’s setup can accommodate both a couples’ trip and larger family holiday of six people. Credit: Lauren Wishart
Thanks for listening, tune in again for next week’s episode!
Thanks for tuning in to this week’s episode of the Snowys Camping Show Podcast. Don’t forget to subscribe to us on YouTube, Spotify, iTunes, Amazon Music, iHeartRadio, Pocket Casts, Podcast Addict, or Stitcher so you never miss an upload.
If you have any questions for Ben and Lauren, make sure you head over to our Facebook group and let us know as we’d love to hear from you.
Catch you out there!
The post Ep72 – Lauren’s Setup appeared first on Snowys Blog.
]]>The post Ep68 – Spare Bits for Your Caravan Kit with Kev appeared first on Snowys Blog.
]]>Or watch the video version here:
Snowys’ resident caravanning expert Kevin is fit for the rough and tumble of off-road travel…
all thanks to his fool-proof fix-it kit of trusted tools and tricks! In this episode of the Snowys Camping Show, outdoor enthusiasts Ben and Lauren hitch a ride with Kev to learn what he keeps in his spare part compartment.
From the shackles and buckles, to the spares for repairs – Kev reveals all that allow him a quick-sticks recovery in those tricky off-track stitch-ups!
Shortcuts:
00:00 – Intro
01:12 – Welcome, Kevin!
02:27 – Kev’s List
05:03 – Hose Clamps
07:45 – Tie Wire, Insulation Tape, Duct Tape, and Cable Ties
09:44 – Fuses, Electrical Wire, and Electrical Terminals
12:58 – Wheel Bearings
17:53 – U-Bolts
21:04 – Grease and WD40
22:05 – Split Pins
23:39 – Screws and Bolts
25:36 – Puncture Repair Kit and Second Spare Wheel
28:36 – Chain, Turn Buckles, and Shackles
32:40 – Snatch Strap, Tow Rope, Ropes, and Ratchet Straps
34:49 – D-Shackles
35:34 – Tool Kit
37:31 – Battery Drill, Drill Bits, Angle Grinder, and Charger
40:35 – Spare Water Connection
42:26 – Spare Water Tank Barbed Tail
44:52 – Blue Plastic Tarp
46:20 – Further Thoughts
Mentioned in this Episode:
Ep43 – Caravan Water Tanks 101 with Kev
Ep52 – Caravan Refrigeration with Kev
Ep60 – Caravanning the Oodnadatta Track with Kev
Welcome, Kevin!
Among many others, Kev last joined Ben and Lauren in Episode 60 where he detailed his journey along the Oodnadatta Track. This week, we welcome him back to take us through the spare parts that save him potential hassle during any adversities he may experience off-track.
Kev’s List
The motive behind Kev’s list of caravan parts is to provide some sort of temporary aid when travellers have no access to a mechanic or service station off-road. As most vehicles will have repair kits of their own, these kit bits are more specific to a caravan.
Kev describes this list as his ‘basic’ default… despite how many items it includes! For short trips, it can be modified, though he maintains that all components are necessary for extended touring or travelling to remote areas.
In compiling this list, Kev has considered every possible failure that could eventuate on an off-road trip. Some issues can be fixed on the road, such as a loose hose or a set of bearings, but others may require leaving the van to find help. Nonetheless, these spare parts are easily accessible in the spur of the moment.
Hose Clamps
These are required for caravan plumbing in feeding the water supply from the tank/s. As they come in different sizes, Kev recommends looking underneath your caravan to identify what you may require.
If your hose is split or cracked and requires a joiner, a hose clamp is essential here too. That said, the same approach can be taken with cable ties and tie wire, especially if your hose comes loose or is left hanging. When this happens, clamps can break off, resulting in a loss of water – so replacement pieces are recommended.
That said, Lauren queries whether taking a spare hose itself is an easier solution. To this, Kev states that he would simply carry a standard water hose for the purpose of hooking up to a mains, and cut pieces from that as opposed to taking additional hoses. For instance, you wouldn’t replace a filler hose with a waste hose, as this would send muck into your tank. Instead, if a hose is damaged, Kevin simply suggests cutting the damaged section out and using a joiner to reconnect it.
Most hose clamps are metal with a Phillips head screw and a loop; as you screw, the loop tightens. These are more versatile and can be sourced from hardware stores. Kev reassures that caravanners needn’t keep a large range, but should have a few spares given how little room they occupy.
Insulation Tape, Duct Tape, and Cable Ties
Duct tape – commonly known as the silver plastic tape, and roughly 50mm wide – is capable of withstanding stress, so is effective for use on a broken window or cracked glass. For leaky radiator hoses too, simply wrap the tape all the way around the split as a temporary seal.
On the other hand, insulation (or electrical) tape is narrower, better utilised for broken wires. Each tape has its purpose, so Kev recommends bringing along both.
Lastly, cable ties are a given and useful for many purposes that involve securing components or keeping loose parts contained for temporary periods. Ben agrees to keep a handful with your spare parts on all off-road adventures.
Fuses, Electrical Wire, and Electrical Terminals
Many caravans have either glass (inline) or blade fuses – and with many models featuring electrical appliances, this has become more common. An electrical terminal is usually crimped onto an electrical wire, which thus has it unusable if it comes off. For this reason, Kev keeps a couple of spares on hand to keep him out of trouble.
As the size of the fuses will vary from one caravan to the next, Lauren asks whether it’s worth taking a couple of each size. To that, Kev confirms that this depends on the caravan itself. Older caravans use a glass or inline fuse with 10-15Amps, while a more modern style will use battery chargers or solar panels. Kev recommends determining what your van requires and take a spare of each. As they take up minimal space, he recommends looking into buying packets of various sizes and taking a multitude.
Lauren also queries whether there are any fuses that fail more regularly than others. Kev confirms that solar panels use a large fuse, so if a wire comes loose – namely a live wire from the battery – and makes contact with something immediately, it will trip. There isn’t a specific size, but Kev suggests mediating these potential issues by carrying a handful of the bigger fuses available.
Wheel Bearings
These should go hand in hand with right tools, as it can be headache depending on the component. Part of the bearings are pressed into the hub, and both the tools and know-how are also required to remove the cone from inside the hub if cracked or heat-affected. Keeping wheel bearings as a spare part is an advantage for caravanners, as they can be difficult and time-consuming to source from elsewhere – often taking several days.
If a bearing has collapsed completely, and you’re in the middle of nowhere – towing the van isn’t an option, as the wheel will both damage the axel and come loose. For this reason, Kev recommends partaking in a car maintenance course prior to any extended tours, to develop the skills and knowledge to change a wheel bearing easily and independently. That said, having a spare without the knowledge to fit it yourself still allows the opportunity for somebody else to do it for you.
The procedure of changing a wheel bearing involves first removing the grease cap from the hub, the split pin holding the hub nut on, the hub nut itself, and finally the hub from the axel. It’s also required to take the tyre off the wheel and the wheel off the hub, before attempting to punch out the cones within the hub. This can be done by turning it upside down on a piece of wood, knocking the cone out, and fitting a new one back in – though this process also requires the adequate ability. In addition, the hub seal is usually damaged after removing the inner bearing, so this is likely to require replacement too. YouTube content is a helpful platform that provides basic knowledge on how to approach the procedure of changing a wheel bearing.
As car bearings tend to be more durable, Kev only brings one set of bearings for the van. He has encountered other caravanners with collapsed wheel bearings, which can be a result of how tightly they’ve been secured. This can cause overheating and turn them blue, before they collapse. While this is unlikely to happen, it is expected to more with a caravan than with a car.
Nonetheless, Kev reassures that it’s unlikely for two sets of bearings to collapse on a trip away. For this reason, he only keeps one set of wheel bearings for one wheel – plus a hub seal, grease that withstands high temperatures, or any form of lubricant to ensure temporary support.

It’s unlikely for two sets of bearings to collapse, so Kev only keeps one set of wheel bearings for one wheel in his kit. Credit: Kevin Leslie
U-Bolts
The use of U-bolts depends on a caravan’s suspension system. For those with leaf springs, or who plan to travel along bumpy, rough terrain, U-bolts should be spring-bolted to the axel.
While Kev has only ever experienced his U-bolts breaking off his 4WD while traversing rough surfaces, he’s nonetheless heard of occasions where they have come loose from caravans; butts will come free, bounce off, and break, leaving the axel suspended without security. While this is unlikely to happen, it’s not uncommon for U-bolts to be moved or released after your caravan has been serviced.
Kev confirms that U-bolts must be specific, depending on the length and size of the axel – for example, rounded/cylindrical, or square/angular. In other words, Bunnings isn’t the answer!
Grease and WD40
Grease is used when applying wheel bearings, as well as on the tow-ball of a car. While greasing wheel bearings need only be done by using your fingers from a tub, greasing a coupling in a compressible system requires a grease gun.
As for the trusty WD40 – Ben, Lauren, and Kev each agree that this is a necessity, and a basic component for all road trips.
Split Pins
Yes, Lauren – these are just like giant bobby pins.
Split pins work by inserting a bolt through the point of connection, and a pin through the bolt itself. They’re available in a range of sizes and packs, and relatively inexpensive too. As they tend to be a common spare part to carry off-road, most nuts feature a hole for a split pin too. Among many things, tire wire can be used for the same purpose – though it’s always ideal to have access to the correct part.
Screws and Bolts
These needn’t be too big, as screws, nuts, and bolts that are become harder to replace. Kev recommends sizes from between 3mm and 6mm, and screws such as PK and Phillips. Keep an assortment of compatible nuts and washers as well, including wheel nuts.
Puncture Repair Kit and Second Spare Wheel
Lauren suggests Zoosh – like an aerosol can with an inbuilt hose, attached to the end of a tyre. The hose empties the can of foam into the tyre; as the vehicle drives, the foam coats the tyres interior and repairs any slow leaks.
For larger punctures or holes though, Kev recommends a plug. In his experience, a plug allows a temporary fix of the flat tyre before it can mended properly at a later time, where the spare is used to replace it in the meantime. Sometimes, cars can drive on plugs for years, and this strongly indicates their high durability. That said, Kev maintains to take the tyre to a mechanic at the earliest opportunity to be fitted properly with an internal plug.
As for wheels, Kev carries four spares – which is enough to give our minimalist adventurer, Ben, a heart attack! While it may be a lot of weight, Kev explains that after once shredding a wheel and replacing with his spare, he was left with nothing else in the event of another tyre-related issue throughout the trip. On the other hand, Ben’s approach is to invest in good quality tyres to begin with, carry only one spare… and hope there are no issues! All considered, both Kev’s and Ben’s tactics are as valid as each other.
Chain, Turn Buckles, and Shackles
In the 30s and 40s, interstate trucks would be undriveable if a significant part was broken – such as a suspension arm or spring, leaving the axel floating freely about without anchorage. A temporary fix is to chain the axel to the chassis. This is usually done by wrapping steel cable around both the spring and the axel, linking it up to the chassis, applying a turn buckle, pulling it tight to keep the axel in place, and continuing to drive slowly until a more permanent fix is obtainable. That said – like most things – this requires know-how.
Should you find yourself in a similar situation – which, albeit, is an extreme circumstance – Kev recommends a 1.5-metre length of chain, purchased from a hardware shop, with a turn buckles and shackles. Again, tie wire can also be used to hold the chain in place, while a turn buckle features a hook and eye on each end to help tighten it.
Snatch Strap, Tow Rope, Ropes, and Ratchet Straps
Where the first two are handy for towing, the latter are ideal for tying down and securing. Again, as neither take up substantial space, Kev recommends including each of them in your spare parts kit without question.
Ratchet straps can be used to tie a wheel to the bumper, or equipment to either the roof racks or underside of the caravan. Usually, if ratchet straps aren’t on hand, these methods can’t be applied as well. Simply ensure that whatever you have on hand instead is not too thin.
By the same token, using straps or rope for towing purposes must be properly and professionally rated.
D-Shackles
These are also required to be properly rated when used to chain anything up. While Kev’s aren’t rated, they’re adequately strong and only used as a temporary fix. Like other spare parts mentioned, these are specific to the vehicle itself – usually requiring 4mm-8mm diamond pins – so aren’t available from a standard hardware store.
The shackles of a safety chain also need to be rated, and this can be determined by a Working Load Limit (WLL) stamp on the product itself.
Tool Kit
Yep, just like that one in your tool shed.
Kev recommends including a basic Phillips and flathead screwdriver, a socket set, and a wrench. As a minimum, these can be sourced in ready-made kits comprising of various sizes, types of tools, and pieces.
Kev’s tool kit is a little more comprehensive, also featuring pliers, open-ended spanners, and hammers. Regarding spanners, Kev reminds us that open-ended ring spanners are either metric or imperial. Most hardware stores stock imperial, though can also carry both. This is where an adjustable spanner is useful.

As a minimum, tools can be sourced in ready-made kits comprising of various sizes and types of tools. Credit: Shutterstock
Battery Drill, Drill Bits, Angle Grinder, and Charger
At some point, Kev suggests that caravanners will need to use a battery drill and so will require a spare battery too. While Kev has an inverter in his van, he recommends charging the drill at a powered caravan site as opposed to through an inverter.
Drilling typically isn’t required too much in caravan maintenance, so Kev predicts that the battery won’t be used excessively. That said, he recommends taking one along as a precaution. This goes for an angel grinder, mostly required in bush-camping scenarios when cutting away broken bolts that won’t budge. Usually, those with a drill and an angel grinder can use the same battery across both.
Spare Water Connection
This refers to connecting to a water supply at the caravan park, calling for the fitting that’s screwed into the water inlet on the caravan as opposed to a tap. This requires a spare, given it’s not a unique thread. While American models feature imperial threads, all water and tap fittings sold in Australia are metric thread. Thus, purchasing a snap-on fitting, screwing it in, and turning twice will jam it. They’re not easy to buy, so Kev recommends sourcing these – as well as tap connections – from a caravan accessory store.
Ultimately, it’s suggested to keep spare fittings for connecting to both taps and hoses, as well as ensuring you have the female and male adaptors appropriate for your caravan.
Spare Water Tank Barbed Tail
The barbed tail describes the hose that feeds into tank and to the pump. Kev relays how his brother-in-law once broke his barbed tail, which resulted in water draining from the tank. As a result, the tank was unusable and he was forced to resort to jerries instead.
On some tanks, the barb can be screwed back in. On the other hand, some are moulded as part of the tank itself – which means if it breaks off, the tank itself is broken too. The likelihood of this happening depends on how well the tank is protected.
Lauren queries as to whether buying and upgrading an older van should also mean considering a screw-in tank. Kev doesn’t carry this, as all his barbs are protected – though in some vans, the tanks are fitted in a way that has the barb protruding from the side. This can leave it open to potential damage.
A strange but genius preventative strategy is cutting standard pool noodles (with a hollow core) into different lengths, and using as both hose insulation and protection. Ben seconds this method, where fitting the foam noodle onto roof racks too can prevent them from rattling.
Blue Plastic Tarp
Kev utilises his as a ground sheet in situations when he needs to get in and under his van. As well as this, a plastic tarp can aid in the case of a broken window; simply cut a piece out and tape it to side of van with duct tape to keep weather out.
A multi-use item, the tarp can also be tied to a roof rack as an awning and means of emergency shade, as well as to stop dirt, dust, and debris from damaging or soiling other equipment.
Further Thoughts
Kev re-iterates his understanding that not everyone can action the above repairs alone. For those determined, he maintains park-taking in a car maintenance course to cover the basics. These will assist in providing a temporary fix until further help is acquired.
While there are some things you can fix, there will be others you can’t – so simply adapt to the situation and action what you feel you can. Likewise, if you ever encounter a fellow caravanner stranded in the middle of nowhere requiring assistance or spare parts, making human contact can be reassuring enough. If it’s not direct assistance in mending their caravan, simply offering a lift to the nearest town or passing a message on to another group can still go a long way.
Thanks for listening, tune in again for next week’s episode!
Thanks for tuning in to this week’s episode of the Snowys Camping Show Podcast. Don’t forget to subscribe to us on YouTube, Spotify, iTunes, Amazon Music, iHeartRadio, Pocket Casts, Podcast Addict, or Stitcher so you never miss an upload.
If you have any questions for Ben and Lauren, make sure you head over to our Facebook group and let us know as we’d love to hear from you.
Catch you out there!
The post Ep68 – Spare Bits for Your Caravan Kit with Kev appeared first on Snowys Blog.
]]>The post Ep67 – Personal & Portable Lighting appeared first on Snowys Blog.
]]>Or watch the video version here:
From the flood lights drenching darkness with daylight, to the pocket-sized torches casting a spotlight on what’s ahead…
in this episode of the Snowys Camping Show, Ben and Lauren discuss the variety of portable lighting options that best suit our campsite parties and after-dark outdoor endeavours.
For those feeling in the dark about personal camp lighting, our gear gurus share some of the brightest lightbulb moments of the outdoor industry.
Shortcuts:
00:00 – Intro
01:56 – Battery-Powered Lighting Options
03:37 – Headtorches
04:12 – Lanterns
05:50 – Handheld Torches
07:31 – Area Lights
09:19 – Fairy Lights
10:00 – Types of Batteries
14:12 – Solar
16:08 – Lumens and Lux
17:55 – Light Functions
21:45 – Design Functions
22:47 – Multi-Purpose Lights
23:35 – Headtorches: Strapping and Adjustability
25:14 – Lighting Units Doubling as Power Banks
26:20 – Cost Vs Benefit and Quality
30:00 – Waterproofing
Mentioned in this Episode:
Podcasts:
Ep29 – 12V Lighting with Hard Korr
Ep32 – Battery Chemistry with Hard Korr
Products:
Coleman Northstar Lantern Mantle 95 Instaclip
Explore Planet Earth LED Area Camp Light Kit
Black Diamond Moji Charging Station Lantern and Portable Power
Zempire Hangdome USB Rechargeable Light
Zempire Megadome V2 USB Rechargeable Light
Exped Widget Inflation Pump, Lamp, and Power Bank
Goal Zero Lighthouse 600 Lantern and USB Power Hub
Hard Korr 100cm 3-Colour LED Light Bar Kit with Diffuser
Brands:
Battery-Powered Lighting Options
In Episode 29, Ben and Lauren were joined by Steve Buttigieg and Zac Buckley from Hard Korr to discuss the variety of vehicle and outdoor lighting options for a campsite. As not all campers have access to 12V, this episode covers the basic and more traditional lighting options, including handheld devices, headtorches, tabletop lamps, and hanging lanterns.
From rechargeable to standard AA battery-operated, the lighting options discussed in this episode are those often used to flood a personal or group areas, shed light throughout a tent, or serve as that midnight toilet run chum!
Headtorches
For convenient use around camp as a personal source of light, a headtorch is that hands-free henchman. Often perfect for after-dark cooking, a headtorch is helpful during the more hands-on campsite activities at sundown.
When Lauren was younger, she remembers how heavy they were due to their awkwardly large battery packs. Now, most are rechargeable via a USB.
Lanterns
The more traditional style of lantern – cylindrical in shape and typically positioned in the middle of a table – are becoming less popular as time goes on, given their insufficient output of light in comparison to more advanced models. Due to its outer structure, the lamp casts shadowy spots and fails to effectively disperse light from underneath when suspended. These days, most hanging lanterns available cast light evenly throughout the tent space – including directly downwards – just like a standard light at home.
Nonetheless, Lauren admits she still thinks fondly of the glass gas-powered lanterns she’d use growing up. These models featured a mantel on a stem, and threw light into the area effectively. Aside from Coleman’s dual-fuel lanterns, mantels are becoming harder to claim. Still, Lauren advocates for how useful these lanterns are – especially if gas is already required for a camp stove.
Nowadays, lanterns are both more compact in design but pack a brighter punch. Most cars also feature USB charging points, helpful for powering lanterns during the day before they’re put to use at night.
Handheld Torches
Well, we’ve certainly come a long way since the large, yellow Dolphin torches; the fat, golden Labrador of torches that requires six D-cell batteries and two hands to carry!
Handheld torches by Ledlenser in particular have a powerful beam for spotting and identifying objects in heavy darkness. While they tend to be higher in price than others, some models are more basic and suitable for young children who enjoy exploring. While a headtorch casts a fairly generic beam of light ahead, a handheld design enables more control of where the light is directed and thus better accuracy. As there are pros and cons to both models, keeping one of each in the camp kit would allow the best of both beams in relevant after-dark scenarios.
Area Lights
Brands such as Explore Planet Earth and OZtrail manufacture area lights that are attached to a large extension pole and hung above a space like a street lamp. Dispersing an impressive 15 square metres of beam, these lights are more beneficial for illuminating large communal spaces and setups beyond the caravan parks and out in the bush.
OZtrail also manufacture the Comet Light, chargeable via a 12V USB charging port in a car or a power bank.
Despite their remarkably large light coverage, these lights pack down smaller than a quad-fold chair or two-person hiking tent.
Fairy Lights
Those who follow the Snowys Camping Show on a regular basis will know how supportive Lauren is of the ambient, inexpensive, and efficient fairy lights! Not only are they a fun addition to a camp setup with young children, but they last for a long time on batteries too.
Types of Batteries
Batteries used in portable lighting are generally either rechargeable via a power point or replaceable (such as AA and AAA batteries). While the torch itself may not have a rechargeable battery, some good quality batteries can be charged via a power point and still used to operate it. Maintaining their low price point, Ben suggests that their affordability is nonetheless becoming more and more obsolete.
Most table and tent lanterns are USB-rechargeable, while many units such as handheld torches, headtorches, and some lanterns have a lithium battery built in. These can be recharged, but when the battery itself reaches the end of its life cycle it requires replacing. On the other hand, some rechargeable sealed units – many lanterns and some headtorches – have a built-in rechargeable battery that is completely sealed. This means that when the battery’s life cycle ends, so does the unit in its entirety. This somewhat dismisses the movement to choose rechargeable in order to avoid replacing batteries – so Ben and Lauren recommend first ensuring that the unit’s rechargeable batteries are replaceable, or that the lithium types last for substantial length of time.
With respects to the above, Zempire’s Hangdome and Megadome lantern models are recommended. While the battery is sealed and irreplaceable, the power drawn by the light is minimal and the realistic length of time spent using the unit itself will translate to multiple years of service. By the time the battery reaches the end of its life, it’ll likely be time for an upgrade anyway.
For Lauren, rechargeable sealed batteries are inconvenient when featured in headtorches. Usually, a headtorch is used at a greater intensity and brightness level than a more gentle area light. For this reason, one may not see further use from their sealed battery headtorch after 18 months.
Another consideration is a battery’s chemical composition. Some headtorches can be charged during the night and reach full capacity by the early hours of the morning. For some batteries, leaving it on charge from that point can be harmful due to their chemistry, while others of a different makeup aren’t affected. The details are complicated, so Ben and Lauren simply recommend asking the question before purchasing.
Solar
Solar-powered lighting options are compact and efficient, enabling users to charge their lighting throughout the day for use later in the evening at sundown – for example, MPOWERD’s Luci lanterns. While most lanterns alike only offer solar as a powering option, with a sealed battery – these units are often bomb-proof. On road trips, simply place your lights on the dashboard to catch the sun from through the windscreen.
Like all batteries too, allowing too long between camping trips can mean solar batteries slowly empty out in storage. Draining a solar-powered battery completely may mean recharging takes hours. On the other hand, using a solar light for only a couple of hours each night and charging them in the sun the following morning will often mean they’re constantly at capacity to generate power.
Some solar-powered lights also provide the option for 5V or 12V charging, such as those from BioLite. This is beneficial for winter camping when the sun is less present, as solar charging is less efficient during these times than simply plugging in.

Solar-powered lighting is a compact and efficient option. Credit: MPOWERD
Lumens and Lux
Lumen and lux go hand in hand in giving a measure of how much light a lantern puts out. As elaborated on by the Hard Korr team in Episode 29, a lux gives a more accurate indication. For example, one ‘lux’ at x distance denotes how far one can stand from the light source and still comfortably read a newspaper. While some lights boast 600 lumens with one lux at 20 metres, other lights may only boast half the number of lumens with one lux at 50 metres. Regarding the latter, the light reaches further despite less lumens because the output of each individual light depends on the particular beam structure, reflectiveness of the light’s facets, and how the light as a full unit has been constructed.
As a guide, Ben and Lauren suggest that a light with 80-100 lumens is adequate in wayfinding to the loo at night, while an area light is best suited to more lumens with less lux. This is because there is larger area to illuminate, thus requiring brighter ‘flood’ lighting as opposed to light that reaches a considerable distance.
Light Functions
Standard light modes include high, low, on, and off. Sometimes, too many functions can mean we’re ‘scrolling’ through each mode for longer than we’d like before we eventually land on our desired setting. For this reason, Ben and Lauren suggest that unless there is a specific need for a particular feature, most of the ‘cooler’ settings aren’t necessary.
Nonetheless, orange and red light modes are helpful and recommended. Where red light bodes well for night vision purposes and is less of a disturbance for others at the campsite, orange light repels insects and is helpful for after-dark cooking. Additionally, the difference between spot and flood lighting stems from a lamp’s intensity versus its brightness. A flood light is neither directional nor blinding, but more dispersed. On the other hand, a spotlight has a more pointed beam and is best used for identifying, searching, or wayfinding at night.
Ultimately, Ben and Lauren suggest looking into lighting that offers modes relevant to what you may require in your camp area. While some may only require a simple headtorch with both a flood and spotlight function, others may need a combination of both lanterns and handheld devices.
Design Functions
The design functions determine how a user interacts with their light – for example, suspending them from awnings and tents, or sitting them on tabletops.
A hanging light is often useful in how it disperses light evenly across a space, just as a domestic light. That said, they can be heavy. Lauren recommends first assessing whether the lantern is both light and short enough to hang from the centre of your tent, without distorting the tent’s structure or invading your head space.
Multi-Purpose Lights
Nebo manufacture handheld torches that double as an area light via an inner component that slides out of main body.
While Nebo have many, other innovative designs include headtorches by BioLite that feature a diffuser bag. These are perfect for hikers or space-conscious campers to suspend from the top of their tents.
Headtorches: Strapping and Adjustability
For camping, a headtorch merely requires strapping securely around the head and across the forehead. For running, it’s more ideal to choose a sturdier design that evenly distributes the weight of the unit around the head.
In regard to adjustability, most headtorches will fit without issues. That said, some of the more senior campers have found the adjustability features of some headtorches to be tedious and fiddly. For these after-dark adventurers, it’s recommended to choose a headtorch with less componentry and strapping.
Lighting Units Doubling as Power Banks
Desirable among the younger generation, some lighting units double as power banks to charge smaller devices such as mobile phones. Given their attractiveness, some manufacturers merely state this feature as a selling point rather than a key function. This is because most models only boost a phone’s battery capacity by 20%, serving as more of a means of topping up than fully charging.
Albeit, GoalZero manufacture some models that achieve a better balance of lighting and charging functions. Nonetheless, most affordable portable lighting options will exploit the latter feature as simply a desirable dot point on the packaging.
Cost Vs Benefit and Quality
When it comes to lighting, one usually gets what they pay for. Lights at a lower price point tend to lack robustness, will likely crack if dropped or met with too much force, and won’t last the same lifespan as those with better quality LED and componentry. For example, Hard Korr’s LED bar lights are well designed and sealed in an aluminium casing. On the other hand, a ten-dollar torch from an outdoor department store with replaceable batteries may still be in good working order after years of use, but the quality of the light itself is lower.
The condition of a light can often be determined by shining the torch onto a blank wall. Within the circle of light projected by a lower-budget torch, usually only 30% is lit while the rest is a series of dark patches. Sometimes it’s not always the quality of the materials that determine a good lighting unit, but that of its output.
Ultimately, Ben and Lauren recommend to simply buy what you can afford without the expectation that a ten-dollar light will last in the back of a 4WD for the next ten years of touring. Consequently, keep in mind how often you’ll need to replace these lights over time. Know what you need your light for, and go from there.
Waterproofing
For those looking at waterproof lighting, search for an Ingress Protection (IPX) rating. As well as dust, the IPX rating varies from unit to unit depending on the extent to which it can handle water – such as heavy rain, submersion, or a light splash. Choose the IPX rating based on the type of environment you’re likely to be in.
Thanks for listening, tune in again for next week’s episode!
Thanks for tuning in to this week’s episode of the Snowys Camping Show Podcast. Don’t forget to subscribe to us on YouTube, Spotify, iTunes, Amazon Music, iHeartRadio, Pocket Casts, Podcast Addict, or Stitcher so you never miss an upload.
If you have any questions for Ben and Lauren, make sure you head over to our Facebook group and let us know as we’d love to hear from you.
Catch you out there!
The post Ep67 – Personal & Portable Lighting appeared first on Snowys Blog.
]]>The post Ep60 – Caravanning the Oodnadatta Track with Kev appeared first on Snowys Blog.
]]>Or watch the video version here:
Far from the concrete complexes of the metropolitan maze,
Kev from the Snowys warehouse recently hit the rough and tumble of Australia’s outback on his off-road adventure along the Oodnadatta Track.
In this week’s episode of the Snowys Camping Show, outdoor experts Ben and Lauren sit down with our accomplished caravanner to discuss his venture along the sunburnt, red-dirt roads between Adelaide and Alice Springs, bypassing the barren bitumen of the highways.
Be it suspension hacks, unkempt tracks, or the cons of mud flaps – Kev tells all and leaves nothing in the dust.
Shortcuts
00:00 – Intro
00:46 – What and Where is the Oodnadatta Track?
02:27 – Best Time of Year to Travel the Oodnadatta Track?
04:45 – Caravanning on the Oodnadatta Track
06:43 – Considering Caravans
07:33 – Tyres and Suspension
15:12 – Stone Guards
17:11 – Mud Flaps
20:15 – Protecting Water Taps and Gas Fittings
21:33 – Off-Shoots and Side-Routes
23:23 – Track Conditions
27:15 – Vehicles
28:07 – Kev’s Favourite Spots
Mentioned in this episode:
Episodes:
Ep34 – Camping Terms Explained
Other:
The Government of South Australia: Outback Road Warnings
What and Where is the Oodnadatta Track?
The Oodnadatta Track begins at Marree – a small town located in the north-east of South Australia – and follows the old Ghan train line that runs between Adelaide and Alice Springs. After riding 617 kilometres of dirt road, adventurers will eventually hit the town of Marla on the Stuart Highway, south of the border between South Australia and the Northern Territory.
On his recent venture, Kev explored the track from Maree to Oodnadatta, before heading north to Witjira National Park.
Best Time of Year to Travel the Oodnadatta Track?
Given summertime temperatures can reach between 47 and 48 degrees Celsius, it’s recommended to travel the Oodnadatta Track in the cooler months of the year. In early June, the warmest days are around 20 degrees Celsius, suggesting the most temperate period to span between April and September. That said, ideal travelling conditions ultimately depend on the weather at the time. Rain on outback roads can create slippery, perilous mud tracks, while warmer, drier months call for additional water supplies.
Wet weather can sometimes have the Oodnadatta Track impassable, resulting in closures lasting up to three weeks. As a helpful guide, Kev recommends Outback Road Warnings on the Government of South Australia website. The site houses colour-coded maps indicating the roads that are both open and closed, as well as the routes best suited only to 4WDs or other vehicles. Another option is to simply call ahead at road houses, such as the Pink Road House in Oodnadatta.
Caravanning on the Oodnadatta Track
From Kev’s experience, he recommends an off-road van, sitting higher and boasting both better suspension and tyres for the Oodnadatta Track and road conditions alike. On the other hand, a conventional road caravan rides lower, with a softer suspension system and inadequate tyres that bode better for smoother surfaces. While a conventional caravan lacks the features and functionality that an off-road van can deliver along the more unstable roads, travellers who take their conventional vans are recommended to drive no faster than 60 kilometres per hour.
Even in an off-road van, travelling too fast on dirt roads can be dangerous due to a lack of grip on the loose surfaces. That said, Kev confirms that a small, a retro-style van pulled by a low-slung car is the most strongly advised against on the Oodnadatta Track or routes alike. Nonetheless, the difference between a rough and even ride will depend on the road conditions at the time of travel, be it graded or corrugated.
Considering Caravans
Generally speaking, smaller vans are both easier to tow and less likely to bog in soft material. That said, a larger van still delivers – just better so in dry conditions.
Tyres and Suspension
On off-track adventures, Kev recommends heavy-duty, light truck-style, or all-terrain tyres for both the car and the caravan. The latter are square in construction, and don’t bulge as much as standard tyres. Once the tyre pressure has been reduced to 20psi the tyre sits on a larger platform and spreads further, thus softer on bumps, relieving the load off the suspension, and preventing bulging. Bulging often occurs when the tyres are thinner, leaving them more susceptible to puncturing by rocks or other sharp materials.
Shock absorbers are used in most suspensions, controlling how it rebounds from a compressed to expanded state. In doing so, shock absorbers work fast and thus generate heat, which can result in them coming loose and falling away. Such issues are usually faced by rally drivers, so it’s often recommended to drive slowly along dirt roads. Shock absorbers in 4WDs are larger and require more oil to move, disperse more heat, and better handle movement.
Not all caravans have shock absorbers, but are leaf-sprung instead (in the case of most road caravans). While these caravans are still safe to drive on dirt roads, drivers need to be wary in keeping the vehicle under control to prevent it from skipping sideways along corrugation when rounding corners. Kev’s off-road caravan has shock absorbers, with a single-axle beam. This is because if an independent suspension arm breaks, replacing it is more of an ordeal than finding another axle beam. Kev’s vehicle still maintains movement on the tracks, but at only 3.6 metres long doesn’t pose too much of an issue.
So what are the benefits of independent suspension? This allows for one wheel to move up and down independently of every other axel on the van – in other words, each wheel is detached from an axel reaching from one end to the other. However, in the case of an axle beam, if the van is knocked on one side the spring compresses and lengthens, moving the wheel slightly backwards. As this happens, it changes the direction of the connected wheel on the other side. So, after a bump in the road sends the van briefly into mid-air, the other wheel will shift slightly as though responding to the steering wheel, sometimes resulting in an out-of-control swaying.
While it depends on the size of the van, axle beams generally aren’t as sufficient as independent suspension on rougher roads. Shock absorbers also, without a doubt, enhance the performance of any suspension system. Removing a suspension system and installing a new one is doable simply by cutting off the spring hangers, and rewelding the steel or fittings. That said, when installing shock absorbers onto an existing caravan one needs to be aware of space and where they can realistically be fitted. This includes consideration for both the compression and expansion length of the shock absorbers, best determined by a caravan repairer, engineer, or a suspension specialist with the facilities and know-how to weld an appropriate suspension. Put simply – re-installing or incorporating a suspension beneath a caravan is not a cheap or straightforward exercise!
Stone Guards
Kev doesn’t have stone guards, as he finds he doesn’t require them for general use. That said, hindsight is a bugger, as he comments that – after journeying the Oodnadatta Track six times – they may have been beneficial to look into ahead of his most recent trip.
Instead of stone guards, Kev currently has aluminium panels on the bottom of his caravan – though admits that the gas bottle, drawbar, and electrical fitting each need better protection. Even with large mud flaps, stones can still bounce about – and while the van is unscathed, the water tanks and other vital units fitted underneath require more defence. Kev’s car has mud flaps, but even with a checker plate at the base and padding towards the top of the frontal part of the van, stones can still ricochet in all directions. Considering this, he aims to look into something more permanent.
Mud Flaps
On a previous trip away, Kev fixed mud flaps underneath the front of his van to prevent stones and mud from invading unwanted areas. That said, this was thought to have altered the airflow going up and under the van, as Kev discovered dust throughout the inside of his van that had entered through the gaps. After taking the mud flaps off, however, he found the interior of his van to be cleaner. When the airflow is altered, dirt and dust come up and off the road from different directions and sucked straight into the open gaps of the van. A result of a disrupted airflow can also be overheating, even if the mud flaps have been positioned on the car instead.

When the airflow is altered, dirt and dust come up and off the road from different directions and sucked straight into the open gaps of the van. Credit: Kevin
As beneficial as mud flaps seem to be, they’re not always practical. For example, driving through a dip simply has them dragging and collecting stones. Another protective accessory is the V-shaped stone shield positioned above the caravan’s drawbar – described by Ben as a bulbar that’s been strung with a fish net. Kev warns that these should be fitted relatively loose to reduce the velocity of any stones that make contact with it. Without doing so, the net acts as a spring or trampoline, capable of sending a stone straight through the back window!
Protecting Water Taps and Gas Fittings
Caravan water tanks and gas units should be installed right up under van, with their taps and fittings protected by rubber caps and covers. Essentially, everything beneath the caravan should be guarded or protected in some way.
Off-Shoots and Side-Routes
In Kev’s experience – some are manageable, while others are far worse. For example, the route to Lake Eyre passes through private property and was both seriously rough and ill-maintained – with corrugations measuring a metre apart and 200 millimetres deep!
Considering this, drivers who aren’t confident on uneven terrain have the option to leave their caravan at William Creek and head out in their 4WD.
Track Conditions
In Ben’s experience riding the off-tracks of rural SA and the NT, it’s common to go from a beautifully smooth road – as quiet as a highway, with only the hum of the engine to be heard – to a route so rough that the tyres chip and the fastest speed manageable is 40 kilometres per hour. This time around, Kev found the road conditions manageable (bar several corrugated segments past William Creek). After rain, the vehicles that travel along the tracks compact the surface over time, producing a smoother surface. Generally though, the Oodnadatta Track is well-maintained. Trucks require the roads to be regularly graded and in good condition, in order to maintain a reasonable speed in their frequent travels to and from cattle stations.
It’s all well and good to discover that the Oodnadatta Track is closed before your journey has begun – but what if you’re already on the track when the rain comes?! Luckily Kev wasn’t, at the time of his slippery situation. On their way to Dalhousie Springs, Kev turned off just out of Oodnadatta to camp, after learning that the forecast would be 0.2 millimetres of rainfall.
The weather bureau was right – Oodnadatta certainly saw 0.2 millimetres… plus another 9.8, which had the road messy, muddy, and slippery the following day! Kev was notified by passing cars of the track’s condition further on, making frequent stops to dig clay and mud out from the crannies and crevices of the wheels! Nonetheless, within two days at Dalhousie Springs, everything had dried out.
Vehicles
As mentioned earlier, appropriate vehicles for travelling the Oodnadatta Track can be determined by their tyre construction, the weather conditions, and the nature of the road itself at the time. While the track is doable with a sprinter van, this would require substantial consideration and planning in the lead-up. Kev and Ben also recommend establishing a buffer, like preparing to stay put a little longer to ensure departure is safe and manageable in unideal conditions.
Kev’s Favourite Spots
From the south to north, Kev’s trip began at Marree in SA, passing through Leigh Creek, Farina (home of the outback backyard bakery, operating in the winter months), and the Prairie Hotel in Parachilna (serving the “Feral Platter”: emu, camel, and crocodile)!
The journey through mid-north SA is wonderful, with another potential route via the Clare Valley wine regions and into the Flinders Ranges. In that, bypassing the latter follows a road that curves around Leigh Creek and sees the all-too majestic Flinders Ranges visible on the right-hand side. In Farina, the private camping ground (requiring payment on arrival) offers toilet facilities and a donkey shower that operates by lighting a boiler. For more on how a donkey shower operates, check out Ep34 – Camping Terms Explained.
In Marree, visitors can explore the original Ghan railway line, as well as the old railway engines, bridges, and tracks that ran through to the early 1980s before closing to the public. With the Flinders Ranges and Lake Eyre South, Coward Springs is a special place to sightsee, home to hot springs and a museum showcasing the history of the original Ghan railway line.
The SA outback is home to some cool, quirky characters too – like Talc Alf, who carves artwork from talc stone, displays them in his home, and welcomes visitors to admire and explore on their way through. The William Creek pub is a hot, happening, and iconic establishment, while the nearby airstrip is open for tourists to take flight on a scenic tour over Lake Eyre (an experience also offered in Maree).
For those who like the fast track over the off-track, the Stuart Highway is the most direct route to Alice Springs. That said, the Oodnadatta Track delivers a more scenic road trip experience, and Kev recommends allowing three days to navigate every nook and cranny – especially when factoring in detours and side-routes.
Take it easy, take it slow, and take it in. Oh… and take two spare wheels (one for the car and another for the caravan)!
Thanks for listening, tune in again for next week’s episode!
Thanks for tuning in to this week’s episode of the Snowys Camping Show Podcast. Don’t forget to subscribe to us on YouTube, Spotify, iTunes, Amazon Music, iHeartRadio, Pocket Casts, Podcast Addict, or Stitcher so you never miss an upload.
If you have any questions for Ben and Lauren, make sure you head over to our Facebook group and let us know as we’d love to hear from you.
Catch you out there!
The post Ep60 – Caravanning the Oodnadatta Track with Kev appeared first on Snowys Blog.
]]>The post Ep53 – Kangaroo Island appeared first on Snowys Blog.
]]>Or watch the video version here:
From leaving home for the SeaLink dock to a seafood cone on the Stokes Bay rocks,
Lauren and her partner Jesse explored the nooks, crannies, and crevices located thirteen kilometres off the coast of South Australia on the beauty-bountiful Kangaroo Island.
Be it sandboarding the Little Sahara dunes or foraging along the starfish-flecked shores of Bales Beach – in this episode of the Snowys Camping Show, Lauren dives into the hits, misses, and must-sees of Kangaroo Island through a true wildlife lover’s lens.
Short Cuts:
00:00 – Intro
00:36 – Kangaroo Island
01:33 – Why Kangaroo Island?
03:06 – Budget
05:48 – Travel and Accomodation
09:29 – Food
11:25 – Lauren’s Itinerary
29:29 – ‘Hit’ and ‘Miss’ Places
30:08 – Must-See Locations
31:10 – Pleasant Surprises
32:22 – A Take-Home Message
Kangaroo Island
Kangaroo Island is located south of Adelaide, off the coast. Larger than one may initially think, it largely covers the base of the Spencer Gulf. On a clear day, the island is visible from the South Australian shores, particularly from the bottom of both the Yorke and Fleurieu Peninsula. From boarding to disembarking the ferry, travel time from Adelaide takes roughly forty-five minutes, including the process taken to freight and unload vehicles.
Why Kangaroo Island?
Lauren’s only visit to Kangaroo Island had been in high school, where she spent only a night before travelling back to Adelaide the following day. Her partner Jesse was born and raised on the island, though left when he was a teenager and hasn’t returned since. The timing of certain family endeavours had it convenient for both Lauren and Jesse to travel over for a full week in March. Given how long it had been since the two of them had respectively visited the island – coupled with the sheer cost of a trip for two – they decided to first experience it kid-free.
Budget
Last Christmas, Lauren’s gift was an “overseas holiday”…with SeaLink! As the cost of travel is likely to be a barrier for some, Lauren recommends a SeaLink voucher as a present idea for loved ones looking to visit Kangaroo Island. For both Lauren and Jesse to travel with their camper van in early March, the cost of travelling via the ferry was just over $450. Any vehicle longer than five metres required a prior booking.
Despite the pricey travel expense, Lauren can confirm that after experiencing an immersion of what the island has to offer, she understands and supports the costs involved. With them came a greater appreciation for what there was to see and do, where more accessibility may have cheapened the experience.
Travelling and Accommodation
Lauren and Jesse left for their holiday on a Thursday night and returned late on the Wednesday of the following week. The ferry was pleasant, though rougher on their return to Adelaide than it was on the way over.
On the island, Lauren and Jesse stayed in their camper van, where booking at the caravan park in advance wasn’t necessary given their travels outside of school holiday periods. Lauren describes many council-based campgrounds with physical meters available as the payment method, while most National Park campgrounds have adequate phone signal and are paid for on their respective website via a QR code, displayed onsite.
While the websites indicate which sites at the campground are available, Lauren describes how common it is to find that most people arrive first before booking and paying online. As a result, these campsites aren’t registered on the website as occupied. For this reason, Lauren suggests pre-booking during the busy holiday periods, but not necessarily in the off-season.
Food
For cost efficiency, Lauren and Jesse decided to pre-pack their food. While Jesse grew up on the island, the cost of travelling across as a tourist – let alone living as a resident, with cargo fees and related logistics – meant expenses were higher than what one may pay in an SA town.
All their shopping was done at home in Adelaide, with a final stop in Yankalilla to fill up with fuel. At the eastern end of the island, Penneshaw and other core towns like Parndana and Kingscote have means of both food and fuel, including supermarkets. While travelling back to these towns may steal forty-five minutes to an hour from your day, they provide a safeguard for obtaining any missing or additional items – such a forgotten jumper, or more snack-like foods.
Itinerary
Given their six-day long trip, Lauren and Jesse loosely followed a section in SeaLink’s suggested itineraries on Kangaroo Island. The comprehensive guidebook details seven regions across seven days, where the island is categorized into its separate regions.
Lauren outlines where she roamed, starting from where the ferry docks at the east of the island in Penneshaw and the Dudley Peninsula. Home to cellar doors, cafes, and crystal-clear beaches, Lauren didn’t favour anywhere here in particular. That said, she describes a nice campground near Antechamber Bay within the Lashmar Conservation Park, while the Cape Willoughby Lighthouse Tours are a perfect option for families with children interested in history.
Spanning across to where the east end of the island meets between Penneshaw and Kingscote, Lauren describes the American River and surrounding areas such as Pelican Lagoon, home to long hikes and coastal walks. Mount Thisby, recently re-named to Prospect Hill, climbs an extensive run of stairs up a large sand dune to the highest point on Kangaroo Island. Here, one end of the island is visible at two kilometres away. Lauren and Jesse explored this region on their final day, first cutting down to the south coast.
Lauren describes the southern areas as rugged but beautiful, spending limited time in Cape Gantheaume but recommending the walking trails and hikes established at the base of the cape. In the south coast, the Murray Lagoon at the end of Winter is thought to be stunning and surreal, especially for bird watchers. Lauren and Jesse camped within the area, and enjoyed both the cooking facilities and walking trails laced throughout.
Given their budget and disinterest in partaking in any tourist-like activities, they avoided Seal Bay – though admitted how ideal this part of the island would be for families with young children. East of Seal Bay is Bales Beach, peppered with what seemed like thousands of starfish, while Vivonne Bay holds crystal clear waters for waist-deep wading, and a large, postcard-perfect rockpool.
It was the sand dunes of Little Sahara that had Lauren caving to their only paid tourist experience – sandboarding! For only a flat entry fee, Lauren describes it as “wicked fun” (despite almost hurtling into a bush as she surfed her way down the sandy slopes)!
At the western end, Lauren and Jesse visited the Flinders Chase National Park and Hanson Bay. They chose to navigate this region last on their trip due to the time of year, when seasons begin to shift and the wind picks up. The south coast tends to experience strong winds, hence their decision to traverse this area first. The western region is also home to the Kelly Hill Conservation Park, exhibiting the impressive Kelly Hill Caves – thought after two and half years since the horrific bushfires, this attraction remains closed. For this reason, and with many access roads still barricaded, Lauren would suggest for those more interested in adventure-based activities (as opposed to the cottage industry attractions, such as Clifford’s Honey Farm) to delay a visit to Kangaroo Island for another year. The devastating impacts of the bushfires include a loss of vegetation aiding the maintenance of soil, while heavy rains have subsequently caused erosion.
One morning, Lauren and Jesse woke at 5:30am and made their way into the Flinders Chase National Park, stopping on Bunker Hill Lookout for a steaming hot cup of tea to start the morning. From there, they headed down to Remarkable Rocks just before 7:00am. With not another person in sight, the two of them basked in the magic of the cold, misty morning. The large number of seals visible from Admirals Arch too meant that Lauren and Jesse were content with having not splashed out at Seal Bay instead (literally)!
With not another person in sight, Lauren basked in the magic of the cold, misty morning from Admirals Arch. Credit: Lauren Westgarth
On the western end of the north coast they visited Cape Borda, navigating the walking trails of the wildlife park. That includes those that were closed off, where Lauren had a terrifying encounter with a snake…even with fly perched on its cold, lifeless eye! Again, Lauren and Jesse avoided the cottage industry-based activites such as horse riding and winery tours, passing down the middle and through Parndana for a fuel stop without lingering for too long in the heartland.
On the north coast, commonly known beaches include Stokes Bay, Emu Bay and Smiths Bay. Most beaches in this area are familiar by their elevated representation on Instagram – though despite what she felt she was encouraged to believe on social media Lauren admits that Stokes Bay wasn’t superior to any other beach. That said, the Rockpool Café (closed on Mondays) is home to the most succulent assorted seafood cone she has ever tasted!
Snelling Beach was the most picturesque of them all, where Lauren considers the view coming in through Constitution Hill to be unparalleled.
All in all, Lauren and Jesse preferred to take the tracks less travelled. The excessive stylization and geo-tags on social media set an expectation for a tourist prior to visiting, removing an element of anticipation and ability to experience the island first-hand. Lauren comments that in the time she and her partner explored Bales Beach at length, roughly nine variations of groups, families, or partnerships arrived, lingered, and left. What Lauren and Jesse discovered along the shorelines and in amongst rugged beachside nature was missed by those who expected to see more in less time. Ultimately, Lauren suggests to approach the island with a sense of adventure, plenty of time, an abundance of curiosity, and a desire to absorb more of fewer places over simply marking off every location in less detail.
Lastly, Lauren and Jesse stretched back to Penneshaw over the space of a full day. Having not visited the wineries or tourist-based locations, Lauren claims that a full week could be dedicated to exploring the Kingscote and Penneshaw area in its entirety. Places of note included Duck Lagoon on the Cygnet River, Emu Bay in the upper corner, the original Kingscote landing site of the first settlement, and the Oyster Farm Shop on the American River.

A full week could be dedicated to exploring the Kingscote and Penneshaw area in its entirety. Credit: Lauren Westgarth
‘Hit’ and ‘Miss’ Places
For Lauren, a blend of both was Stokes Bay. The glorified images on Instagram that she was privy to prior to her trip away meant her expectations of the area were heightened, in comparison to what she witnessed. That said – as long as the Rockpool Café remains, she will return!
Must-See Locations
The beachside home of the best seafood cone – the Rockpool Café in Stokes Bay is on the top of Lauren’s list. The view from Prospect Hill was also a magical memory, while the beauty of Bales Beach prevailed over the others. Picturesque, solitary scenes at the base of Flinders Chase and Remarkable Rocks are well worth the early rise too, as visitors began to filter through just as Lauren and Jesse were leaving Admiral Arch.
Pleasant Surprises
Given the activity is typically enjoyed by tourists, Lauren was amused to admit how much she enjoyed the sandboarding at Little Sahara. Since the family’s long-loved video of her Dad skidding his way down a dune – his sandboard slipping from beneath him, corkscrewing into the air, and knocking him in the head – Lauren had felt a sense of connection to the activity, compelling her to experience it herself. That said, she didn’t expect to enjoy it as much as she did!
A Take-Home Message
Aside from having a stand-off with a dead snake, witnessing Jesse come a cropper sandboarding at Little Sahara, and finding possums perched in their camper van three nights in a row – Lauren can’t identify the single-most amusing story of the trip. Overall, it was a successful, sublime time away, where her most pressing suggestion would be to explore every cranny, investigate every nook, and navigate the ups, drops, and bends.
If something takes your interest – go beyond the bounds of a pre-planned schedule, trust your intuition, and soak it in.
Thanks for listening, tune in again for next week’s episode!
Thanks for tuning in to this week’s episode of the Snowys Camping Show Podcast. Don’t forget to subscribe to us on YouTube, Spotify, iTunes, Amazon Music, iHeartRadio, Pocket Casts, Podcast Addict, or Stitcher so you never miss an upload.
If you have any questions for Ben and Lauren, make sure you head over to our Facebook group and let us know as we’d love to hear from you.
Catch you out there!
The post Ep53 – Kangaroo Island appeared first on Snowys Blog.
]]>The post Ep52 – Caravan Refrigeration with Kev appeared first on Snowys Blog.
]]>Or watch the video version here:
Chill out – considering a fridge for your caravan or camp vehicle doesn’t have to be challenging.
From the hum of a compressor fridge to the fumes of a gas-powered – the pitfalls and benefits of portable refrigeration depend on what a camper requires on their travels.
In this episode of the Snowys Camping Show, Ben and Lauren keep their cool as they discuss portable refrigeration with our caravan expert, Kevin from the Snowys warehouse.
Short Cuts
00:00 – Intro
00:30 – Introducing Kev from Snowys
01:05 – Refrigeration for Vans
03:20 – Caravan Fridges
07:21 – Powering Caravan Fridges
10:15 – Advantages of Caravan-Specific Fridges
11:57 – Drawer Slides
14:36 – Advantages and Disadvantages of Compressor Fridges
17:32 – Securing Fridge Doors
19:12 – Replacing Fridges in Secondhand Caravans
20:47 – Insulation Options: DIY vs Professional
22:43 – Advantages of Insulation
24:57 – Noise: Compressor vs Absorption Fridges
28:25 – Considering Your Portable Fridge | A Summary
Mentioned in this Episode:
Category Pages:
Brand Pages:
Products:
Bushman DC50−X 50L Upright Fridge
Bushman DC85−X 85L Upright Fridge
Dometic CFX3 25 Portable Fridge/Freezer 25L
Engel MT−V45F 40L Fridge Freezer
Engel MT−V60F 60L Fridge Freezer
myCOOLMAN CCP36 Portable Fridge/Freezer 36L
myCOOLMAN CCP73 Portable Fridge/Freezer 73L
Refrigeration for Vans
While Lauren travels in a campervan, Ben owns a chest fridge for his 4WD adventuring. Generally, caravans, campervans, motorhomes, and that alike will include a fridge of their own, with the exception of some more basic camper trailers.
When considering a secondhand caravan, there are ways to determine if or when an upgrade may be necessary. Firstly, when buying from a private supplier, ask them to first turn on the fridge to establish that it’s in working condition before following through with the purchase – be it a compressor or absorption-style fridge. When purchasing from a dealer, this should already be a step in their process before handing it on. Regardless, fridges have lifespans – so if it seems to be deteriorating, factor a replacement cost into the price you’re expected to pay.
Caravan Fridges
Typically a smaller version of what is found in a home kitchen, a caravan fridge is either freestanding or mounted as an element of the caravan’s interior cabinetry. For those who love a drink – just picture a mini bar fridge.
When we refer to caravan fridges, we distinguish them by their cooling units. A home-style fridge has a compressor, which pumps the refrigeration around its cabinet to create a cold environment. On the other hand, caravan fridges without a compressor operate via absorption-style technology.
The mechanism involves heating an ammonia solution to create a vapour, which travels through the tubes at the back of the fridge before converting back into a liquid in the condenser. When this occurs, heat is absorbed, removed from the cabinet, and dispersed through the vents into the atmosphere, cooling the fridge’s interior. The condensed liquid travels back down into a small reservoir, before flowing back into the boiler and heated again to continue the process. The heating component occurs via a small gas flame. With no additional moving parts, this is the operation of a traditional caravan fridge. When a customer looks for a gas fridge, this is the style of the fridge to which they are referring.
Ironically, a lot of heat is required to cool the fridge, which is why positioning your caravan in direct sunlight has the fridge working less efficiently. As the vents are already working to expel heat, doing so into an even warmer environment can further prolong this process.
Powering Caravan Fridges
A caravan fridge is typically a three-way model, offering powering options across gas, 12-volt and 240-volt. While older models lacked a 12-volt option, those more recent now incorporate it as a third mode of power. If operating with gas, it’s important to ensure a chest fridge is standing level for optimum efficiency. Within a three-way fridge, a 12-volt electric element sits on one side of the boiler, while the 240-volt sits on the other. The boiler itself sits directly on top of the gas flame. It’s for this reason that gas tends to be a more efficient powering method, whereas 240-volt power will only be as effective if it can produce the same intensity of heat. The elements on either side transmit heat from themselves to the boiler side-on, thus less effective. That said, gas emits fumes that require exterminating.
Operating via 12-volt power is done so for maintenance purposes. Starting warm with a 12-volt operation will mean a fridge takes longer to cool, as too little heat is generated. While 12-volt draws a large current, it meanwhile needs to maintain the element at a lower wattage in comparison to the 240-volt element. As a result, it draws a lot of battery and more power than what a vehicle can provide. Given the absence of a thermostat on a 12-volt model, a fridge relies on either 240-volt or gas to reach a cold temperature when camping overnight. Switching to 12-volt powering maintains this temperature in transit.
In light of the above, the 12-volt element of a three-way fridge is an entirely different structure to an efficient compressor 12-volt fridge.
Advantages of Caravan-Specific Fridges
So, what are the advantages of choosing a caravan-specific fridge over a standard 12-volt or 240-volt powered chest fridge?
A chest fridge is normally used for camping and 4WD-ing, with an opening above as a lid. On the other hand, a better option for caravans is an upright fridge correctly ventilated to sufficiently expel heat from the cabinet. If heat is forced to maneuver around the cabinet, the cooling process is slowed.
A three-way chest fridge should also be positioned away from a vehicle to avoid dispersing gas fumes into its interior overnight.
Drawer Slides
In some caravans, the fridge is not built into the kitchen but through a hutch on the side. Essentially, it behaves as a chest fridge that extends on a drawer slide from the side of the caravan, adequately ventilated.
Most fridges on a drawer slide are a standard 12-volt chest fridge. If using an upright, three-way fridge, a potential setback is the required connection to a gas bottle with a long, flexible gas tube. These can wear away with the persistent rough and tumble of travelling, where a deteriorated gas line can cause a leak. For this reason, a compressor fridge running off 12-volt power with extension cords is a simpler alternative.
With the danger of bi-products from burning gas, three-way fridges are required to be appropriately vented by directing the fumes outside of the van via a flue or ‘chimney’ outlet. Earlier gas models didn’t have these, which meant the dispersion of gas was slower. While the heat itself produced from gas-powered fridges isn’t harmful, gas fumes are what can cause fatal consequences.
Advantages and Disadvantages of Compressor Fridges
Compressor fridges run off a battery. Depending on their size, most will draw between one and two amps, while larger models may do so on more. The main consideration is to continue meeting the battery power with what is drawn. These fridges run on battery power overnight before recharging on the drive the following day, and are a suitable choice as long as they receive the same volume of power they generate.
While compressor fridges can be tilted or positioned at any angle, an absorption-style fridge needs to be level at all times. If a caravan is parked on an incline or slant, the liquids will fail to circulate the fridge effectively.
For long-term camping without power, campers will require a solar panel system to maintain the battery power levels. While this may be seen as a disadvantage, it is usually easily to overcome.
Securing Fridge Doors
Most caravan fridge with front-opening doors feature a travel lock, while others include a pin that slides into a bracket for securing.
Oh, and Ben – to keep the chilli sauce out of the ice-cream, Kev recommends to lie bottles horizontally…and maybe keep the ice-cream in the freezer (or the chilli sauce in the fridge?)

A caravan fridge is a smaller version of what is found in a home kitchen, mounted as an element of the caravan’s interior cabinetry. Credit: Shuttershock
Replacing Fridges in Secondhand Caravans
Those purchasing a second-hand caravan and replacing the fridge may be wondering which model is the most suitable choice.
Compressor fridges are of different dimensions to three-way styles, so the cabinet may need altering. If transitioning from a compressor to a gas fridge, it’s wise to consider running a gas line, and adequate ventilation strategies i.e. flue-ing the gas flame.
In reverse, the process is not as detailed. While the gas line will need to be removed, a 12-volt system will need to be installed to support the fridge with batteries. Fitting a gas line will require an approved gas installer, while fixing a 12-volt system can be done independently.
Insulation Options: DIY vs Professional
When considering a gas fridge, an approved gas installer is required. That said, the mounting process can be attempted independently, though inadequate venting will mean the fridge won’t run efficiently.
Heat needs to escape from the sides and top of the fridge cabinet. Earlier van models had fridges simply fitted into their cabinet without sufficient insulation, which had the bench top heating up due to the ineffective expulsion of heat.
A DIY option involves fitting a fridge into a timber frame sitting flush with the body of the fridge, with insulation padded in and around it. This way, the fridge sits isolated from the rest of the caravan furniture, insulated, and appropriately vented.
Advantages of Insulation
So, does insulation offset issues related to overheating?
Some people like to pack insulation similar to that found in ceilings down the sides of their fridge, while others fit small 12-volt computer fans in the vicinity. Fans work effectively by creating an up-draft from the base to the top of the fridge, where the cooler air coming from the lower region pushes the hot air to the top.
Another option is to insert holes in the floor underneath the fridge, cover with a fine mesh, and attach a backwards-facing scoop to divert the warm air air upwards. The air beneath the van is cooler, so the aim is to draw the cooler air in, push it up through the refrigeration tubes and push warmer air out through the top.
For gas fridge ventilation, the flame is required to be flued outside the vehicle.
Noise: Compressor vs Absorption Fridges
Like a household fridge, a compressor fridge will activate during the night with a low hum. On the other hand, a three-way fridge will produce no sound at all.
That said – those with a three-way fridge should keep their ear out for a bubbling sound. This indicates a blockage, where the fridge is attempting to force solutions through a tiny hole caused by rusting of the tubes from the inside out by the Ammonia solutions. At this point, it’s recommended to have the fridge assessed by a professional.
In terms of maintenance, Kevin suggests running a gas or chest fridge at least every three to six months. His own method involves plugging it into the garage’s power, leaving it running for a day, ensuring the elements are warm at the back, and the interior of the fridge is cold. This keeps the motors lubricated and the gases moving. Doing so after a year is likely too long a period between uses.
These issues aren’t experienced with compressor fridges, as they operate via different solutions. Their internal mechanism is unlike that of an absorption-style fridge, where the exchange from a liquid to a gas releases energy in the form of heat.
Considering Your Portable Fridge | A Summary
For those new to caravanning, Kevin confirms that considering a portable fridge depends on its supplementary components – such as a battery and solar panel. His personal recommendation is a compressor fridge, given it runs efficiently in various temperatures and on askew angles, hums only softly at night, and keeps fridge contents consistently cold. That said, some campers may prefer the idea of various fuel choices – like gas – where a gas-powered fridge can run on a single bottle for multiple weeks. For this reason, one may prefer a three-way fridge. Essentially, the choice should depend on what a customer hopes to achieve from their fridge.
The most common brand of portable fridges is Dometic, who own Waeco. While Waeco tend to stock 12-volt fridges and Dometic three-way, they now all fall under Dometic who are renowned for their quality portable fridges. Cheaper brands provide fridges that operate via the same system, though the insulation, general fridge features, and the way in which the cabinet is constructed can each dictate their reliability.
Other brands of portable fridges include Bushman Fridges, Engel, myCOOLMAN, and Evakool, the former two stocking upright models. Regarding compressor fridges, it’s best to reconsider a fridge if the name of its compressor is unfamiliar to you. Essentially, Kevin suggests sticking to a well-known brand like Dometic to ensure a greater sense of reassurance behind the fridge’s reliability.
Lastly, it’s wise to first stock a portable fridge with food already chilled. Not only will the food remain cold for longer, but the fridges won’t need to work as hard to expel heat. For example, in the case of chest fridges – the cold air drops to the bottom when the lid is opened, unless drawn outside by a gust of wind. This design mirrors that of fridges found in supermarkets, some without lids.
Thanks for listening, tune in again for next week’s episode!
Thanks for tuning in to this week’s episode of the Snowys Camping Show Podcast. Don’t forget to subscribe to us on YouTube, Spotify, iTunes, Amazon Music, iHeartRadio, Pocket Casts, Podcast Addict, or Stitcher so you never miss an upload.
If you have any questions for Ben and Lauren, make sure you head over to our Facebook group and let us know as we’d love to hear from you.
Catch you out there!
The post Ep52 – Caravan Refrigeration with Kev appeared first on Snowys Blog.
]]>The post Ep51 – Taking Care of Business with Camp Toilets appeared first on Snowys Blog.
]]>Or watch the video version here:
Let’s cut the crap.
From roadside long drops to campsite stop-overs, it’s now common for patches of our sunburnt country to appear dappled with a soft, white material – and news flash, it’s not snow.
With camping an increasingly popular activity around the country, portable toilet practices are becoming more necessary than before. Throughout this episode, Ben and Lauren waste no time in flushing poor toilet practice down the drain, dumping a detailed discourse on camping toilet options for those stark trips beyond suburbia.
Short Cuts
00:00 – Intro
01:15 – Toileting on Your Travels
06:07 – How Can We Curb the Turds?!
07:13 – Toilet Paper and Wipes
11:23 – Trowels and Shovels
12:35 – Toilet Kits
14:42 – Burning Toilet Paper
17:23 – Shewee Peebol Bags
18:39 – Shewee Female Urination Devices
20:00 – Car Camping and 4WD Touring Toilets
20:53 – Thunderboxes, Toilet Frames, and Other Dig-A-Hole Toilets
24:24 – Cons of Dig-A-Hole Toilets
25:47 – Enclosed Toilets
30:42 – Cons of Enclosed Toilets
31:25 – Caravan Toilets
32:07 – The Final Flush
Mentioned in this episode
Podcasts:
Ep18 – Camping, Waste, and Leaving No Trace
Ep45 – Fire Ban Seasons with the CFS
Blogs:
Products:
Thetford Aqua Soft Toilet Paper
Bushranger 4×4 Gear Diggar Shovel
Sea to Summit Alloy Pocket Trowel
Sea to Summit Sling Dry Bag 10L
Sea to Summit Trashsack Garbage Bag
Blacksmith Camping Supplies Australian Made Pipsqueak Bag
Sea to Summit TSA Hand Cleaning Gel Sanitiser
Shewee Peebol Pocket Sized Toilet
Shewee Female Urination Device
Aussie Campers Jimmy’s Thunderbox Toilet
Elemental Thunder Down Under Bucket Toilet
Other:
Toileting on Your Travels
This isn’t the first time Ben and Lauren have talked crap.
A previous episode titled ‘Camping, Waste and Leaving No Trace’ discusses waste and rubbish considerations when camping, including approaches to toileting and the use of bog roll in the bush.
Roughly ten years ago, the expected process of outback toileting was to dig a hole measuring approximately 30 centimetres deep. Nowadays, many sites specify for campers to be entirely self-sufficient – that is, to carry their waste away with them upon departure.
In Lauren’s experience so far this year, most camping areas have been peppered with used toilet paper, seemingly without any attempt to bury or cover it over. As humans, we all need to go…and sometimes, we can’t control when or where we do so. That said, everyone despises a crappy campsite – yet many out there still contribute to them.
So why are campers failing to apply proper toileting practices at the campsite?
Is it taboo?
Is it too off-putting to bear our business in the backseat between stops?
Those with young children may argue that it’s no different from carrying used nappies. Nonetheless, it requires a shift in mindset – and ultimately, there are ways to take care of business in a relatively discreet, odourless, and hygienic manner.
Those who continue to litter loo roll will only contribute to the cause of why many camping grounds are closing down. With this in mind, Ben and Lauren settle on some of the more suitable camp toilet options that should be considered on a trip away.
How Can We Curb the Turds?!
So – what can we do as a community to help prevent this (d)ungracious behaviour? Ben and Lauren want your feedback.
As mentioned, increasingly more campgrounds are closing based on this sole display of misconduct. These include the more accessible sites that are typically convenient for quick weekends away. Despite this, disposing of standard rubbish seems to be a simpler task for some than doing so with their own waste.

There are ways to take care of business in a relatively discreet, odourless, and hygienic manner. Credit: Shuttershock
Toilet Paper and Wipes
According to Lauren’s research, toilet paper can take anywhere between one and three years to break down – even within a hole in the earth. This includes multi-ply, single-ply, and recycled variations, still surfacing even after a couple of months. While particularly cold, wet, or dry soil slows down decomposition, it is apparent that soil of a moist, loamy, and healthy consistency promotes the process at a faster rate. To achieve a similar effect, Ben and Lauren also suggest scattering sticks and bush debris on top of your waste and toilet paper before covering it with earth.
With every camper burying bog roll in the bush over the course of three years, the volume of toilet paper only multiplies and the chance of digging it up again becomes more likely. When entombed to at least 15 centimetres underground, biodegradable wipes have been found to decompose more efficiently than toilet paper. This doesn’t refer to the standard plastic-based, wet, or compostable wipes – instead, ‘biodegradable’ wipes are the way to go, often bamboo-based.
With Thetford Porta Pottis, it’s recommended to utilise their separately available toilet paper in conjunction. Though not a luxurious three-ply structure, the paper is nonetheless designed to do the job and decompose with waste. Standard, wet, or perfumed wipes tend to be less effective.
Trowels and Shovels
While some may not enjoy the idea of incorporating a large shovel into their camping kit, there are lighter, more compact designs available that detach into separate parts for easy packing.
Further to this, Ben owns a small, three-part trowel that folds out – a design perfectly suitable for preparing a hole for toileting purposes. Some trowels and more lightweight and compact still, boding better for hiking trips that demand lighter loads.
Ultimately, there are more uses for a trowel or shovel than simply digging a bog hole – and with so many options available, there are even fewer reasons why campers shouldn’t dig a hole for the sake of considerate outback toileting.
Toilet Kits
When roadside pullups are inevitable, a toilet kit in the trunk is ideal. This can simply take the form of a dry bag holding a small pocket trowel, a roll of toilet paper, hand sanitizer, and a cigarette lighter.
Ideally, the kit should be easy to use and a receptacle to simply throw your used toilet paper in, roll up, and transport to the nearest bin. Lauren suggests the Sea to Summit Trashsack Garbage Bag as an option too. Already lined with a bin bag, its slight size is adequate for stashing toilet paper. Alternatively, campers can replace the bin bag with a scented supermarket type, or apply bi-carbonate soda to the existing bag to help reduce odour. The sack then allows for simple removal of the bin bag for disposal.
Ben uses a Blacksmith Camping Supplies Australian Made Pipsqueak Bag and packs it with a toilet paper roll, mini shovel or trowel, hand gel, cigarette lighter, and a plastic bag for potential wet weather protection. That said, he hopes to eventually incorporate some form of drybag for carrying used toilet paper beyond a campsite facility.
Burning Toilet Paper
No, we weren’t taking a random, sporadic tangent in mentioning a cigarette lighter as part of a toilet kit.
Given ash is likely to degrade at a faster rate than bulk toilet tissue, Ben explains that burning toilet paper can also help reduce its build-up at a campsite.
(No Lauren, not in the communal campfire – in the bog hole!)
That said, it’s important to ensure the space surrounding the hole is clear of bush debris, as flames can surpass the edge of the hole. Note too that in Fire Ban Season, this paper-burning approach would be prohibited.
Shewee Peebol Bags
The Shewee Peebol bag is essentially a pocket-sized toilet that takes the shape of a plastic bag holding biodegradable granules, like a nappy. Campers can simply urinate into the bag, where the liquid waste transforms into a solid, gel-like substance. Once sealed, the bag can then be disposed of normally. Bags alike are those found on airplanes for motion sickness.
As Peebol bags cannot be utilised more than once, this option isn’t the most cost-effective and are instead ideal for emergency situations.
Shewee Female Urination Devices
Despite their popularity, Shewee Urination Devices (commonly known as Shewees) are not referred to enough as useful toilet options away from civilization. Easy, effective, and compact – Shewees are a no-fuss, fresh option for females!
Car Camping and 4WD Touring Toilet Options
Wheeling into the weekend? There are two toilet alternatives when car camping or 4WD-ing: digging a hole at each site and fixing a toilet frame over the top, or bearing a sealed, enclosed unit in the the boot (such as a Porta Potti).
Within the former, options include simply digging a hole and free-squatting without a seat, positioning a toilet frame or seat over the hole, or a Thunderbox.
Thunderboxes, Toilet Frames, and Other Dig-A-Hole Toilet Options
A Thunderbox is a sturdy box-like structure built with galvanized steel and hinges that allow it to fold in on itself. When expanded, it appears as a square-shaped chimney, where the wooden top lowers and locks into place as a seat. On particularly long, extended holidays with her family, Lauren brings a large shovel to entrench a hole at least a metre deep, places the Thunderbox over the top, and seals it away as well as she can. When the soil has a clay-like consistency, she applies water and packs it firmly around the base of the box to create a stiff, cement-style seal. Collapsed, the Thunderbox slides in flat and compact with her camp tackle.
That said, the top of the Thunderbox is MDF (Medium Density Fibreboard), which can swell after making contact with water. While this doesn’t impact its usability, Lauren notes it as a consideration and precaution. In the case of severe damage, the top of the Thunderbox can be easily replaced via a simple DIY effort that involves re-using the hinge and tracing the original toilet seat shape onto a new slab of wood.
Alternatively, Ben owns the OZtrail Quadfold Toilet Chair that features a flap of material at the front as a splash guard. While it does the job, Ben aims to eventually upgrade to the Thunderbox given its sturdier build and ability to be lodged firmly into the soil. Unlike the Thunderbox, the Quadfold chair can become unstable if positioned over a hole dug too wide.
Overall, the benefits of both the Thunderbox and OZtrail Quadfold are that they’re relatively inexpensive, require no chemicals, and are as simple as a toilet seat over a hole in the earth.
Cons of Dig-A-Hole Toilet Options
While it’s clear that dig-a-hole toilets are effective – we can’t just go around digging holes anywhere and everywhere. Some areas will either forbid it, or the terrain will be impossible to excavate – such as rocky surfaces typical of hiking trails and mountain slopes.
So, if our wonderbox-Thunderbox doesn’t suffice…what else is there?
Enclosed Toilet Options
Enclosed, sealed toilet options are likely to become more prevalent with the increasing number of campsites requiring campers to be fully self-sufficient in their toileting. Brands stocking such options include Thetford and Dometic.
While these choices are larger, heavier, and more awkward to incorporate into our camp kits, they remain the easiest solutions when holes aren’t an option. Put simply, Porta Pottis mirror caravan toilets, and can be emptied at authorized dumping points or into a domestic toilet attached to a sewerage system.
Dumping points can be located via the Dump Point Finder app, or through Wiki Camps. On the other hand, Porta Pottis should not be emptied into long drops or toilets on a septic system. The chemicals used in Porta Pottis eradicate the bacteria needed to carry out the microbiological processes the septic system relies on to function. For more information, check out one of our previous blogs, ‘How to Choose a Camp Toilet‘.
Alternatively, bucket toilets don’t involve added detergents and so can be tipped into normal toilets, offering a viable option for those who aren’t keen on the additional chemical necessities of a Porta Potti.
To avoid travelling too far beyond the campsite at night too, enclosed toilet options are ideal (especially for children). Given they’re relatively odourless, simply keep it within the tent after dark and relocate back to the ensuite tent in the morning.
Other options include bucket toilets with an internal bag, where those without a bag would simply require rinsing afterward. Open seats on a frame with bags suspended beneath can also eliminate the need to dig a hole – although a free-hanging bag in the open also has it prone to animal and wildlife interference.
Ultimately – sealed camp toilet options can be used anywhere, don’t require a hole, keep waste out-of-sight-out-of-mind, and enable easy sealing for transit.
Cons of Enclosed Toilet Options
With every pro, there’s a con – and the pitfalls of enclosed camp toilets include their cost, size, and frequent requirement of chemical solutions.
While the Thunderbox is also an investment, it’s built to battle the outback brutality and bog roll, lasting a lifetime. In the case of an enclosed toilet option, Ben suggests spending the money on a superior model to avoid issues with leakage in cheaper designs.
Caravan Toilets
Much like an enclosed portable toilet, caravan toilets are more elaborate with their toilet seat and a cartridge that mirrors the base of a Porta Potti. Caravan toilets are removed from the side of the caravan and wheeled to a dumping point for disposal.
Essentially – if you have a caravan, you likely gain one thing and lose another: the former is a pre-existing toilet system, while the latter is a reason to leave toilet paper about the place!
The Final Flush
A toilet plan on a camping trip is important for both the environment and consideration for other campers who follow. It can be easy to believe that we’re the only group at an empty campsite, though it’s likely that a family passed through only hours before. Eventually, poorly treated campsites will close down in their protest against cleaning up our crap – literally.
Thanks for listening, tune in again for next week’s episode!
Thanks for tuning in to this week’s episode of the Snowys Camping Show Podcast. Don’t forget to subscribe to us on YouTube, Spotify, iTunes, Amazon Music, iHeartRadio, Pocket Casts, Podcast Addict, or Stitcher so you never miss an upload.
If you have any questions for Ben and Lauren, make sure you head over to our Facebook group and let us know as we’d love to hear from you.
Catch you out there!
The post Ep51 – Taking Care of Business with Camp Toilets appeared first on Snowys Blog.
]]>The post Ep47 – Australian Manufacturing with Blacksmith Camping Supplies appeared first on Snowys Blog.
]]>Or watch the video version here:
Maybe they used to fight over the TV remote.
Maybe they used to nick food from each other’s plate at the dinner table. Maybe they still call dibs on the front seat of the car.
Sibling antics aside, founders of Blacksmith Camping Supplies Laine and Erin have demonstrated how hard work, collaboration, and a shared love for the great outdoors can foster a successful Australian family business. In this episode of the Snowys Camping Show, we unpack what Australian-made products mean to them. In that, Lauren and Ben query the challenges they’ve faced, the feedback they’ve embraced, and the production process from design to dispatch.
Short Cuts:
00:00 – Intro
00:58 – Introducing Laine and Erin
02:09 – History
04:37 – Sourcing Aussie-Made Materials
07:01 – Products
08:59 – Machinery and Equipment
11:19 – Blacksmith Camping’s Point of Difference
12:14 – Humble Beginnings
14:21 – A Rapid Progression
15:16 – The First Employee
17:13 – When You Know, You Know
19:30 – Challenges
20:24 – New Designs
21:51 – Cost
22:45 – Inspiration from Competitors
24:10 – The Process from Design to Dispatch
27:21 – Knock-On Effects
31:20 – Maintenance of Machinery
33:32 – Quality Control
35:42 – The Importance of Aussie-Made
37:49 – What’s on the Horizon?
39:37 – Find Out More
Mentioned in this Episode:
Sites and Pages:
Blacksmith Camping Supplies – Home
Blacksmith Camping Supplies – About Us
Blacksmith Camping Supplies – Shop All
Blacksmith Camping Supplies – Our Materials
Blacksmith Camping Supplies – Contact Us
Adelaide Annexe & Canvas – Home
Blacksmith Camping Supplies – Facebook
Blacksmith Camping Supplies – Instagram
Snowys Outdoors – Blacksmith Camping Supplies Brand Page
Blacksmith Camping Supplies Products:
Pipsqueak / small storage bags
Introducing Laine and Erin
As founders of Blacksmith Camping Supplies, Laine and Erin are not only brother and sister but the children of Snowys Outdoors Director Richard. Outside this interview, Lauren and Ben address Laine as their boss – but not today! Our podcast hosts take the reins.
History
After Snowys was established in Adelaide during the mid-90s, Laine and Erin found they became increasingly familiar with camping, 4WD, and outdoor equipment. Leading up to 2019, the general feedback from customers presented the opportunity for Snowys to supply and stock Australian-made products. This was when Laine and Erin decided to mirror their father’s ambition and create high-quality, Australian-made outdoor gear. In building their own brand, they identified an opportunity to control the process from start to finish – from sourcing material, hardware, and products within Australia, right through to quality control. In this way, they maintain a genuine sense of pride in the production of their canvas camping bags.
Sourcing Aussie-Made Materials
Given the already limited supply of Australian-manufactured materials, our podcast hosts query how important Laine and Erin considered the sourcing of these, as well as how they approached obtaining the supplies they were satisfied with.
After a lot of research, Erin can clarify that while Blacksmith Camping seeks Aussie-made materials, there’s also a regard for the process they undergo – for example, canvas interwoven with Queensland-grown cotton. While they’ve been offered canvas materials fabricated offshore, the quality of such is both insufficient for their product purposes and lacks relevance to the harsh Australian conditions.
Despite Australia’s deficiency in some materials – like zippers, which Erin instead sources from Japan – Laine confirms that Blacksmith Camping has been relatively lucky within the outdoor industry. As their products are synonymous with the history of the swagman, their roots are Australian and so have had them benefitting from enough supply options.
Products
Blacksmith Camping Supplies stock canvas bags for 4WDs and camping, including those for wheels, hoses, power cords, general storage, camp ovens, smaller items, tools, and more. The main construction materials are canvas and PVC, with both UV and rot protection. While these are sourced from around Australia, the zippers, Velcro, and some hardware need to be sourced from overseas. With even their webbing obtained from Victoria, the foundation of Blacksmith Camping’s canvas bags is Australian-made.
Ben reminds those who seek 100% Australian-made products that it’s virtually impossible to achieve this. Most products will boast roughly 80% of Australian materials with the remaining 20% physically unable to be sourced from anywhere other than overseas.
As mentioned, deeming a product as Australian-made involves covering more factors than the materials alone. Some brands of Australian products may use Australian materials, though their manufacturing takes place offshore. Erin confirms that Blacksmith Camping produce every bag onsite in their humble, Adelaide-based workshop – with four exceptional sewers operating behind her as she speaks!

Blacksmith Camping Supplies stock canvas bags for 4WDs and camping. Credit: Blacksmith Camping Supplies
Machinery and Equipment
For Laine and Erin, the mission around Australian-made products extends past materials to the machinery and equipment used in the manufacturing process – including repairs and servicing.
The Pathfinder fabric-cutting machine, requiring two full-time, permanent employees, was sourced from Victoria. Machine operators will service the system physically when they can make it across the border, as well as remote into the machine itself from interstate. Erin sourced her sewing machines from Queensland, and has accepted substantial assistance in their setting up and servicing. That said, her Diploma in Textiles and background in sewing has granted her a profound understanding of the machinery.
While it isn’t their driver, sourcing infrastructure from around Australia is a bonus for the Blacksmith brand. Navigating the equipment has proved a steep learning curve, where the support they’ve received – even from competitors – has helped pave the way. Nonetheless, no one pushed harder for the Pathfinder cutting machine than Laine, who in the lead up to its arrival had spent every night flexing his forearms by hand-cutting fabric with scissors!
Blacksmith Camping’s Point of Difference
While there are many, high quality and durability are the two most distinctive brand qualities. Blacksmith Camping develops practical designs that their customers claim to need, acknowledging and understanding their requests for useful products that last a lifetime.
Humble Beginnings
Circling back to Laine’s massive forearms – Lauren and Ben ask where it all began, and at what point the two of them graduated to more efficient equipment.
In 2019, Laine and Erin huddled into the back room of the Snowys’ Adelaide store to mesh both their love of the outdoors and experience in the industry. With ever-bulging forearms and a single sewing machine, Laine cut the fabric that Erin sewed, producing the first Blacksmith bags to sell through Snowys. Their days lasted 12 hours, where 9am-5pm was spent working at Snowys before moving into the backroom for four hours of building their business. This would continue into the weekend too.
Like Harry Potter’s cupboard under the stairs, their initial cranny of creation served as a test in determining whether this was the industry they wanted to pursue. Beyond their blistered, callused hands, Laine and Erin were still convinced, oblivious that their Blacksmith brand was about to boom.
A Rapid Progression
With such a substantial progression over the last three years, Laine is grateful for the opportunity to have initially leveraged off Snowys. Access to their customers and demographic not only further enhanced Blacksmith Camping’s brand awareness, but encouraged customer and staff feedback in the interest of future designs and styles.
The First Employee
As the business developed, Laine and Erin sought a fulltime sewer who could maintain the ideal level of quality while considering customer demand. Until this point, all roles and responsibilities had been monitored by Laine and Erin to a very particular standard – so handing over the sewing machine to their first employee was like handing over a newborn baby to a stranger. They were now expected to teach and train, which for Erin meant drawing from her teaching background.
Amid planning a wedding, Laine found it a personal challenge to build a team larger than their brother-and-sister-band. That said, hiring staff meant Laine and Erin established a quality control process which allowed them to determine whether more training was required, and which area demanded it most.
When You Know, You Know
It was after hiring that first staff member that Laine and Erin established a sense of confidence, dedicating more time to listening to and developing trust with their customers. Their Blacksmith Camping Supplies website launched in early 2021, from which they now ship products to countries all over the world including the United States, Canada, the United Kingdom, New Zealand, and Japan.
Be it receiving a photo from a little girl in Japan happily holding her new bag, to noticing an online order coming in from New York – the thrill of knowing their product is sought from anywhere overseas is a feeling Laine and Erin can only humbly describe as ‘pretty cool’. Ultimately, their success has stemmed from identifying a market for bags complementing camping supplies that don’t yet have a storage option, such as sharp tools.
Initial Challenges
Given the big benefits brought to you by Blacksmith bags, the initial challenges that Laine and Erin encountered were a small workspace and minimal machinery. One can only manufacture so many bags in a day and, without the adequate cash to fund machinery in the early stages, efficiency was an issue the two of them hoped to improve as their business blossomed. With a greater rate of productivity, time no longer becomes a substantial factor in the cost of production, further helping to maintain low selling prices.
New Designs
From designing to dispatching – Lauren and Ben want to know how Blacksmith Camping identifies a new product opportunity.
It starts with the customer. Using their request as an aid, Laine and Erin design what they think both aligns best with the current market and what could be well-received. After asking Snowys staff to trial, test, and thrash about in the scrub, they progress these ideas from prototypes to final products.
Erin expresses how much she loves receiving suggestions from customers via e-mail. A benefit of being a small business is how quickly they can physically respond to a request for an extra feature, such as a pocket.
Cost
What comes first – the product, or the price?
Laine explains the importance of meeting the ideal level of quality and practicality while still prioritising Australian-made materials. In regard to cost, he circles back to efficiency, where prices will simply reflect the effectiveness of the manufacturing process.
Inspiration from Competitors
In the instance of their wheel bags, Laine and Erin first sourced five or six from competing brands to establish what works, why they’re popular, and how Blacksmith Camping could produce a better design. Despite having made customer review-based changes over time, the Blacksmith Camping Supplies wheel bag is one of their most successful products.
The Process from Design to Dispatch
From the initial sketch to the final product – the complexity of a design determines the overall length of the manufacturing process. In the interest of perfecting its design, a product will usually begin as three or four prototypes. After assessing its overall form, the team move it into the production stage. The entire process lasts between three and four months.
The cutting machine is operated by a program called Pathfinder that enables an easy, efficient, digital creation of patterns. Considering this, the production aspect of a new design is quick, where most of the time is allocated to determining whether it’s a good fit for the brand and the current market. From the paper, to the calico, and finally to the canvas – the level of thought devoted to creating a product is greater than a customer may consider, be it the direction of a zipline or the size of a pocket.
Knock-On Effects
From their exploding success, there have been unavoidable knock-on effects. The Coronavirus, now in its third year, has impacted businesses all over the world on varying points of the scale – particularly concerning the supply of materials.
Blacksmith Camping fortunately avoided the heavier impacts, launching prior to the peak effects of the virus. With the subsequent increase in travel within our own backyard too, locally-made products became even more attractive to avid 4WD tourers and adventurers.
During this period, sourcing supplies from within Australia was even more of an advantage than doing so internationally. Utilising Australian canvas made from cotton grown nationally meant fewer interruptions to border and trade restrictions overseas. That said, the demand for Aussie-made materials was higher and Erin was met with difficulties in obtaining canvas from their usual manufacturer who simply couldn’t fulfill the demand at their usual rate. Ultimately, the challenges they inevitably faced had Blacksmith just as vulnerable as every other business of their kind.
With the rising price of steel proving it no longer viable to sell via retail, Hillbilly Camping Gear has made the tough decision to discontinue selling wholesale. Laine states that Blacksmith can both sell direct to a customer and share profit on their income with Snowys. In the case of Hillbilly, their only option now is to remove the middle man. That said, the high demand for their long lasting, top quality, and quintessentially Australian gear simply reflects the increasing support for Australian manufacturing.
Maintenance of Machinery
Sewing machine mechanics may be scarce – but they’re out there, and Erin confirms that Blacksmith have been very lucky! Sewers themselves tend to be hidden gems too, especially when considering who best fits the Blacksmith brand and expectations.
Nonetheless, local mechanics like Adelaide Annexe & Canvas – specialising in caravan awnings – are always willing to lend a hand, which Laine claims is a true reflection of the outdoor industry.
Quality Control
We’ve established that Erin and Laine are relatively particular individuals…so it won’t surprise you to know that every finished Blacksmith Camping product is placed on a shelf and reviewed thoroughly before it’s dispatched.
From a loose thread to an imperfection in the fabric itself, Erin scans for consistent back-sewing and even stitching. Any bag that fails the first test is sent straight back to the sewers, where products with only minor faults earn their place on the ‘seconds’ shelf.
The Importance of Aussie-Made
Initially, Erin was of the belief that all canvas was the same. After almost three years of sourcing supplies and materials for Blacksmith Camping, she can confirm that the quality of Australian canvas is superior.
The construction of offshore canvas tends to skip a few steps, be it bleaching or washing, which can lead to the fabric breaking down or rotting. That said, this doesn’t necessarily deem it poor – only insufficient for harsh Australian conditions, manufactured instead to suit its local climate. Australian-made canvas features UV resistance and other qualities allowing it to withstand unique Aussie environments – a hearty fabric that lasts forever.
Furthermore, in choosing to purchase Australian-made products, one also chooses to support Australian jobs and the national economy.
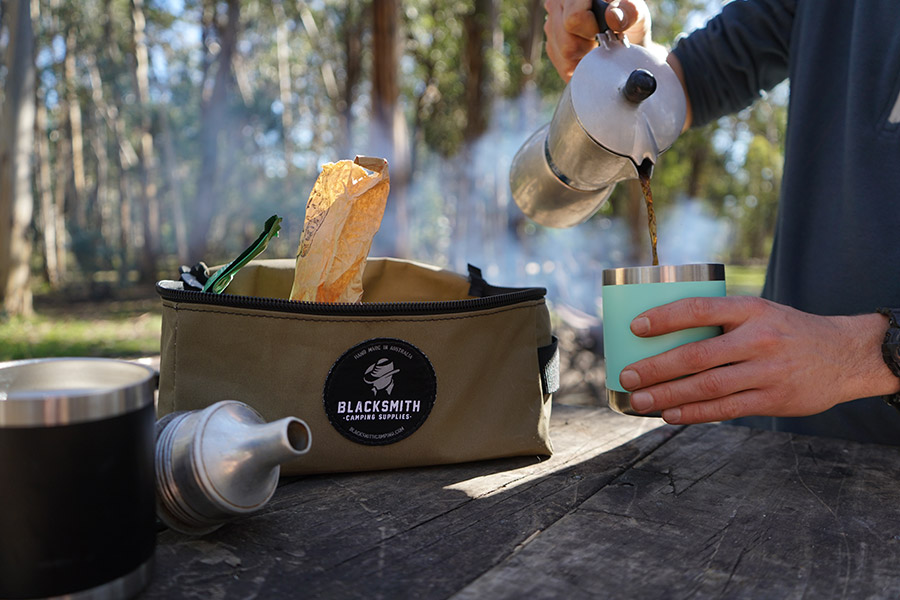
Australian-made canvas features UV resistance and other qualities allowing it to withstand unique Aussie environments.
Credit: Blacksmith Camping Supplies
What’s on the Horizon?
Continuing to expand the Blacksmith team is a mutual goal for both Laine and Erin. Regarding products, they hope for their visions of tool rolls, additional organisers, and jerry can bags to become a reality. With the success of their 4WD wheel bags, the siblings also plan to design a Ute bag for a tray, and a 4WD system where every Blacksmith bag has a place in your boot.
Laine and Erin also hope for more machinery and thus better efficiency, in the interest of continuing to lower their prices.
Find Out More
Aside from the Contact Us page on their website (BlacksmithCamping.com), Blacksmith Camping is also active on both Facebook and Instagram, currently monitored by Laine. Of course, products can also be viewed and purchased through Snowys Outdoors.
Thanks for listening, tune in again for next week’s episode!
Thanks for tuning in to this week’s episode of the Snowys Camping Show Podcast. Don’t forget to subscribe to us on YouTube, Spotify, iTunes, Amazon Music, iHeartRadio, Pocket Casts, Podcast Addict, or Stitcher so you never miss an upload.
If you have any questions for Ben and Lauren, make sure you head over to our Facebook group and let us know as we’d love to hear from you.
Catch you out there!
The post Ep47 – Australian Manufacturing with Blacksmith Camping Supplies appeared first on Snowys Blog.
]]>The post Ep45 – Fire Ban Seasons with the CFS appeared first on Snowys Blog.
]]>Or watch the video version here:
They’re our hot weather heroes,
fighting the flames and forewarning the community of dangerous conditions. While every state and territory have a rural fire service of their own, Ben and Lauren chat with Phil from the South Australian Country Fire Service (CFS) and extinguish any confusion around Fire Ban Seasons.
From considerations in campfire cooking, to seeking the right refuge – in this heated episode of the Snowys Camping Show, Phil cools the coals and clarifies all regulations that are relevant to travellers and tourers during the Fire Danger periods.
Short Cuts
00:00 – Intro
00:50 – Introducing Phil from the CFS
01:43 – Gas Stove Regulations
04:16 – Travelling During the High Season
08:17 – Radios
09:14 – Protection in Bushfire-Risk Zones
13:08 – Bushfire Refuges
18:04 – Travelling on Foot
20:36 – Identifying a Fire
22:59 – The Fire Danger Season: Unpacked
28:03 – Braziers and Above-Ground Fires
29:20 – Comfort Fires
29:57 – Environmental Protection Agency (EPA) Legislation
32:15 – “Gas” Stove Terminology
33:33 – Use of Gas Appliances
35:30 – Generators
37:45 – Induction Cooktops
40:00 – Extinguishing a Fire
45:08 – Find Out More or Get Involved!
Mentioned in this Episode:
Products:
Other:
What Can I Do / What Can’t I Do?
Bushfire Safer Places and Bushfire Last Resort Refuges
Emergency WA – Fire Danger Ratings
CFS SA – Fire Danger Season Dates
Queensland Parks & Wildlife Service – Campfires and Cooking
Introducing Phil from the CFS
Chatting with Lauren and Ben today is Phillip McDonough from the CFS. Phil works as the Strategy and Compliance Officer in the Preparedness Operations department, loosely known as the prevention area. The sector focuses on legislation and compliance-type issues, with relevance to keeping campers and hikers safe when touring outback and country areas during the Fire Danger Season.
Gas Stove Regulations
In previous years, devices such as camping stoves, pull-out kitchens, and gas BBQs in caravan parks were prohibited during a Fire Danger period. After a change in regulations, caravan parks and alike are now exempt. The adjustment allows travellers to utilise gas BBQs and carry out external cooking in caravan parks on a Fire Ban Day.
Where the new policies concern caravan parks, they do not apply to national parks. The latter operate via their own legislation that indicates the use of physical fires and gas cooking devices are still not permitted on Fire Ban days. Such activities also remain banned at free camps and layaway sites unless campers have been issued specific permits to allow otherwise.
Previously too, gas BBQs were allowed to be utilised within 15 metres of a house or domestic building. This did not account for the popular Bunnings BBQs, given the hardware store doesn’t fall under the same criteria. Considering this, the CFS incorporated specific terminology that referenced ‘commercial businesses’ to continue the Aussie tradition of the Bunnings BBQs.
Travelling During the High Season
Ultimately, travellers ought to be prepared and well-informed before travelling during the fire season. Some regional areas lack phone reception, which can lead to further difficulties – so camping somewhere with poor or no coverage will require pre-planning for potential problems.
While the CFS website indicates what is and is not permitted in alignment with restrictions during the Fire Danger Season, the Bureau Of Meteorology (BOM) website helps travellers to confidently identify potential Fire Bans or predicted fire weather up to four days in advance. With a specific fire danger prediction function, the BOM is recommended for acquiring an accurate idea of the conditions before travelling. The CFS base their decisions on the BOM’s data, where severe circumstances trigger their release of a Total Fire Ban status.
Other online emergency platforms include the Alert SA and Emergency Plus apps. The Alert SA app (or your state’s equivalent) allows the user to establish a ‘geo-fence’ that marks roughly where they’ll be travelling. In an area with phone reception, the app will notify the user if a fire has been lit nearby. This allows campers to maintain a sense of situational awareness when out bush.
Interstate, the NSW Rural Fire Service offers Fires Near Me, where Victoria’s services are via Emergency Management Victoria (EMV). Ultimately, camping in high-risk areas during the fire danger season demands an adequate phone signal for the best chance of seeking help in the case of a bushfire emergency.
Radios
When a fire is active, the CFS initiate a notification process. As the sole national information body, the Australian Broadcasting Corporation (ABC) is the only commercial partner contracted with the CFS. While commercial radio stations will break into their own transmissions and communicate independently, they are bound by no formal agreements.
Another method to stay linked with other members of the camping community is via radio and television communication ‘trees’. With adequate radio contact in and out, park rangers and relevant authorities aware of your travel plans can notify of when there will be a Total Fire Ban. The forewarning can aid the process of rearranging and restructuring plans in accordance with the recent weather changes.
Protection in Bushfire-Risk Zones
Firstly, adequate drinking water is vital to include when travelling through high-risk zones. When faced with a fire, the key to survival is keeping a solid barrier between yourself and the flames – for example, a woollen blanket. While cotton burns and synthetic melts, wool does neither and so offers the best defence. Other examples of protective barriers include a building, a shelter or alike, a large tree, or a boulder. Phil recommends storing a woollen jumper or blanket in your vehicle while travelling as a simple safety step, like in fire trucks. Contrary to popular belief, dampening your woollen blanket will result in steam that burns the skin, so it’s suggested to keep the fabric dry.
Within your vehicle, keep below window-height where the radiation is less intense, with a blanket over the top for protection and insulation. Out in the open, locate a hide-out or solid object to position between yourself and the blaze. When this proves difficult or impossible, Phil’s advice is to move sideways from the fire, as opposed to attempting to out-run it by moving upwards or ahead.
Bushfire Refuges
The black smoke of a bushfire turns day into night. Open flames draw air in from the 360-degree scope surrounding the fire, engulfing it in the hurricane of heat. Phil often parallels the intense roar of the angry blaze to how it sounds standing beside a freight train.
Escaping a bushfire can be confusing and disorientating as it generates relentless heat, a smokey stench, and a suffocating haze. There are two types of bushfire refuges, each listed on the CFS website: Bushfire Safer Places and Bushfire Last Resort refuges. On the front page, travellers can enter the town they’re headed to, and those highlighted indicate bushfire refuges.
Usually, a Safer Place offers the best chance of survival as its infrastructure (for example, that of a township) means less vegetation and flammable materials. The deeper someone travels into a Safer Place, the more likely they are to find safety and security. On the other hand, a Last Resort refuge – as its name suggests – should only be considered as a final option and not before a Safer Place. Despite reduced vegetation, a Last Resort is not found within a Safer Place and, with no servicemen to assist, is nothing but an open space (for example, an oval). While these are well-signed, there is no guarantee they will protect to the extent of a Safer Place.
To determine bushfire refuges, a boundary is drawn at an adequate distance from vegetation and measured to less than two kilowatts per square kilometre – the threshold of survival. While there will be sparks, embers, and smoke, it’s the radiant heat that causes the most damage and poses the greatest threat. This is prevented within the Safer Place zones after many are measured to be below the threshold. On the CFS website, a Safer Place is identifiable as a yellow shaded area while Last Resort Refuges are each marked with a green icon.
Travelling on Foot
For those with a Personal Locator Beacon (PLB) but without a vehicle, the initial reaction when feeling under threat of a bushfire is to activate the PLB. That said, doing so within another emergency event will likely make it difficult for a service member to respond while they’re busy battling the blaze. However, it is still beneficial to know that there are people within the area.
In the case of pre-occupied service members, those in danger of a bushfire beyond their vehicle are urged to identify the direction of the fire and begin moving to the side rather than ahead or on an incline. As touched on earlier, it is virtually impossible to outrun a fire. Phil elaborates that fire travels almost 10-times faster up a slope than along flat land, while the heat radiates at a lower intensity from the sides of the flames.
Ultimately, travelling on foot requires adequate preparation, education, and spatial awareness.
Identifying a Fire
If your nose says ‘comfort campfire’, but your gut says ‘bushfire’ – the CFS want to know immediately. Phil assures that they would rather receive a phone call in the early stages than for an observer to standby until it exacerbates. First, identify where the smell is coming from. Is it a campfire that can be handled independently, or more frenzied flames that are likely to spiral out of control?
In outback SA, the CFS may be 200-300km away before they reach a reported fire, which could meanwhile grow substantially – a tyranny of the distance between outback locations. On the other hand, response times to situations within the Mount Lofty Ranges surrounding Adelaide are reduced from hours to minutes. This comes with the greater population of people and higher concentration of resources in the area, and built-up country regions alike.
In some areas of the state, active prescribed burning is a helpful strategy. Phone operators ask a series of pre-set questions to help the caller identify the status of the fire, including how it smells and appears. If the fire seems uncontrolled, the operators can investigate further and consequently prevent a serious bushfire.
The Fire Danger Season: Unpacked
From campfires to camp stoves, the nuances of Fire Ban Season can be confusing. Lauren and Ben ask Phil to extinguish some of the perplexity by asking what constitutes a Fire Danger Season and, more specifically, what resource is most reliable from which to confirm relevant dates.
Fire Danger periods vary across the state, where SA dries out from the west to the south. The time between the west coast drying out and the Mount Gambier area in the southeast of the state doing so differs by four to six weeks. To minimise the inconvenience of the Fire Danger periods to the farming industry and camping community, the CFS stagger the dates.
South Australia is fragmented into 15 Fire Ban districts – West Coast, Northwest and Northeast pastoral, Eastern and Lower Eyre, Flinders Mid-North, Adelaide Metro, and finally tracking across to the Southeast Riverland and Lower Southeast. Kangaroo Island is its own Fire Ban district, with ever-fluctuating dates that depend on the volume of annual and seasonal rainfall.
While Victoria and NSW mirror SA’s approach, the NT covers the entirety of their state and WA indicates their Fire Danger ratings on their website. Ultimately, the most accurate information can be sourced from each organisation’s website.
Leading into traditional seasonal dates, the CFS liaise with local bushfire management committees to gather their recommendations. From there, they base their decisions on the risk of the fuel loads (that is, the total combustible content of a fire zone, building, or space), dryness of the fuels, and foresight into when the season may conclude. It’s also not uncommon for the CFS to further extend the season if their initial closing dates are found to be premature. This process happens in October, and by November 1 – when the first district looks to approach an early season – the dates are published on the CFS website.
While Fire Danger Season prompts restrictive use of some equipment, this doesn’t mean to say that there aren’t potential Total Fire Ban Days beyond these dates. Occasionally, there are days on the cusp of the Fire Danger Season that could pose a significant risk. In these situations, a Fire Ban Day is declared through the media, and restrictions are put in place. During the Fire Danger Season, this process is corresponded – though restrictions are already established. Such concern vehicles in long grass, use of certain equipment, stationary engines, and physical fires. For example, many farmers carry out acre burning – though if they do so during the Fire Danger Season, a permit is required from their local council.
Comfort fires also need to adhere to certain criteria during Fire Danger periods, including their size and depth. The restrictions indicate that a comfort fire needs to be less than one square metre, and entrenched 30 centimetres into the ground. A responsible member of the group is also required to control the fire from the time it ignites to the time it is extinguished, and there always needs to be an extinguishing agent within reach. A ‘responsible’ group member is someone not under the influence of alcohol or drugs, and of an appropriate age to monitor the fire.
On Total Fire Ban Days, campfires are prohibited in all capacities.
Braziers and Above-Ground Fires
During the Fire Danger Season, above-ground and brazier fires are forbidden. This is due to the nature of their design, which doesn’t allow them to sit within a 30-centimetre trench.
That said, there are exceptions for those who manage to obtain a permit – though this is not a simple endeavour. Suitable permits are administered by the local government, and require an inspection of the site. When camping out bush, this can be inconvenient and difficult to follow through with.
Considering this, Phil encourages campers to simply dig a 30-centimetre hole as a firepit.
Comfort Fires
While some campers are known to toss some spuds on the coals (hungry for potatoes or not) in anticipation of someone questioning their ‘comfort fire’ – Phil clarifies that the exemption in the new legislation allows campfires for both comfort and cooking during the Fire Danger Season.

The exemption in the new legislation allows campfires for both comfort and cooking during the Fire Ban Season.
Environmental Protection Agency (EPA) Legislation
While comfort fires are permitted in Fire Danger Seasons under relevant restrictions, some areas continue to ban them under the EPA legislation on account of their smoke causing an inconvenience. That said, those camping generally aren’t within zones affected, where most of the clause refers to areas surrounding and within townships and alike. Caravan parks will often indicate whether travellers can create a campfire, but those camping within relevant townships are simply encouraged to consider this extra step to avoid prosecution under the EPA legislation.
Regarding backyard camping, local councils outline regulations on how to approach campfires and, given they administer the legislation for the EPA, offer the most suitable advice.
“Gas” Stove Terminology
It’s important to note that while national parks indicate against ‘gas’ stoves, this terminology covers a broader group of cooking appliances.
Be it multi-fuel stoves using unleaded fuel or Shellite, or Trangias with methylated spirits and other fuel types – the term ‘gas’ in the context of appliances during the Fire Danger Season extends beyond Liquified Petroleum Gas (LPG) equipment. Essentially, liquid, gas, and solid fuels such as hexamine tablets and bricks, are all prohibited under this term.
Use of Gas Appliances
Many appliances can be bundled within the ‘gas’ arena, including angle grinders, gas soldering equipment, and oxy welding machines. Despite falling under the same banner as gas stoves, the use of these tools as an independent group is restricted under certain circumstances.
As mentioned, gas cooking is exempt from restrictions if in a caravan park or within 15 metres of a domestic or commercial building. That said, it’s recommended to clear the stove’s surrounding space to four metres, removing leaves and other bush debris from within the boundary. While this clearance concerns the sides of your pit, it also refers to the space above – so remove any flammable vegetation and low-hanging branches from within four metres above the pit too. Doing so ensures plenty of buffer, and the lowest chance of wayward sparks igniting.
Generators
There are two categories of generators: enclosed and non-enclosed.
Here in SA, an enclosed generator should only be used at a campsite if someone is within the vicinity at all times – in other words, doesn’t simply ‘set and forget’. In this case, like comfort fires, there needs to be a cleared space, an extinguishing agent within the area, and someone present at all times. If the latter isn’t possible, there are further, complicated regulations involved.
Non-enclosed generators pose a higher risk, as vegetation is more likely to come into contact with the device itself. Much of the danger revolves around its exhaust system, so every stationary engine must comply with the relevant system regulations. If the exhaust gases pass through the manufactured exhaust system, with no identified leaks or escapes, a non-enclosed generator is deemed to comply. Moreover, no vegetation, leaves, or bush debris are to come into contact with the exhaust system.
Induction Cooktops
With the increase in use of solar and 12V devices, and the rapid development of batteries, Lauren and Ben ask Phil on behalf of the camping community whether such devices can be used all-year-round, regardless of Fire Danger restrictions.
Much to their surprise, it’s a solid NO from Phil!
On a declared Fire Ban Day, an electric cooker is only permitted for use on the ‘foreshore’. The term describes the space ranging from the low tide watermark to the first standing bush or grass. However, gas and electric BBQs supplied by some parks are a commercial system, maintained and guaranteed to comply with the full meta-clearance and therefore exempt from this law.
Be it an open flame or electrical charge, any heat source is bound within tight restrictions on a Fire Ban Day.
Extinguishing a Fire
From a woollen blanket to a water bucket, Phil outlines the best methods to extinguish a fire.
While it depends on what seems appropriate at the time, he suggests keeping a small extinguisher in your camp vehicle in case a fire begins to burn beyond control.
On the other hand (and contrary to what some believe), Phil confirms that sand is not advised as a means of dousing a fire. Unlike others, it traps in the heat, posing harm to anyone who may trip and fall into the pit.
Ultimately, the most effective extinguishing agent is water. The key is to disperse it via small droplets or mist using a knapsack, spray bottle, or garden sprayer. The droplets absorb the heat which, as previously mentioned, is the main cause of harm. On the other hand, a large volume of water thrown directly onto the flames simply sinks into the sand and disappears. Essentially, fragmenting water into smaller particles via a spray device is far more effective than dumping a full pail in a panic.
Lastly, activating a dry chemical fire extinguisher produces a white powder that swallows the oxygen feeding the flames, meanwhile cooling the fire. That said, the powder itself contains chemicals that can eat away at a vehicle’s electrical components if left to settle for too long (an ironic feature of a device stored in the car boot!). Another limitation is how it can affect asthmatics, often caught in the wind and easily inhaled.
Overall, given the dry chemical extinguisher lacks practicality and is primarily used in emergencies, dispersing water remains the most common and effective strategy to diminishing a fire.
After extinguishing the flames, heat can remain among the coals. A successful procedure is raking them out to allow the heat to diffuse, where coals will cool faster still after sundown. Before departing the area, simply ensure the ash and fire debris is cool to touch.
Find Out More or Get Involved!
The CFS website, Facebook page, and other social media platforms remain the most effective sources of information on Fire Danger Seasons and related weather considerations for touring and camping. To get involved, simply jump online, read more about the responsibilities of volunteers and CFS members and the opportunities available, and follow the recruitment process.
In country towns, local brigades welcome and encourage those who are interested to drop in and visit. This is a great way to navigate the community and get to know the locals.
To stay relevant and informed, the CFS website offers information on What Can I Do / What Can’t I Do, where any change in regulation is reflected. The map on the website’s front page is also layered and interactive, allowing a comprehensive understanding of the state’s bushfire and weather status.
Thanks for listening, tune in again for next week’s episode!
Thanks for tuning in to this week’s episode of the Snowys Camping Show Podcast. Don’t forget to subscribe to us on YouTube, Spotify, iTunes, Amazon Music, iHeartRadio, Pocket Casts, Podcast Addict, or Stitcher so you never miss an upload.
If you have any questions for Ben and Lauren, make sure you head over to our Facebook group and let us know as we’d love to hear from you.
Catch you out there!
The post Ep45 – Fire Ban Seasons with the CFS appeared first on Snowys Blog.
]]>The post Ep43 – Caravan Water Tanks 101 with Kev appeared first on Snowys Blog.
]]>Or watch the video version here:
From filtering out the funky flavours, to repairing ruptures from rocky roads,
we run the tap on all there is to know on water tank care in this episode of the Snowys Camping Show.
Get to know the most trusted tanks for your travel, considerations for cleaning, and how to treat that tainted taste in your drinking water. Settle in with Ben, Lauren, and Kevin from the Snowys warehouse, as they filter out the folly and talk Water Tanks 101 for caravans, RVs and motorhomes.
Short Cuts
00:00 – Intro
02:07 – What is a Water Tank
02:35 – Installing Another Tank
04:20 – Advantages of Additional Tanks
06:30 – Water Tank Protection
07:37 – Water Tank Materials
11:18 – Filling Your Tank
14:00 – Tips for New Tanks
15:30 – Repairing Your Tank
17:13 – Algae in Water Tanks
21:33 – Water Treatment and Cleaning
29:50 – Filtering
31:40 – Optimising Your Tank’s Lifespan
35:12 – Hot Water Tanks
39:49 – Questions from Our Listeners
Mentioned in this Episode
Blogs:
Guide to Handling Corrugations in your 4WD
Products:
Podcasts:
Ep14 – Water Source Options for Camping
Other:
Emma Shaw And Husband Thom Lap Australia In Vintage Caravan, Write A Book – Veronica Matheson
What is a Water Tank?
In the context of camping or touring, a water tank is suspended beneath a camper van or trailer. Some motorhomes also have them inbuilt.
Usually, caravan water tanks are plastic and available in several sizes. Depending on their vehicle’s weight rating and capacity, some travellers keep up to two tanks while others hold three. In most cases, one water tank is already built into a caravan or motorhome – though some like to install a second.
Installing Another Tank
When fixing an additional water tank to your vehicle, it’s worth considering where it would best be placed. Depending on its position, the sheer weight of a tank can upset the balance of a camper or towing vehicle.
Kevin recommends seeking professional advice first, particularly when considering a large tank in respect to a smaller van. There will need to be regard for when the tank is empty, partly filled, and full – so revisiting either your caravan’s manufacturer or a service centre will ensure these weight variations are considered. While mounting the tank in the centre should be adequate, there is always the possibility of affecting the Aggregate Trailer Mass (ATM). For example, a 90L tank adds 90kg to your load – and even if it can only realistically be installed towards the back, this could affect how it’s towed.
Advantages of Additional Tanks
In most caravans, water tank sizes can range from 60L to 90L. Some vans with showers hold two 90L tanks, and often a third in larger vans as a consideration within their design. The benefits that come with more than one water tank depend on the volume of water one may require.
A 60L tank can often be too small, where some campers feel the need to transport extra water in jerry cans. As lifting a full jerry is a hefty task, it’s recommended to simply install a second tank as opposed to storing additional water in multiple small water containers or cans – provided the additional tank sits within the caravan’s weight rating. That said, some prefer to carry additional containers within their vehicle in the case of a leak in their main water tank. Lauren and Ben elaborate on this approach throughout Ep14 – Water Storage Options for Camping.
Water Tank Protection
Despite a durable construction from hard plastic, it remains likely for a water tank fastened underneath your vehicle to cop damage from a rock – especially off-road on rougher terrain. Standard inclusions of a caravan water tank are stone guards fixed around the front, sides, and bottom of the tank. While these offer some protection, the hose connection at the rear remains exposed to potential damage. Knocking a fitting can mean losing your water supply entirely, so Kevin recommends ensuring all components are tucked away and protected.
Water Tank Materials
Most water tanks are black and manufactured from food-grade plastic, the latter assisting in preventing the plastic-like, artificial flavour. A tank made from food-grade plastic is also best used with accessories alike. For example, a regular garden hose without a food-grade feature can defeat the purpose of pleasant-tasting water sitting in a food-grade plastic tank, as the hose then taints the flavour of the water passing through. Considering this, those wondering why their water may have an unpleasant taste should first assess the features of their hose. Food-grade hoses are often white and blue in colour.
The flavour of your water can also be determined by where you’re filling your tank from. Water flavour tends to vary from town to town – for example, that sourced from a city reservoir will differ to tap water from a remote town like Alice Springs. Generally, water should be safe to drink from a town – however that from a bore or an external shower block tap should first be checked if it’s fit for human consumption. Based on his personal experience too, Ben suggests that water’s flavour can be determined by how its mineral composition reacts with the materials of your water tank or bladder.
Filling Your Tank
Topping up your tank can be done at most caravan parks, although this isn’t the case in more remote areas where the water (for example, from a bore) needs treating. Coober Pedy is home to a desalination plant and charges campers for any water tank refills due to the high expense of the process.
In light of this, Kevin recommends researching, planning ahead of your road trip, and being considerate of the realistic water resources (or lack thereof) available within various towns and communities. Alternatively, water bladders and boxed water from supermarkets are a reasonable option when keeping drinking water separate from that of other uses – especially when water is scarce. For example, filling your tank with bore water is an unpleasant drinking option, and depending on where you pull up on your trip there may be limited points at which you can rinse and refill again. Ultimately, it’s wise to adopt a forward-thinking approach, establish what’s available, and only take what you need from eligible sites.
Tips for New Tanks
Usually, additional preparation of your newly installed tank is unnecessary before it is first filled. The tank should have already been tested for leaks, topped up with water, and the van itself serviced.
Contrary to what some may presume, plastic particles and dust often found in new plastic containers are not an issue in the case of caravan water tanks. The tanks described in this podcast are blow-moulded, a process that forms hollow plastics leaving no machinery-made marks or debris behind.
If the flavour of the water is a concern, Kevin suggests draining the tank first and taking it back to the supplier if it continues to taste unpleasant. Otherwise – your water tank should be road-trip ready!
Repairing Your Tank
While most water tanks are made from food-grade plastic, others manufactured from stainless steel are more expensive and can pose more issues if damaged. For example, a simple leak involves removing and welding the tank – a somewhat complicated and timely task.
On the other hand, repairing a plastic tank can be far less of a concern. Instead of using the flame of a cigarette lighter to melt the plastic and seal the hole (sorry Ben!), Kevin recommends simply inserting a screw to block the cavity. For larger holes, emergency repair methods include patching the rupture using silicone – though this offers only a temporary fix, and campers should be aware of how it may subsequently affect the water’s flavour.
Algae in Water Tanks
When it comes to algae build-up, owning a black tank often means we naturally follow the ‘out-of-sight-out-of-mind’ theory…until we notice small brown particles floating freely in our bottles, or taste a funny swamp flavour with every mouthful. Sometimes, getting on our knees with a basin of hot water and a scrubbing brush is all we feel we can do to achieve a clean tank. That aside – how does algae slime its way into our water containers to begin with?!
Algae is a type of fungus that begins as spores in the atmosphere. In this form, algae can exist for a substantial length of time before it’s activated by a blend of sunlight, oxygen and moisture. Considering this, a cause of algae build-up can be that its initial spores already existed in the water source you filled your tank from.
Another potential explanation is the use of a clear filler hose. Less common nowadays, these hoses tend not to include food-grade features and their transparency allows sunlight to react with both moisture and oxygen within the walls. When the algae dehydrates, it peels away from the walls of the hose, washes into the tank, and subsequently contaminates the water.
Most water tanks tend to be black, which aids the prevention of algae growth. Without sunlight permeating the tank, algae lacks the third element it requires to grow. While some types of algae may still grow in dark environments, most variants shouldn’t in a black water tank. Algae presence ultimately depends on the water source a tank is filled from, as well as how a tank’s overall condition is maintained.
With either option viable, some campers either keep water inside their tank ongoing or periodically drain it away. While there are no more benefits to one approach over the other, Kevin’s personal method is to always keep his water tank full. In doing so, he follows the theory that with less water comes more oxygen, leading to algae peeling away from the filler hose and back into the tank. While emptying a tank every now and again can be necessary, keeping it filled also allows peace of mind that you are consuming water from where you last filled your tank before reaching a lesser quality water source.
Water Treatment and Cleaning
From standard chlorine to silver ions, there are products available that help treat contaminated water. That said, Kevin’s approach is to refrain from adding chemicals to his water tank but insists on ensuring it remains colourless. Where chlorine can potentially affect the water’s flavour, decent, food-grade hoses and a quality filter is often all that’s necessary. As touched on earlier, the flavour is determined by the source from which you have filled the tank, how the water has been treated, and how the water then reacts with the tank’s materials.
Cleaning your tank should occur at the point you notice a change in taste or an algae build-up. The most efficient, thorough way to do so is by filling and draining the container repeatedly, flushing away any unwanted contaminants. Bioproducts for tank cleaning and sanitising options such as Milton, vinegar, or a mild solution bleach are also available, though removing the flavour they leave behind will require thorough rinsing and constant flushing.
Cleaning a water tank beneath a motorhome or caravan is difficult, so Kevin recommends completely detaching it and devoting the time and energy it truly requires. In that, be thorough in and around the baffles.
Baffles are the inner features that work by preventing water sloshing within the tank. In dispersing the wave energy, they moderate the surge effect typical within unbaffled tanks.
While some smaller water containers (like Lauren’s chook drinker at home) can be cleaned using an aggregate such as gravel to scratch away at algae, this process is less viable for a larger caravan water tank. Instead, more appropriate methods include a high-pressure hose, or tank cleaners containing a sterilizing compound. The latter works best when applied and left to soak overnight, then rinsed from the tank the following day. Oh, and yes Ben…a giant bottlebrush would also work well enough!
While there will usually be a solution to every water worry, there are likewise prevention strategies. These include avoiding algae where possible and, in that, filling your water tank with clean water from the beginning.
Filtering
With chemicals and sanitisers, filters are another method of eliminating algae. Micro inline filters have even smaller holes for the purpose of sifting out the more minuscule particles – a classic example being the desalination process. Other effective filter systems include carbon cylinders, which work by binding to the heavy metals in water.
In essence, how you choose to filter your water can depend on how susceptible you are to the algae toxins, which can affect some more than others. Nonetheless, as algae isn’t entirely avoidable, the most cost-efficient, effective strategy to filter the fungus is via an inline filter.
That said, it’s often asked whether a filter is equally as functional without the pressure of a main water source. As an inline filter is designed for use with a pressure hose, those without access can instead connect the filter to their van and pump the water through using either a hand or pressure pump. Where handheld types require a little more gusto, an electric pump with a higher PSI is a more efficient alternative.
Ultimately, using the appropriate tanks and complimentary hoses is the most no-fuss strategy in preventing algae build-up and water contamination on your camping trip.
Optimising Your Tank’s Lifespan
Nothing lasts forever – but with enough care and consideration, most things can get close. As mentioned earlier, your water tank is susceptible to damage beneath your van or motorhome. Positioned far enough from the ground, the risk of rocks flicking up from the more rugged roads remains just as high, and it’s for this reason that off-road vans should provide stone guards as standard protective equipment.
Nonetheless, it remains true that the rear of the tank – where the hose fitting protrudes – is exposed. While most long-road vans are unlikely to stray from the radius, it’s not unheard of to occasionally be signposted down a dusty dirt track. A tank guard is highly recommended to keep your tank from potential damage on tougher terrain – regardless of your route. Better still, keep all joins tight and ensure all hoses are tucked away high, fixed to the underside of your van to avoid flapping. Undergo a visual inspection for drips, and ask a friend to work the pump for any issues here too.
Just like a bed wetter only days after graduating from nappies, a leaking tank is best identified by the wet patches left behind. That said, don’t mistake a leak for the breather holes simply doing their job – when water gushes out of these openings, this is an indication that the tank is full. Eventually, the running water should cease.
Regarding pumps, there is little maintenance required – for example, 12V impeller pumps for showers and kitchen use. Impeller pumps aren’t self-priming, usually fixed down the outside of the tank and often attached to a small outlet or handpump. It’s important to operate these with a substantial level of water sitting above, as it can be damaging to continue to run them while dry. Aside from obvious leaking, any water spouting from the top of a handpump often indicates damaged seals.
Diaphragm or pressure pumps are more efficient and pump to a higher PSI. Water pipes are maintained under consistent pressure to allow immediate water flow, though losing pressure over time has pressure pumps automatically turning on and off. When this happens unnecessarily, or they show signs of leaking, your pressure pump may need attention.
Ultimately, pump maintenance can mostly be determined by visual inspection.
Hot Water Tanks
Most hot water tanks fall under the umbrella of ‘pressure tanks’, with pressure-release valves to prevent the tank from splitting or exploding. When the tap or lever on top of the tank is lifted to activate the valve, water under pressure begins to dribble out. It’s important to ensure nothing is gumming or blocking the mechanism of the valve, as this will cause a build-up of pressure and consequently blow a hose off – or in worst-case scenarios, rupture the tank.
While stainless steel tanks don’t require sacrificial magnesium anodes, steel tanks prone to rusting have protective lining that will nonetheless break down over time. An anode, measuring roughly 30cm long and 1.5cm in diameter, is screwed into the inside of the tank and works by attracting corrosive compounds in the water away from the walls of the tank. This leaves a white, chalk-like substance at the bottom of the tank that eventually requires rinsing away. It’s recommended to change a sacrificial anode every six months.

Pictured left: a used sacrificial anode, half corroded away
Pictured right: an unused sacrificial anode
Most caravans hold a storage vessel for hot water. While there was once a period when one could enjoy continuously flowing hot water, gas regulations were soon introduced that ordered for hot water systems to be outside, mounted within an enclosure, and with adequate ventilation. Given that the structure of caravans didn’t compliment this criteria, storage heaters were established.
Questions from Our Listeners
With so many keen campers tuning in, Lauren and Ben are eager to answer some of the questions that were posed ahead of the recording of this podcast.
One listener asked whether it’s possible to build a water filter system that erases the unpleasant taste from water in inland Australia – namely Charleville in Queensland.
Kevin’s recommendation is to see a filter specialist and advise them of what you hope to sift out. For example, some filters available can eradicate both smells and flavours. From there, the filter can be built into your caravan’s system, where any water coming in from the tank will flow through it and into your taps.
Honestly, if they can achieve drinkable sewage water – what can’t they do?!
Another query is on how iron precipitation in the tank from bore water can be prevented. While we don’t seem to have a simple answer to this unique question, Kevin simply suggests using a decent filter. Some filters include ceramic and, as previously noted, charcoal. Both remove the heavy metals and minerals found in water sources, such as bores. Ultimately, seeking professional advice and using multi-stage filters is an appropriate point to start.
Lastly, a listener asks whether a greywater tank is recommended – and if so, how they’re best cleaned. Kevin advocates for a greywater system, but the most classic problem is the wastewater flowing out from the caravan and onto the ground. Greywater often consists of food particles and dirty dish water which, if left out in the open, can then attract flies about the campsite.
Some caravan parks provide drains nearby, where greywater can alternatively be directed via a long hose. Occasionally though, lengthy hoses can slow down the flow of the drainage. A greywater tank is a viable alternative, but can nonetheless be a space invader and eventually require emptying via a hose anyway.
Kevin’s greywater draining system works by keeping a bucket underneath as a catcher, with a hose attached to the bottom allowing the water to run straight into the drain. When bush camping, the alternative is to run the hose off towards the base of a tree. If your dishwashing liquid is biodegradable, this shouldn’t harm the tree or surrounding plant life. Cleaning the system is as simple as using a tank cleaner and flushing the water back out beneath the tree.
Thanks for listening, tune in again for next week’s episode!
Thanks for tuning in to this week’s episode of the Snowys Camping Show Podcast. Don’t forget to subscribe to us on YouTube, Spotify, iTunes, Amazon Music, iHeartRadio, Pocket Casts, Podcast Addict, or Stitcher so you never miss an upload.
If you have any questions for Ben and Lauren, make sure you head over to our Facebook group and let us know as we’d love to hear from you.
Catch you out there!
The post Ep43 – Caravan Water Tanks 101 with Kev appeared first on Snowys Blog.
]]>The post Ep37 – Towing a Caravan with Kev appeared first on Snowys Blog.
]]>Or watch the video version here:
Every great movie starts with a good trailer,
and so does towing a caravan (see what we did there?).
In this episode, Ben and Lauren chat with Snowys’ resident caravanning expert Kev about the logistics of towing a caravan – from weight distribution and driving considerations, to brakes, mirrors, and tyre pressures.
Shortcuts
00:00 – Intro
00:27 – Introducing Kev
00:57 – Should I Tow a Caravan?
01:56 – Tow Ball Weight Vs Towing Weight
03:11 – Caravan Weight Considerations
07:10 – Weighing Your Caravan
09:39 – Braking Systems
12:10 – Electric Brakes and Brake Controllers
13:21 – Weight Distribution
18:55 – Tyre Pressures
20:33 – Spare Tyres
21:34 – Suspension
22:37 – Final Checks Before You Tow
26:15 – Towing Mirrors
30:50 – Driving Considerations
34:29 – Break Stops for Beginner Caravan Towers
36:08 – Overtaking
37:24 – Final Thoughts
Mentioned in this Episode:
Categories
Sub-Categories
Thanks for listening, tune in again for next week’s episode!
Thanks for tuning in to this week’s episode of the Snowys Camping Show Podcast. Don’t forget to subscribe to us on YouTube, Spotify, iTunes, Amazon Music, iHeartRadio, Pocket Casts, Podcast Addict, or Stitcher so you never miss an upload.
If you have any questions for Ben and Lauren, make sure you head over to our Facebook group and let us know as we’d love to hear from you.
Catch you out there!

Snowys’ resident caravanning expert Kev explains the logistics of towing a caravan.
The post Ep37 – Towing a Caravan with Kev appeared first on Snowys Blog.
]]>The post Ep36 – UHF Radios with GME appeared first on Snowys Blog.
]]>Or watch the video version here:
Hello — Snowys Camping Show to loyal Snowys fans — do you read me?!
From marine to mountaineering, tune in to this episode of the Snowys Camping Show as Ben and Lauren lead an extensive discussion on UHF radios with Tony from GME.
Covering a vast range of talking points stretching further than the Hay Plains – know how to best mount in the mountains, choose your channels, and select the best gain for the best range.
Short Cuts
00:00 – Intro
01:18 – Introducing Tony from GME
03:42 – What does GME stand for?
05:18 – GME history
07:04 – GME Radio Products, Services, and Systems
8:19 – Australian Manufacturing
10:23 – Upgrading From a 40-channel Radio
14:39 – Why Do I Need a UHF Radio?
16:29 – Limitations of a UHF Radio
20:26 – What is UHF CB?
22:21 – Commercial Channels and Encrypted Digital Radio
23:02 – Can I use a UHF CB Radio on a Boat?
24:31 – Which UHF CB Radios are Available for 4WD Tourer Campers?
27:04 – Considerations When Mounting Antennas
30:00 – How Accurate is the Advertised Range of Each Radio?
35:00 – How do Antennas Actually Work?
43:43 – ‘Plug and Play’ Radio
45:07 – Interference and Installation Considerations
46:34 – How Effective are Stick-on Window Aerials?
Mentioned in this Episode
Products
Personal Locator Beacons (PLBs)
Introducing Tony from GME
With almost twenty years of experience in consumer electronics, Tony is a passionate employee of GME with a genuine curiosity in their products and associated markets. His ever-present interest in 4WD-ing, camping, fishing, and electronics had him naturally progressing into the GME space. Now with six years at the company under his belt and a boss four-wheel-drive, he has all the gear – and a fair idea!
What does GME stand for?
With sixty-two years of trading under parent company Standard Communications, Greenwich Marine Electronics (GME) manufactures a distinctive range of consumer electronics. A well-recognised brand with a long, proud history, GME has no intention to keep its meaning a secret. Nonetheless, the link to marine electronics can confuse those who aren’t aware of their past purpose. The company produced marine radios before Ultra-High Frequency (UHF), soon catering to different markets as the business evolved.
GME History
It began in a backyard shed.
GME was founded by Edward “Ted” Dunn in 1959, initially specialising in TV tuners and other facets of television service. From there, Dunn began to identify the more niche markets, before working to source and develop products to suit. The UHF category interested him, and by the 1980s relevant products became necessary within the farming community. Communication was required back to the homestead, though the absence of mobile phones and limitations of AM radios meant fewer alternatives to do so. As UHF radios gained traction, Dunn seized the opportunity to develop products that met these demands.
Where AM radios can refer to 27 MHz (“megahertz”) and Single Side Band (SSB) radios, Tony clarifies that the many types of two-way communication are simply distinguished by their different frequencies and waves forms. Before UHF radios, GME was producing 27 MHz marine radios.
GME Radio Products, Services, and Systems
If GME wasn’t already an enigma – the company deal in more than just radios. That said, every product offered is in some way associated with radio frequency (RF) and radio communications. Products cover UHF and UHF Citizen Band (CB) radios, commercial radios requiring operating licenses and private frequencies, emergency and Personal Locator Beacons (PLBs), marine communications or Very-High Frequency (VHF) radios, and all associated antennas.
Additionally, GME offers Kingray TV signal distribution systems like those manufactured during the initial stages of the company.
 and radio communications.")
Every GME product is in some way associated with radio frequency (RF) and radio communications. Credit: GME
Australian Manufacturing
As the only Australian manufacturer of UHF CB radios and emergency beacons, supporting Australian companies is a highly valued notion at GME. Given some materials need to be sourced from overseas, Ben and Lauren ask Tony how people can view the extent to which GME products are Australian-made.
Firstly, the main priority of GME is to continue to manufacture in Australia. While labour costs are higher here than overseas, and some components are received from all over the world, GME remain committed to Australian production. Tony states that the simplest way to describe the extent to which GME products are Australian is on a revenue basis. Of their yearly revenue, 80% comes from Australian-manufactured products created in their factory in Sydney, New South Wales.
Limitations to 100% Australian-made products remain, where the mission is always to achieve a happy-medium percentage of quality against cost.
Upgrading From a 40-Channel Radio
Roughly ten years ago, 80-channel radios were introduced as the suggested transition from 40-channel types. As Ben owns the latter, he turns to Tony for his advice on whether upgrading is necessary, and what the limitations are if he does not.
While a 40-channel radio is still adequate, refusing to shift to an 80-channel model simply denies someone 50% of the full picture.
For example, if a group using 80-channel radios need to communicate, those with 40-channel types may not be able to hear them if their radio falls short of access to the channel in use.
The Australian Communications and Media Authority (ACMA), who mandate and manage the spectrum, originally opted to make 40-channel radios illegal. The intention behind this proposal was to encourage the market to upgrade to the 80-channel product. However, the feedback they received suggested they shouldn’t – and given the 40-channel radios showed no sign of functional failure, the ACMA adjusted their approach.
For simply communicating with a friend via an agreed channel, a 40-channel radio is sufficient. However, monitoring highway danger and safety channels when on-road travelling is best done using an 80-channel model to ensure you are not operating with 40 fewer. While the decision is now in the hands of the 40-channel community as to whether they upgrade, it remains highly recommended that they do to experience the full advantages of a more extensive channel range.
The benefits of UHF radios extend beyond their channels. As technology has advanced, there are more features of updated models to take advantage of that aren’t factored into the earlier types. A newer style of radio that Ben has recently started to enjoy allows the user to simply ‘plug ‘n play’, without the need for a complicated installation process (these will be elaborated on later in the podcast). That said, UHF radios in general last a long time, leading many to prefer using their existing model until there’s a more steadfast reason to transition.
Why do I need a UHF radio?
The answer is simple: a UHF radio allows communication without the infrastructure. Beyond metro centres, patchy mobile reception calls for efficient and effective comms achieved through UHF radios.
By extension, UHF radios are a safety precaution in allowing communication in the case of emergencies. Solely relying on a mobile phone in these circumstances is an issue, as only 40% of Australia’s landmass is covered for mobile phones. Considering this, one doesn’t need to travel too far out of a city to ultimately lose mobile coverage.
Limitations of a UHF radio
As with all two-way comms, UHF radios are effective by line of sight – that is, the straight, unobstructed path between a transmitting antenna and a receiving antenna. For example, it is not possible to contact someone in Darwin from Adelaide, as both communicators are required to be within the range of their radios.
The effectiveness of the transmitting and receiving of comms depends on a vast number of factors. These include the transmission power, the size of an aerial, and the geographic nature of the area. For example, while travelling through a mountainous area will drop the maximum potential transmission range, doing so through the Hay Plains will achieve far more distance out of the radio.
At any one time, there are close to three million UHF radios in commission across Australia. Considering this, it is highly likely to be successful in connecting with another traveller or making a call via one of the dedicated emergency channels. That said, UHF radios are not the be-all-end-all of comms, where emergency beacons provide an added level of safety and insurance if emergency situations become more dire.
While UHF radios and emergency beacons are not direct alternatives to satellite phones, they are nonetheless complementary. A satellite phone is a powerful device that works anywhere on the planet, though the purchase price is substantially higher. What’s more, owners will be paying for ongoing subscriptions whether their device is in use or not, while a UHF radio is free to utilise after purchasing. With an open communication platform, UHF radios allows for anyone tuned into the same channel as others to hear and respond – a key difference to satellite phones, which instead require one to call a specific user.
Ultimately – the more solitary one travels the more necessary multiple safety devices are. More avid, remote travellers carry a satellite phone, UHF radio, and an emergency beacon together.
What is UHF CB?
So what’s the difference between UHF and UHF CB radios? The latter refers to Citizen Band, which can be accessed by anyone. On the other hand, UHF and VHF commercial radios operate via the same frequencies but offer licensed channels that aren’t open to the public. These individually licensed frequencies allow users to have private conversations without interference from others.
As the conversation around UHF versus UHF CB becomes a little complicated, Tony clarifies that the distinction is ultimately related to frequency. UHF, as mentioned, refers to Ultra High Frequency – and within this is Citizen Band and Commercial range. Both operating on the same frequency, they simply offer different channels. A UHF CB radio hosts 80 channels tuned within the Citizen Band, where any frequencies operating beyond this are for commercial use and require a license. While UHF or commercial radios reach Citizen Band channels, there are UHF CB radios that allow users to hear commercial channels but not transmit via them.
Commercial Channels and Encrypted Digital Radio
Ultimately, there is a difference between UHF and UHF CB radios. While it’s expected for police and other emergency services to use commercial channels as opposed to those that are publicly accessible – in many cases, they use a different technology altogether: encrypted digital radio.
Unlike some concepts, radio isn’t radio. There are many radio-based products, and each function differently depending on the requirements. Gone are the days when it was possible to sit in our living rooms and listen to the whereabouts of the police. Now, such sensitive content is protected, where all communication – especially in metro areas around Australia – is encrypted.
Can I use UHF CB radio on a boat?
A marine radio operates via VHF channels. In a practical sense, a VHF radio can work on land where a UHF CB can on water – however, this contradicts the purpose of each radio’s respective design.
A VHF is designed for use in marine environments, and it’s recommended that one purchases a radio based on what they will more likely use it for. In Australia, GME as a manufacturer are not permitted to offer products that transmit more than five watts of power via a UHF radio. Transmission of VHF marine radios reaches 25 watts, providing a greater range.
Considering this, there are specific benefits to different products that are designed according to these standards. For example, a 4WD-er with a VHF can talk to every boat on the harbour – but none of the other 4WD-ers on the road!
What UHF CB radios are available for 4WD tourer campers?
Many!
A UHF CB radio is available in both a handheld (portable) design, and a fixed-mount (mobile) model requiring installation in a vehicle. Within both categories, there are variations to power transmission, standard features, waterproof radios, GPS capabilities, and Bluetooth – and this is where customers require detailed consideration in the interest of aligning the product to their specific uses.
Tony recommends a handheld radio at a minimum – the closest to a one-size-fits-all model – for infrequent users who would like communication abilities outside metro areas. Handheld models are convenient, useful both within and outside a vehicle, practical at the campsite, capable of monitoring traffic, and are without the investment of a fixed mount and antenna.
That said, there are limitations around range, given their smaller antenna. Furthermore, the battery-power feature has it demanding constant charging, as opposed to what would otherwise be required of a fixed mount model via the 12-volt system in a vehicle.
Considerations when Mounting Antennas
When we consider the range of a five-watt handheld radio versus that of a five-watt fixed mount model, we turn to their antennas. By default, the taller the antenna the further a radio can transmit.
Other determining factors include where on the vehicle the antenna is mounted. Mounting to the back of a vehicle can drop the available range the antenna can transmit on. The less an antenna is obstructed, the more effective a radio’s transmission. Considering this, recommended locations to mount an antenna include in front of the bull bar, or on top of the roof.
While some may want to consider surrounding the antenna with a flat plain, this isn’t so much a consideration anymore as it was when antennas were ground-dependent. Nowadays, most antennas are ground-independent, eliminating the necessity for a ground plain and instead dictated by the extent to which the antenna is obstructed. For example, vertically mounting an antenna against the flat, back wall of a Jeep will have your radio struggling to transmit a signal through the body of the car. On the other hand, surrounding the antenna with an unobstructed, clear range allows a more effective transmission. Drivers who otherwise find aerials on the bull bar distracting should consider how significant adequate reception is for their journeys.
How accurate is the advertised range of each radio?
While some brands state the wattage range of a radio, GME do not. Tony confirms that the most common questions asked refer to the extent of the range expected from a handheld radio. Essentially, there are too many variables – but geographic positioning is an aspect that impacts range to a greater extent.
As mentioned earlier, radios are effective by line of sight. For example, it is more likely for a user to achieve sufficient transmission from their radio atop a mountain than it is low within the valleys. With this in mind, some brands claiming 17 kilometres of range is misleading. A customer is likely to be disappointed when their radio “doesn’t work”, despite many factors likely contributing to their inadequate transmission – and this is why GME choose not to make a claim. Broadly speaking, a five-watt handheld radio could offer up to ten kilometres of range in ideal conditions, while a fixed-mount model of the same wattage could extend to 25 kilometres or more.
Nonetheless, range is variable-dependent – and if anything, a company ought to state the transmission power. A customer is likely to choose a one-watt handheld radio over a five-watt handheld because of the difference in price and specific requirements of the radio. For instance, travelling in a convoy within only 500m of other vehicles would likely only demand a one-watt radio, where the need for transmitting beyond ten kilometres is unnecessary. A lower watt radio is also useful for keeping in touch with children and family members within a camping ground.
Essentially, a user’s choice of radio-based on transmission power is dependent on its specific use, where any remote, solo travellers require maximum transmission power and a high-performance aerial for optimum transmission from their radio.
How do antennas actually work?
Following the frequent mention of antennas, Ben and Lauren are curious as to whether there is a visual representation of how they transmit radio waves. It is, for lack of a better word, technical!
Radio waves are transmitted via a ‘radiation pattern’. Essentially, this pattern describes how a signal is released from the radio into the antenna and communicated out. This is called a ‘gain’ rating, denoted by a decibel isotropic (dBi) number.
Antennas are available in specific gain ratings, including 2.1dBi, 6.6dBi, and 8.1dBi. The length of an antenna correlates to its gain measurement, where a shorter antenna will have a lower gain rating and an 8.1dBi antenna measures two metres long.
Tony clarifies that a higher gain does not necessarily equate to a better-performing antenna. As the gain rating of an antenna increases, the radiation pattern changes shape. He describes an inflated balloon, which could be viewed as a 2.1dBi radiation pattern (i.e. distributing a broad transmission over a smaller distance). Increasing the gain rating is the equivalent of applying more pressure to the ‘balloon’, consequently elongating it in a horizontal fashion. So, while an 8.1dBi antenna transmits further than an antenna of 2.1dBi, it does so via a flatter radiation pattern.
Ultimately, as mentioned previously, transmission is dependent on geographic conditions. Running an 8.1dBi antenna in hilly terrain results in poor range, as the signal is unable to overcome the obstructions. Therefore, the nature of the terrain determines the performance of the antenna. Many antennas in the GME range have interchangeable whips, allowing users to choose the whip that best complements the current conditions. A whip is the straight, flexible, fibreglass rod, with a spring on the base to prevent breakage along corrugated roads. A smaller, shorter whip with a lower gain rating works better in the hills, like the Victorian high country. On the other hand, the Nullarbor Plain calls for a longer antenna with a higher gain rating.
Most adventurers seek ground-independent antennas, as their design incorporates a feature at the base that eliminates the need for a flat plain. In contrast, a ground-dependent antenna is a product of old technology. Put simply, those who don’t choose a ground-independent design are those who are willing to drill a hole in the centre of their roof! With the evolution of technology over time, ground-independent designs offer greater flexibility in where users can mount their antennas. In the 80s, optimal performance of a UHF radio could be achieved by puncturing a hole through the centre of a vehicle’s roof. The antenna uses the roof as the ground plain to operate effectively.
As well as transmitting and receiving radio signals, 2.1-metre antennas have also been seen to double as flagpoles. While this is not a specified use of the antenna, nor is it noted in GME’s instruction manual – it’s a tempting idea for most campers, fishermen, and 4WD-ers. Owed to the antenna’s exceptionally heavy-duty spring base, a flag attached to the top is unlikely to provoke any physical damage, or – to Tony’s knowledge – affect how the aerial operates.
Lauren enquires whether there is a hybrid model of a fixed-mount and handheld radio available, to which Tony presents more than one option.
Firstly – with GME’s handheld model, users can purchase drop-in chargers to mount in their vehicles, unscrew the antenna from the handheld, and connect a smaller magnetic antenna that can be attached to the vehicle’s roof. This essentially transforms the handheld radio into a pseudo fixed-mount antenna. While this method remains inferior in the absence of larger antennas, repositioning the antenna to the outside of the vehicle automatically improves the range. This further reinforces the effect of limited obstructions – a common theme throughout the discussion. The best possible scenario for an antenna to perform at its optimum is a mounting position that is high, free of obstructions, and outside a vehicle.
Another option for a hybrid is the ‘plug ‘n play’ model.
‘Plug ‘n Play’ Radios
This model is a fixed-mount radio that does not require permanent installation in a vehicle. The device is supplied with a 12V DC cigarette lighter socket which, once plugged in, runs the small magnetic antenna. With a ‘plug ‘n play’ radio, users can enjoy the benefit of a fixed-mount design – but are nonetheless limited by the antenna.
In the presence of a large fixed-mount radio inside a vehicle, with small, handheld radios in the same vicinity – Lauren asks whether the fixed-mount model works to boost the effectiveness of the handheld devices. As great as that would be, Tony confirms that this is not the case. An antenna needs to be attached directly to a radio to form any kind of relationship or connection.
Interference and Installation Considerations
It is worth noting that if a customer purchases a radio and finds it doesn’t work effectively, the chances are that it has little to do with the radio itself and more so its sensitivity to other radio waves. Products that tend to disrupt a radio’s efficiency are those generating noise, and LED light bars.
Positioning an antenna nearby LED light bars creates an interference heard through the radio. Considering this, when installing an antenna on a vehicle it’s wise to note where the cables run, to prevent bundling up beside those for other devices such as LED light bars. When light bars are removed from the space, problems related to the radio’s effectiveness are too.
How effective are stick-on window aerials?
Are they a last resort, or equally as effective as other models discussed? Again, Tony circles back to considering where the antenna is mounted, its height, and its gain rating.
For example, 2.1dBi and 4.5dBi stick-on antennas will still transmit and receive, though not as effectively as a 1.2-metre antenna mounted on a bull bar. The former are best utilised in a convoy-style scenario.
Thanks for listening, tune in again for next week’s episode!
Thanks for tuning in to this week’s episode of the Snowys Camping Show Podcast. Don’t forget to subscribe to us on YouTube, Spotify, iTunes, Amazon Music, iHeartRadio, Pocket Casts, Podcast Addict, or Stitcher so you never miss an upload.
If you have any questions for Ben and Lauren, make sure you head over to our Facebook group and let us know as we’d love to hear from you.
Catch you out there!
The post Ep36 – UHF Radios with GME appeared first on Snowys Blog.
]]>The post Ep32 – Battery Chemistry with Hard Korr appeared first on Snowys Blog.
]]>Or watch the video version here:
Episode Overview
Be it jump-starting your Jeep or keeping the cold ones crisp, plug in when off the grid with battery options from flooded lead acid to lithium.
Outdoor experts Ben and Lauren host a supercharged chat with Sam and Zac from Hard Korr about the background of batteries, their chemical construction, best uses, compatible charge cycles, safety, and more.
From the crank battery in your car to deep-cycle charging of devices – get to know the batteries that bear the best results out bush.
Shortcuts
00:00 – Intro
02:57 – Types of Batteries
03:22 – AGM Battery Construction
04:03 – Vehicle (Crank) Batteries Vs Deep-Cycle (Auxilary) Batteries
06:40 – Don’t Use a Crank Battery as a Deep-Cycle Battery!
07:02 – Do secondary car batteries require a corresponding battery chemistry?
08:13 – Considerations for a Dual Battery Set-Up
11:04 – Can you charge a lithium battery from the alternator?
12:00 – Charging an Auxiliary Battery with a New Car (Smart Alternators)
12:21 – Variable Voltage Smart Alternators
13:04 – Using a DC-to-DC Charger
14:22 – Basic Terminology Explained for Beginners
22:26 – Comparing Lithium Batteries
26:00 – Lithium Battery Safety
30:22 – Using the Right Charge Cycle for Your Battery
37:09 – Charger Types Explained (PWM, DC-to-DC, MPPT)
41:40 – Why do you need a regulator with a solar panel setup?
42:55 – Compatibility Between Batteries and Solar Panels
50:42 – Important Tip if Charging Lithium Batteries with an AGM Program
51:22 – The Future of AGM and Lithium Batteries
55:38 – Limitations of AGM and Lithium Batteries
Mentioned in this episode
Absorbed Glass Mat (AGM) batteries
Hard Korr Voltage Sensitive Relay Kit
Hard Korr Dual Battery Wiring Kit
Types of Batteries
While the most common batteries are found beneath the bonnet of your car, other types include flooded lead acid, Absorbed Glass Mat (AGM), calcium, gel, and lithium. Where AGM batteries are more popular for use at the campsite, the lithium variety are also used as a power source for electronics.
AGM Battery Construction
The AGM battery is comprised of plates segregated by fibreglass mats. The battery’s acid and electrolytes are absorbed by the mats, preventing fluidity within the battery. Pressure is then applied to the plates within each cell of the battery’s casing.
Vehicle (Crank) Batteries Vs Deep-Cycle (Auxiliary) Batteries
A vehicle battery is otherwise known as a ‘crank’ or ‘start’ battery, producing short, sharp bursts of high current ideal for starting an engine. The plates within a crank battery are thinner and its active material less dense, allowing a higher surface area for the chemical reactions to occur. As a result, the battery releases a higher current. Thanks to your vehicle alternator, a crank or start battery can drop a dramatic volume of charge quickly without needing to deeply discharge.
On the contrary, deep-cycle or ‘auxiliary’ batteries are designed to charge periodically, allowing you to discharge its capacity without damaging the cells. Unlike crank batteries, their plates are thicker, delivering continuous power at a lower current-draw, for longer. This allows prolonged use, deeper discharge, and overall longer service life – boding well for 4WD-ing and camping, and ideal for powering fridges, lights or fans.

Where AGM batteries are more popular for use at the campsite, the Lithium variety are also used as a power source for electronics. Credit: Hard Korr
Don’t Use a Crank Battery as a Deep-Cycle Battery!
Crank or start batteries are not designed for multiple discharge and recharge cycles, unlike deep-cycle varieties. Discharging a crank battery’s full capacity as done with an auxiliary will shorten its service life significantly.
Do secondary car batteries require a corresponding battery chemistry?
The short answer is no. In most to all cases, the crank and auxiliary battery will be of different chemistry and size. Although the crank battery is connected, it is charged via the vehicle’s alternator while the auxiliary battery is charged through a DC-to-DC charger or a Voltage Sensitive Relay (VSR). Given this, the batteries needn’t be of the same chemical makeup.
Considerations for a Dual Battery Set-Up
In the alternate scenario of charging two auxiliary batteries parallel (excluding the crank battery beneath the bonnet), these are required to be of the same chemistry. Whilst the crank and auxiliary batteries have opposing charge cycles, a dual battery system where two auxiliary batteries are charging together require a corresponding chemical makeup.
It’s unknown whether the chemistry of the second battery – dual or not – is required to be the same as the crank. However, if connected from the battery, it is accurate to assume they should each be chemically constructed the same way with the same amp-hour charge.
Can you charge a Lithium battery from the alternator?
It’s not ideal. Alternatively, a lithium battery can be charged via a VSR.
The VSR – an isolator – detects the voltage produced by the alternator, charges the battery, then cuts the circuit link when it detects a drop in voltage from the pre-set minimum (i.e. when the car engine has been turned off). Consequently, the crank battery doesn’t discharge from the auxiliary battery charging after the engine stops running.
Charging an Auxiliary Battery with a New Car (Smart Alternators)
While new cars on the market allow the charging of auxiliary batteries via a DC-to-DC charger, older models haven’t required this. This is because newer car models have smart alternators.
Variable Voltage Smart Alternators
One of the two types of smart alternators is the Variable Voltage Alternator, found more commonly in more recent car models. As its purpose is to save power and fuel emissions, this alternator drops below 12.7V when it detects that charging the battery is unnecessary, even when the engine is on.
In these situations, a VSR will not work, given it has inbuilt fixed cut-in and cut-out points. Instead, it will assume the vehicle is off, cut the link, and cease the charging of the auxiliary battery while the vehicle is still running. For this reason, a DC-to-DC charger is necessary for such vehicle types.
Using a DC-to-DC Charger
Where a VSR will only charge a battery to 85% capacity (depending on the battery’s chemistry), a DC-to-DC charger has a more advanced charge program, tailored to the different types of batteries available. After setting in accordance with the battery type, the DC-to-DC charger will charge the battery to 100% capacity. A DC-to-DC charger thus offers benefits, whether your vehicle requires one or not.
Basic Terminology Explained for Beginners
When discussing batteries, Cold Cranking Amps (CCA) often arises as a common term. Cold Cranking Amps are important to look for in a starter battery as opposed to deep-cycle batteries, as kick-starting an engine requires a large volume of power. Cold Cranking Amp measurements are based on a thirty second time limit at a temperature of zero degrees Fahrenheit.
For example, if a battery has a CCA rating of 600 amps, this means it can deliver 600 amps of power to the starter battery, for 30 seconds in zero degrees Fahrenheit. This needs to happen without it dropping below 7.2V.
While AGM batteries may be an exception, CCAs are irrelevant to deep-cycle batteries such as lithium batteries, as they are unable to exert the high current required to jump-start engines. To jump-start a petrol vehicle, there is 1 CCA required for every 1 cubic inch of displacement in an engine, while diesel engines require 2 CCA per 1 cubic inch. Whilst lithium batteries are still not recommended, it is possible to deliver sufficient amps from other deep-cycle battery types (AGM more commonly) via a high-rated Anderson board. Nonetheless, using deep-cycle batteries to jump-start vehicles should only be attempted in emergencies, as discharging the battery quickly shortens its life span.
Another term commonly referenced in relation to deep cycle batteries is Amp Hours (AH). An amp hour indicates the number of amps a battery can deliver in one hour. Older or lesser quality 100AH lithium batteries can’t always deliver that current over one hour, and for this reason Amp Hours are only a theoretical measure. For example, the battery could instead deliver 50 amps over two hours.
In fact, the ultimate current delivered from that battery will differ depending on how quickly it is discharged. This is indicated by the battery’s C Rating measurement, which measures the current in which the battery is both charged and discharged. For example, a battery with a 100 Amp Hour and C20 rating indicates that the battery will discharge continually over a 20-hour period.
Comparing Lithium Batteries
In the case of reputable manufacturers, a battery that reads 100 Amp Hours should correspond to a C20 rating. On the contrary, cheaper manufacturers use a rating 20% higher than a C20, in the interest of selling more batteries with less lithium.
Where AGM batteries are more linear, a lithium battery will start at a voltage of 14.2V, drop to 13.2V, hover between this and 12.4V, then finally drop to 10V. Given this, the battery will require an overall ‘nominated’ figure i.e. an approximation or midpoint. In this case, the nominal voltage would be 12.8V.
Whilst there is no legal requirement to list a C20 rating, there are introductions to new laws that require passing a specific read in order to be accepted into the country. This is in the interest of safety.
Lithium Battery Safety
A poorly constructed lithium battery is dangerous and prone to exploding. It’s important to ensure these batteries are manufactured to a high standard before purchasing.
There continues to be oversight of these products to ensure only safely constructed batteries are accepted, with new protocol surrounding this as of recent months.
Using the Right Charge Cycle for Your Battery
In discussing discharging, we’re referring to the battery’s charge cycle. Depending on the chemistry of the battery in question, a charge cycle indicates the voltage/s delivered at various levels, for different periods of time, in order to reach full charge. This differs to the process of an alternator, which delivers charge straight into the battery.
Different batteries require different charge cycles. For example, while a flooded lead acid battery with 100 Amp Hour is ideally discharged to 50% capacity to maximise service life, a lithium battery is safe to be discharged to 80%. That said, a lithium battery can realistically discharge to 99% at a pinch, and – depending on their chemistry – other batteries can be discharged to 70%-80% of their capacity. Nonetheless, habitually discharging to below its ideal capacity will drop a battery’s service life.
After heavy discharging of a flooded lead acid battery, an equalization program is required to be introduced every 28 days. The process ensures all cells are of an equal voltage, undoing the build-up of negative chemicals. Without this, the battery will fail to charge to its full capacity, which in turn decreases its service life.
Where a fully charged lithium battery ranges between 14.2V and 14.4V, an AGM battery at full charge sits at 13.8V. A lithium battery holds its charge for 3-4 months, while an AGM will be at 13.8V for around a month. It is not ideal to store an AGM battery without charge for too long without replenishing.
It is suggested to charge your battery using more advanced chargers, such as DC-to-DC, as much as possible. Solar and DC-to-DC chargers have a pre-programmed cycle to ensure maximum usage of the battery life.
The explanation behind why there’s an ideal depth of discharge for batteries is complicated, and beyond the scope of this episode. Essentially, if a charger isn’t delivering the voltage required, the battery’s charge will simply fail to reach 100%. For example, wherever the amp reading is on 13.6V, the charger will stop.
Charger Types Explained (PWM, DC-to-DC, MPPT)
Types of chargers include Pulse Width Modulation (PWM), DC-to-DC, and Max Power Point Tracking (MPPT). Both PWM and MPPT chargers are types of solar regulators, suited to charging batteries with a solar panel.
The PWM charger gradually charges by moderating the width of the electrical pulses, like a sinewave. The width will either increase or decrease to moderate the charge. In the right circumstances, a MPPT regulator can charge a battery quickly. For instance, if a solar panel’s maximum open circuit voltage is high enough, the MPPT takes advantage of that, delivering both a higher current and faster charging.
Cons of MPPT chargers are that they’re heavier, less portable, and more advanced in electricity circuitry. The latter means they are less reliable over time, while portability is key when off-road adventuring.
While most people with solar systems on their house have a MPPT controller, the variation of MPPT and PWM controllers in an off-grid system of that size is negligible. In fact, the value of an MPPT charger comes with the larger kilowatt capacity system on a house. This is because the maximum voltage of solar panels on a roof is much higher than that of portable solar panels.
Why do you need a regulator with a solar panel set-up?
Solar panels give out an open voltage of 22V and close voltage of 19.2V. As delivering 19V into a 12V battery isn’t possible, a regulator converts the 19V back to a 12V so it can feed the 12V battery.
Portable power packs are available as all-in-one units with inbuilt MPPT controller, therefore requiring connection to a raw panel. As the power pack has solar input specs, the solar panel output needs to correspond to these. In the case of inbuilt MPPT controllers within battery packs, it is suggested to disconnect the regulator and plug the panel directly into the power pack. Whilst a 24V wouldn’t work, it would be rare for a 12V solar panel not to suit that regulator.
Compatibility Between Batteries and Solar Panels
If the rating of a regulator isn’t sufficient to handle the current coming from a solar panel, the process won’t work. For example, a 40 Amp Hour AGM power pack with inbuilt MPPT and solar input specs of 18-20V with 5 amps fits a 200-watt solar panel. However, the solar panels deliver 11 amps and are unable to regulate down to 5 amps. Essentially, if a regulator only handles a maximum of 5 amps, the panels must correspond to this (i.e. 80-90 watts), where a current that is too high presents the risk of frying the regulator. Whilst most regulators include around 15% of inbuilt ‘fat’ for protection, it’s still recommended not to exceed the ideal current.
A low amp rating doesn’t allow too many options for adequate solar panels. Most panels should state the number of amps they’re rated to use.
Important Tip if Charging Lithium batteries with an AGM Program
While some batteries such as AGM require a ‘float’ program – a continuous voltage to keep them floating at a certain charge – such a process will damage a lithium battery due to its difference in design. When releasing a load to power the system’s devices, the charger is usually capable of recognizing this.
The Future of AGM and Lithium Batteries
While AGM batteries are currently the more popular choice and accessible option, the advantages of Lithium batteries may see them ultimately prevail as we move forward in the 12-Volt space.
With new technology and the gradual decrease in price of lithium-ion phosphate, it’s not out of the question for AGM batteries to eventually phase out in favour of lithium types. Given the fast-charging, long-lasting characteristics of Lithium batteries, and with AGM systems still common, it’s possible there will become more of a demand for lithium battery-compatible appliances and voltage regulators to ensure consistent use and power out of AGM systems.
Limitations of AGM and Lithium Batteries
It’s understood that owners of AGM systems can be cut from their load at only a 30% discharge. Certain accessories (an example being a fridge) require certain voltages, which is where AGM batteries can fail. Their chemistry discharges in a linear fashion, i.e. from a full charge of 13.8V to a full discharge of 10.5V, which means the load will inevitably cut out at some point. While voltage regulators are an optional accessory at present, it’s hoped that they become more of the future part and parcel.
The main issues with lithium batteries are their price point and safety concerns. Price wise, it’s unlikely lithium batteries will reach the same price as AGM batteries anytime soon. Their tolerance of heat is also low, where it is strongly advised to not keep them beneath a bonnet as both a safety and performance consideration. Considering this limitation, lithium batteries indicate an optimal temperature range across three states of use: storage, charging, and discharging.
Thanks for listening, tune in again for next week’s episode!
Thanks for tuning in to this week’s episode of the Snowys Camping Show Podcast. Don’t forget to subscribe to us on YouTube, Spotify, iTunes, Amazon Music, iHeartRadio, Pocket Casts, Podcast Addict, or Stitcher so you never miss an upload.
If you have any questions for Ben and Lauren, make sure you head over to our Facebook group and let us know as we’d love to hear from you.
Catch you out there!
The post Ep32 – Battery Chemistry with Hard Korr appeared first on Snowys Blog.
]]>The post Ep29 – 12V Lighting with Hard Korr appeared first on Snowys Blog.
]]>Or you can watch the video version here:
Sick of being left in the dark on your adventures? Get expert advice on everything you need to know about 12V lighting on this week’s episode of the Snowys Camping Show.
Our gear gurus Ben and Lauren were joined by Steve Buttigieg and Zac Buckley from Hard Korr, where they talked through the ins and outs of illuminating your vehicle and campsite on your outdoor adventures. They cover everything from lux vs lumens, daisy-chaining your lights, mounting options, installation, power consumption, and more. So, check it out below for all the details.
Timestamps:
- 01:26 – How Hard Korr got started
- 03:07 – Where does the name come from?
- 05:28 – How to choose 4WD lighting
- 06:52 – What makes quality LED lights?
- 08:46 – Types of chips
- 11:37 – Lux vs lumens
- 12:34 – How important are lumens?
- 17:12 – RGB & colour temperatures
- 20:26 – Lighting your campsite
- 22:35 – Daisy-chaining lighting
- 23:36 – Working out your power consumption
- 25:00 – When do you need to consider a secondary power source?
- 27:13 – Lights for night driving
- 28:44 – Mounting options
- 31:08 – How many lights can you mount on your vehicle?
- 32:38 – Installation with an auto electrician
- 37:29 – Taking care of your lights
Links to things mentioned in this episode:
- Hard Korr Lighting range
- 12V Lighting
- Driving Lights
- Orange lighting options
- Headtorches
- Australian Design Rules
- Regulations on vehicle lights for South Australia
How did Hard Korr get started?
Hard Korr founders Kirk Buckley and Cameron Cross came from different professional backgrounds – Kirk was in building and construction, while Cameron’s experience was in audio and sales. Kirk needed Cameron to help him with an installation at his home one day. The two of them got chatting about boat lighting and at the time, there were no real 12V lighting for boats available so an idea sparked and together, they made their first boat light kit.
Kirk loved camping and went away a couple of times a year using the old-style gas lanterns. There wasn’t a lot around back then so, the idea to expand their product line was born. Originally it was called Korr Lighting, as one of Zac’s uncles walked into the shed where Kirk had been working on the range and exclaimed “Cor! That’s pretty cool”, and the ‘hard’ part of the name came later.
How do you choose 4WD lighting?
It depends on your application, if you’re doing a canopy fit-out – rigid bars are a great option, or you can hardwire them in. A more compact option is flexistrip lighting as they’re easy to pack and can be cut down to fit your setup.
What makes quality lighting?
Osram LEDs which are German, Lumileds which are Dutch, and CREE, which are American are the top-of-the-line chips that are the leading names in the industry which you should look out for when purchasing 4WD lighting. There are two main types of chips – the 3528 chip and 5050 chip. The 5050 is a lot brighter and you can tell immediately when you switch the lights on. Another quality feature to look out for is a silicone coating over the LEDs, this provides protection from water and dust so that you can use it reliably outdoors.
Lux vs lumens
Lumens are measured at the source of the light, but it doesn’t give you an indication of how far a light will go. Lux, on the other hand, is a measurement of light, so it’s useful information for when you are trying to work out your needs for lighting your vehicle.
How many lumens do you need?
For a headlamp, you just need to see your immediate surroundings so anything around 100 lumens or more is absolutely fine. However, if you’re getting into the hunting or fishing category where you need a high-performance spotlight, a lot more lumens are needed, and you should consider the lux readings as well. Keep in mind that beam distance, is not actually all useable light, the lux reading is going to be more accurate for how far you’ll be able to see.
RGB & colour temperatures
Colour temperatures affect your lux reading. For example, orange lighting gives a lower lumen output compared to white lights and will, therefore, have a lower lux reading. This is what makes orange light so effective at keeping bugs away.
White and orange are the most common lighting colours when it comes to the 4WDing and camping categories. Recently, Hard Korr has brought out 3 colour technology which combines white and orange to create a third shade of warm white so that you get something in the middle for more versatility outdoors.
Limits with daisy chaining lighting
There are limitations with daisy chaining lighting within the Hard Korr range, as the dimmers on their own have a 3.7-amp rating so they will run close to five 48cm bars in one series. You would then need to add 2 or 3-way splitters to branch off to run more bars in your setup.

Everyone’s lighting needs will be different. Image: Hard Korr
Working out your power consumption
The easiest way to work out your power consumption is to add up all the amp-hour power requirements and then divide it by the useable amp hours you have in your battery.
When do you need to consider a secondary power source?
If you’re only running lights in your setup, a secondary power source isn’t needed, just the 12V cigarette outlet in your vehicle. Once you add a fridge, a fan and other gear, then you’ll need to add an auxiliary battery to your setup.
Night driving lights
If you’re driving in the hills, a light bar is great as it provides flooded light and gives you visibility to the side of the road. Whereas, with country driving, a spotlight is better as it will give you a lot of distance ahead. They don’t immediately flood at the beginning, but as you travel further down the road that will expand out for better visibility. Both would cover you for all kinds of scenarios – as you will get distance and flood.
Mounting options
It depends on your preference whether you want to mount your lights on your bull bar or roof rack. Your roof rack will give you more spread, but if they’re good quality lights then it shouldn’t matter as they provide the visibility you need for your use.
How many lights can you mount on your vehicle?
Every state has their own law around the number of lights you can mount on your vehicle and where you can mount them, so it’s important to check that out through the Australian Design Rules, which are linked to above.
Installation with an auto electrician
It’s important to ensure that you safely install lighting in your vehicle, so go to an auto-electrician if you don’t have expertise in that area. You could actually cause damage to your car, not to mention endanger yourself and others in the process.
Taking care of your lights
In terms of caring for your lighting, if it’s high quality and weatherproof lighting, the upkeep will be minimal. However, it’s a good idea to make sure that everything works before you leave so that you’re not caught out at the campsite. You should also check that your auxiliary battery is fully charged so that you don’t run out of power and keep your lights inside their case/bag to protect them when they’re not in use.
Thanks for listening, tune in again for next week’s episode!
Thanks for tuning in to this week’s episode of the Snowys Camping Show Podcast. Don’t forget to subscribe to us on YouTube, Spotify, iTunes, Amazon Music, iHeartRadio, Pocket Casts, Podcast Addict, or Stitcher so you never miss an upload.
If you have any questions for Ben and Lauren, make sure you head over to our Facebook group and let us know as we’d love to hear from you.
Catch you out there!
The post Ep29 – 12V Lighting with Hard Korr appeared first on Snowys Blog.
]]>The post Ep28 – Caravans for Beginners appeared first on Snowys Blog.
]]>Or you can watch the video version here:
Are you sick and tired of setting up your tent each night or are simply dreaming of escaping the hustle and bustle for weeks at a time without trying to squeeze everything you need into the car? Then in this episode of the Snowys Camping Show, Ben and Lauren get the caravan expertise of Kevin Leslie, to break down what you need to know when upgrading to a caravan.
Timestamps:
- 00:00 – Intro
- 03:13 – Why Kevin built his own caravan
- 05:17 – Caravan & camper trailer boom in Australia
- 06:20 – Can your vehicle tow a caravan?
- 09:53 – Difference between a caravan & camper trailer
- 13:00 – Off-road capabilities
- 16:28 – Changing the layout of a caravan
- 19:26 – What to look for in a secondhand caravan
- 27:34 – Onshore manufacturing of caravans
- 29:43 – Types of caravans
- 31:34 – Dangerous modifications
- 36:52 – Ongoing costs
- 38:22 – Caravan covers
Links to things mentioned in this episode:
- Caravan and Camping in Australia Book
- Caravan towing safety SA Gov
- Buying a safe caravan/camper trailer SA Gov
- Trailer Weight Distribution video
- Caravan kitchen gear
- Caravan awnings
- Caravan accessories
Caravan & camper trailer boom in Australia
Over the last few years due to the restrictions on travel, there has been a huge boom in the caravan and camper trailer industry as many people turn to holidaying at home.
When you’re thinking about upgrading to a caravan, there are lots of factors to consider including the size, how many people will be sleeping in the van, and where you want to take it. But, the very first thing you’ll need to determine is the towing capacity of your car.
Towing capacity of your vehicle
Cars have a towing capacity, and they have a download capacity on the towball. Look in the handbook of your vehicle to check how much weight it can tow, this figure will need to include everything you will be carrying in the van so all your water, gas, food, clothes, gear, accessories, furniture, and more.
The download capacity, on the other hand, is how much weight there is on the drawbar of the caravan pushing down on the back of the car. Some cars can’t tow anything without a distribution bar, so make sure you do your research as you may need to make this upgrade if that’s the case.
Caravan or camper trailer?
If you’re considering upgrading from your family tent, then you’re probably tossing up between a camper trailer or a caravan, so let’s break down some key differences that could help with your decision.
Of course, caravans come at a higher cost compared to camper trailers, but they both require a safe place to store them at home. What’s great about a camper trailer is that it’s got everything you need ready to go, with no packing required. Camper trailers are the same size and space as a tent but depending on the design, they can take up to 30 minutes to set up.
Caravans also provide everything you need in one handy package but are faster to set up. There are no pegging points with a caravan unless you are using an awning or annex. You just park it, get it level, put down the stabilisers, plug it in if you’re in a caravan park, and that’s it!
Off-road capability
If you are planning on travelling on rough roads, then your van needs to be set up for it. Consider how the chassis, suspension, and everything else underneath the caravan will manage, and make sure it’s designed to handle corrugations, rocks, ditches, and washouts.
An off-road van will accommodate these conditions, but they are significantly heavier and that needs to be considered when calculating your towing capacity. If bush camping is your style, then an off-road van will allow you to get the most out of your adventures.

Check the towing capacity of your car before buying a caravan. Image: Dometic
Changing layout and increasing capacity
If you’re planning to renovate an older second-hand van, there will be some limitations if you want to change the layout to increase the capacity. You can get clever with the interior space by modifying a double bed into bunk beds, which would then sleep the average family. But you are limited by the internal dimensions and any alterations will depend upon the style of van.
What to look for in a second-hand van
The big issue with older caravans is that the sealant they used had a shorter lifespan, so it shrinks or cracks which lets water into the van. One of the first checks you should do is to look for water stains in the roof corners, windows, frames, and inside the cupboards along the back of the wall.
Examine the overall condition of the van, and make sure everything still runs by plugging it into power. Ask them to run the fridge for a couple of hours before you get there to see if it’s working, as these things are very expensive to repair. Check the suspension, pipes, hoses, water tanks, and shock absorbers for general wear and tear like you would when examining a second-hand car. Timber frames can rot too, and you won’t know how much damage there is until you take the skin off so be wary of that.
It’s worth taking photos of any problem areas, and showing them to a repairer so you can get a quote on the cost before you go ahead and make a purchase. You might still come out on top depending on the condition of the van, so it’s worth looking into repairing instead of buying brand new.
Types of caravans
Many are drawn to windup campers as they look like they can be towed by a smaller vehicle, but they are a bit deceptive. Once loaded with gear they can weigh up to a tonne, so they’re not a great option for cars that have a limited towing capacity.
There are also pop-top styles to consider, they have a lot in common with a standard caravan, but the roof will pop up and down as the name suggests. Pop tops are designed to make storage easier at home in your shed while also offering some wind resistance too.
Dangerous modifications
It’s really important to ensure your caravan is safe to drive on the road, so don’t make any dangerous modifications. For example, some people add a fold-up boat trailer on the back of a van, which adds a lot of weight behind the axle. Weight distribution is very important and it’s essential that your van is never tail or nose heavy. For the safety of yourself and other road users, make sure that you load your caravan properly to avoid unnecessary dangers.
Gas & 12V
Don’t ever modify gas in your caravan, ever. 12V additions are fine, and there are so many 12V options today such as TVs and microwaves that you can add to your van and enjoy some more creature comforts. But, if you want to add a powerpoint or anything like that, you will need to get it done by a licensed operator.
Thanks for listening, tune in again for next week’s episode!
Thanks for tuning in to this week’s episode of the Snowys Camping Show Podcast. Don’t forget to subscribe to us on YouTube, Spotify, iTunes, Amazon Music, iHeartRadio, Pocket Casts, Podcast Addict, or Stitcher so you never miss an upload.
If you have any questions for Ben and Lauren, make sure you head over to our Facebook group and let us know as we’d love to hear from you.
Catch you out there!
The post Ep28 – Caravans for Beginners appeared first on Snowys Blog.
]]>The post Ep17 – Coffee Options for Camping appeared first on Snowys Blog.
]]>Or you can watch the video version here:
Savouring that first sip of hot coffee while you soak up the great outdoors, is a campsite coffee connoisseur’s ultimate start to the day!
In this episode of the Snowys Camping Show, our gear experts Ben and Lauren talk you through all your brewing options so you can make a perfect cup of coffee on your adventures.
Timestamps:
- 00:00 – Intro
- 02:25 – Instant coffee
- 03:47 – AeroPress
- 06:15 – French press
- 06:58 – Stovetop espresso maker
- 07:49 – Drip coffee
- 09:14 – Cowboy coffee
- 10:39 – Portable pod coffee
- 12:35 – Carrying out your coffee grounds
- 13:55 – Coffee bags
- 15:55 – Portable grinders
- 16:56 – Portable french press
- 18:05 – Mugs & flasks for keeping drinks hot
- 19:04 – Milk options & frothing
- 23:04 – Stovetop vs campfire
- 24:53 – Storing your coffee gear
Links to things mentioned in this episode:
- Aeropress
- Ultralight coffee dripper
- Percolator
- Portable capsule coffee maker
- Portable french press
- Kettle
- Battery operated milk frother
- Insulated mug
- Coffee Kit Bag
Instant coffee
Instant coffee is definitely the easiest choice for time-poor adventurers as it’s lightweight, compact, and only requires boiling water to liquefy the granules. Nowadays, there are so many improved instant choices that are more than palatable. But, if you want to step up your campsite coffee game, keep reading for all the other available options.
AeroPress
The AeroPress is a super popular design that’s been around for years and years, offering a fantastic balance between an espresso and a long black. The plastic tube design is very similar to a french press but it’s lighter and more convenient to travel with. You also have a lot of versatility to make a short or long coffee, at whatever strength you like.
The drawbacks are that it can’t make a huge volume for a group and that it requires paper filters. However, you can purchase a reusable metal filter separately to create less waste.
French press
The french press is an absolute classic that’s really easy to use, affordable, and available at most cookware or homeware stores. When you’re camping with a large group, this is a great method for making large volumes of coffee so multiple people can enjoy their cuppa at the same time. You can also brew it as strong or as weak as you like depending on how long you let it steep.
Portable espresso makers
If you prefer a shot of strong espresso in the morning to get you going, then a portable espresso maker might be the ideal solution for you. These are best suited for portable hiking stoves as the base is quite small, so you might want to branch out into other choices for use on a larger gas stove or campfire.
Pour-over/drip coffee
Coffee drippers or pour-over coffee provide one of the lightest and most portable ways to brew your favourite beverage outdoors. They’re comprised of a funnel-style filter into which you add your ground beans. Then while this is suspended over a cup, you pour in the hot water.
Even though they’re effective and will meet your basic caffeine needs, this design is probably best suited to solo hikers and motorcycle tourers who need to count every gram.
Cowboy coffee using a billy/kettle
Cowboy coffee is as basic and old school as it gets. All you need is a billy, water, and your grounds and you’re essentially good to go. The method is easy: you boil water in a pot/billy, add ground coffee, stir it, let it rest for a few minutes, then add some cold water to help them settle to the bottom and it’s ready to drink. It tends to be very bitter, and you’ll find it hard to separate the grinds from the liquid, so it’s not going to brew the smoothest or richest beverage.
Percolators
Percolators are very popular and versatile for camping and at-home use. You just add grounds to the basket, water, and then heat it up over a stove. The boiling water goes up through a tube over the grounds and then back down to make your brew. The only downside with these is that they’re not ideal for use on an open fire, so you’ll need to use them with a gas stove.

There’s a huge array of options for every coffee lover. Image: Blacksmith Camping Supplies
Portable coffee grinders
If you want the freshest coffee possible, you can also add a portable hand-operated bean grinder to your stash and add an extra something to your morning cuppa at the campsite.
Coffee bags
These are essentially just like a teabag, but instead, it’s filled with ground coffee. Basic varieties are readily available from the supermarket or fancier options can be sourced at specialty coffee shops. They are simple and convenient but tend not to produce a very strong brew compared to other methods.
You could even make your own bags if you want to, but again, if you like strong coffee, this method might not be the best choice.
Keeping your beverage hot
Once your drink is ready, you’ll need to keep it warm by pouring it into a double-walled or insulated mug so that it stays hot and ready to enjoy.
Milk heating & frothing options
You can get portable milk frothers that are battery operated so they don’t require plugged power to add some froth to your hot drink. You can even add hot milk to a French press, and then push it up and down to get a frothy effect. Otherwise, you can heat up your milk of choice over your stove gently and add it to your brew.
Campfire vs stove options
When factoring in which method will suit you best, make sure you consider your regular camp cooking setup. Some options won’t work over a campfire and require the concentrated heat of a gas stove.
Storing your coffee gear
Pack your brewer of choice, beans, and mugs all into a little kit to keep everything you need ready to go so it’s easy to grab for a roadside stop on the way to and from the campsite.
Thanks for listening, tune in again for next week’s episode!
Thanks for tuning in to this week’s episode of the Snowys Camping Show Podcast. Don’t forget to subscribe to us on YouTube, Spotify, iTunes, Amazon Music, iHeartRadio, Pocket Casts, or Stitcher so you never miss an upload.
If you have any questions for Ben and Lauren, make sure you head over to our Facebook group and let us know as we’d love to hear from you.
Catch you out there!
The post Ep17 – Coffee Options for Camping appeared first on Snowys Blog.
]]>The post Ep2 – Tips for Keeping Camping Food Fresh appeared first on Snowys Blog.
]]>When you’re tired after a long trip, you may just want a fast and easy meal.
But – eating well and enjoying your food should be part of the camping experience too!
Leave the baked beans and 2-minute noodles on the supermarket shelf and let’s get you some tastier options. In this episode of the Snowys Camping Show, we’ve put together our best tips on how to plan out your meals. We chat about fresh food when camping and how to make the most of it, cooking for the whole family, vacuum sealing and dehydrating foods, what foods last the longest, and best storage methods – plus, tips on how to keep your supplies cool in your Esky or 12V fridge.
This episode is jammed packed with ideas, so check out the details!
Shortcuts:
01:30 – Food to Eat First
02:25 – Healthy Batch Meals for Family Camping
03:39 – Vacuum Sealed Meals
05:50 – Options if you don’t have a dehydrator or vacuum sealer
06:50 – Iceboxes for Keeping Supplies Cold
08:00 – Long-Lasting Supermarket Packaged Food
10:49 – Low-Maintenance Fruit and Veg
12:30 – Keeping Dairy Fresh
14:45 – Canned Food for Camping and Hiking
16:12 – Managing Frozen and Chilled Foods in an Icebox
18:08 – How Vacuum Sealers Work (and Other Uses)
Mentioned in this Episode:
Products:
Blogs:
Guide to Dehydrating Your Own Food
Food Planning Tips for a Multi-Day Hike
Other:
YouTube: Dometic 12/240V Vacuum Sealer
Vacuum Sealing Your Food
Vacuum sealing takes the air out which makes your food last longer and saves you space. This is super handy for pre-preparing meals if you’re camping with a bigger group or family.
What can be vacuum sealed?
You can vacuum seal fresh veggies, meat, sauces, a half-opened packet of chips, your phone to keep it waterproof and more. We’ve got a great video on YouTube that you can check out here.
Can you freeze vacuum sealed food?
Yes, absolutely! You can vacuum seal and then freeze food. Batch-cook meals or make extra dinner each night before your trip, then seal and freeze. They can be defrosted and then reheated inside the vacuum packaging by immersing in hot water. If you cut the top open carefully, they can be washed and reused multiple times as well.
Dehydrated Food
This is a method used a lot for hiking, but it can also work for camping trips – particularly for fruits and vegetables to make them last longer and add extra nutrition to meals.

You can travel longer off the grid when you can keep supplies fresh. Image: Dometic
Keeping Food Cool in an Icebox
Use homemade block ice over store bought ice as it will take longer to melt. Freeze water in airtight containers a few days before to make sure they’re completely frozen. Use filtered water so you can drink it once it melts. Block ice is a win all-around as it saves you money, and you don’t have to dispose of the plastic bag in landfill.
Long-Life Foods for Camping and Hiking
Choose flatbreads like wraps or tortillas as they are more compact and easier to store, plus they keep better than leavened bread. Also hiking food staples like salami and hard cheeses are great for lunches as they don’t need to be kept cold. Dehydrated peas and mash potato are easy to find at the supermarket, will come in handy at the tail end of your camping trip or in emergencies when fresh food is scarce. Head to your local Asian grocer to find a range of long-life noodles, dried mushrooms and other goods that will add variety to your meals, with minimal effort.
Longer Lasting Fruits and Veggies
Choose fruits and vegetables that don’t need refrigeration e.g. apples, oranges, carrots, celery, potatoes, onions, pumpkin, carrots, tomatoes, capsicum etc. Try to select produce that is under-ripe so it stays fresher for longer.
Storing Supplies in Breathable Containers
Storing your produce in a plastic container that’s lined with paper towel allows it to breathe and moisture to be absorbed. This helps it to last longer in transit.
Thanks for listening, tune in again for next week’s episode!
Thanks for tuning in to this week’s episode of the Snowys Podcast. Don’t forget to subscribe to us on YouTube, Spotify, iTunes, Amazon Music, iHeartRadio, Pocket Casts, or Stitcher so you never miss an upload.
If you have any questions for Ben and Lauren, make sure you head over to our Facebook group and let us know as we’d love to hear from you.
Catch you out there!
The post Ep2 – Tips for Keeping Camping Food Fresh appeared first on Snowys Blog.
]]>The post Ep1 – Staying Cool & Comfortable When Camping appeared first on Snowys Blog.
]]>It can be hard to escape the heat beyond the creature comforts of your home…
But that doesn’t mean you can’t enjoy camping in warmer weather. With some preparation and knowledge, you’ll be all set for your adventure – be it sticky and humid, or bone dry and arid.
In this episode of the Snowys Camping Show, Ben and Lauren pull together their best advice for how you can keep cool and comfortable while you camp. For more, check out our blog: Top 10 Tips for Camping in Summer.
Shortcuts:
01:29 – Dealing with Humidity
02:46 – Do dark room tents actually keep you cooler?
05:15 – Water sources and supply
06:28 – Is any gear truly midge-proof?
07:16 – Adding Shade to Your Tent
08:00 – Canvas Vs Polyester Tents
08:34 – Camping Near Water and Dealing with Mozzies
11:00 – Evaporative Coolers and Fans
15:37 – Keeping Food Cool and Fresh
16:30 – Electrolytes and Sun Protection
17:30 – Keeping Comfortable During Sleep
18:33 – What are your tips for keeping cool when it’s hot and humid?
Mentioned in this Episode:
Products:
Tents with dark fly technology – Coleman & OZtrail
Electrolyte powders and supplements
Breathable canvas touring tents
12V fans and portable evaporative coolers
Cotton and silk sleeping bag liners
Blogs:
10 Ways to Repel Bugs While Camping
Prevent Dehydration & Keep Cool When Hiking
Other:
The Snowys Camping Show Facebook Group
Consider Your Tent
Canvas tents are a bit more breathable compared to synthetic, so they’re a better option for warm weather adventures. Tents with dark technology do block out most light, which can help keep your tent cooler, but opening up all the vents inside your tent to create circular air flow will reduce the temperature inside your tent more effectively than dark technology.
Mozzies & Midges
Camping near a lake or water will be cooler but may be a breeding ground for mozzies and other insects, so have insect protection products on hand. Keep in mind that even if your tent is designed to keep midges out, opening and closing doors of your tent can let them in.
Lighting
Avoid white lighting as it attracts insects and go for warm/orange instead, which is also a bit more pleasant at nighttime.
Shade & Trees
You might be tempted to set up under a big old tree for the shade but be careful as branches can rot and potentially break off. You may be able to create more shade using a tarp or by setting up your tent under your awning.
Cooling Options
A portable 12V fan will help if you are a hot sleeper and they’re probably the simplest and most effective option. There are portable evaporative coolers, but just be aware that they have some limitations and aren’t going to work like an air conditioner at home.
You also have the option to wet a towel or wrap a Chill Towel around your neck to keep your temperature down, especially when going on day hikes around camp.

It can be easy to forget to hydrate when you’re swimming all day.
Food & Drinks
Freeze the food you use last to keep your icebox cooler for longer, avoid ice cubes or bagged ice as it melts faster. Instead freeze water in bottles and when they defrost, you can then drink the cold water afterwards.
Make sure your fridge is running efficiently by pre-cooling your supplies before you go away and use it with a cover to deflect heat. Keep your fridge out of direct sunlight and limit the number of times it gets opened.
Sun Protection & Preventing Dehydration
Drinking lots of water is a no-brainer, but don’t forget to top up your electrolyte levels, especially if you’re coastal camping and are in the water all day. Protecting yourself and other from the sun is also essential – so make sure you slip, slop, slap!
Sleep Off the Ground & Leave Your Sleeping Bag at Home
The ground absorbs heat during the day, so sleep elevated on a stretcher to avoid the heat. Bring a liner instead of your sleeping bag or just use a cotton sheet from your bed at home.
Thanks for listening, tune in again next week!
Thanks for tuning in to this week’s episode of the Snowys Podcast. Don’t forget to subscribe to us on YouTube, Spotify, iTunes, Amazon Music, iHeartRadio, Pocket Casts, or Stitcher so you never miss an upload.
If you have any questions for Ben and Lauren, make sure you head over to our Facebook group and let us know as we’d love to hear from you.
Catch you out there!
The post Ep1 – Staying Cool & Comfortable When Camping appeared first on Snowys Blog.
]]>